出租屋部署 HASS 实现全屋智能
前言
最近从杭州搬去南京了,出租屋的智能家居要重弄一下,刚好补一下拖了半年的智能家居文章
设备
| 设备 | 型号 |
|---|---|
| 主机 | 斐讯 N1 |
| 网关 | 小米多模网关 |
| 红外 / 射频遥控器 | 博联 RM plus |
- 斐讯 N1:刷了 Armbian,具体怎么刷 Baidu / Google 吧,我这边之前刷过了懒得重刷一遍演示了
- 小米多模网关:系统已经刷成了 MOD 版的最新版,具体怎么刷后面简单带一下
- 博联 RM plus:红外 + 射频遥控器,59 块钱海鲜市场收的全新
处理
小米多模网关
系统已经刷成了 MOD 版的最新版,具体怎么刷我简单带一下
打开 telnet
系统版本:官版最新版
应该只能拆机开 telnet 了,具体参考这个:https://github.com/AlexxIT/XiaomiGateway3/wiki
系统版本:官版<= 1.5.5
看这个:https://github.com/AlexxIT/Blog/issues/13
文内说的通过按按钮打开 telnet 的方法不完整,应是:
- 给网关断电,等 10s 后通电
- 待黄灯变为蓝灯
- 单击 5 次,停 1s
- 接着循环 单击 2 次,停 1s 的操作,直到指示灯变为绿灯连闪两次
降级 / 刷 MOD 版
斐讯 N1
刷 Armbian
具体怎么刷 Baidu / Google 吧,我这边之前刷过了懒得重刷一遍演示了,或者参考这篇我抄的
安装 Docker
1 | # 安装 Dokcer |
安装 Docker HASS
1 | # 创建文件夹用以存储配置文件 |
HASS 配置
安装 HACS
下载
1
2
3
4
5
6
7
8
9
10
11
12
13
14
15
16
17# 存放未来HACS安装的各种首页磁贴啥的(官方叫Lovelace )
mkdir -p ~/docker/hass/www
# 存放等会要安装的HACS文件
mkdir -p ~/docker/hass/custom_components/hacs && cd ~/docker/hass/custom_components/hacs
# 下载 hacs.zip
wget https://github.com/hacs/integration/releases/download/1.34.0/hacs.zip
# 解压
unzip hacs.zip
# 删除 hacs.zip
rm -rf hacs.zip
# 重启 HASS
docker restart hass添加集成
- 打开 HASS
- 配置 -> 设备与服务 -> 添加集成
- 搜索
HACS并单击下载 - 全部打钩
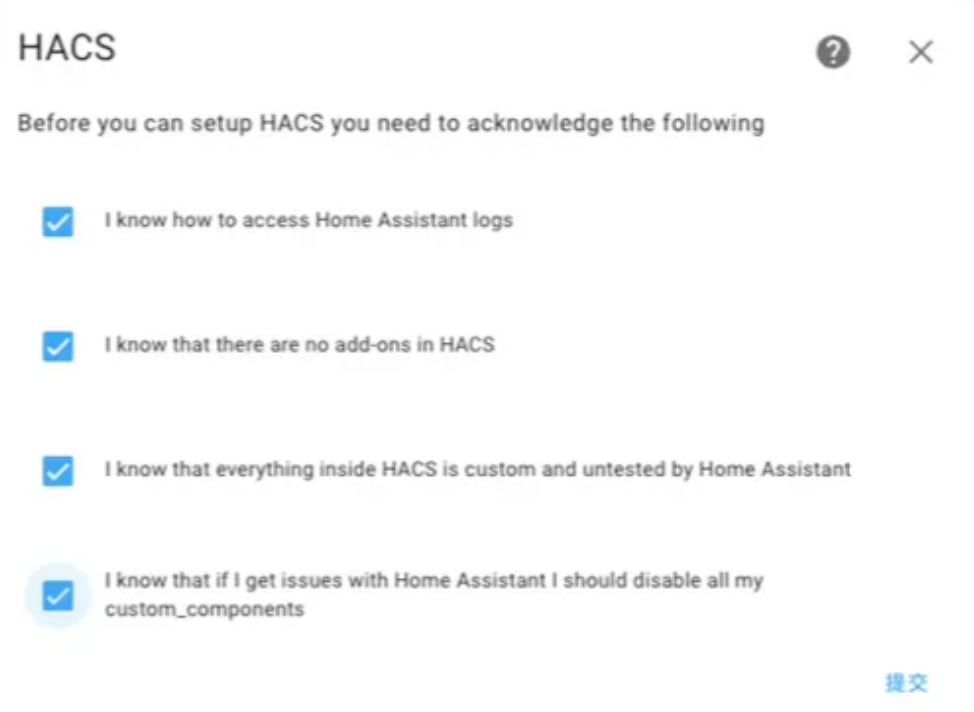
- 复制 8 位验证码,点击上方链接
- 登录后输入 8 位验证码
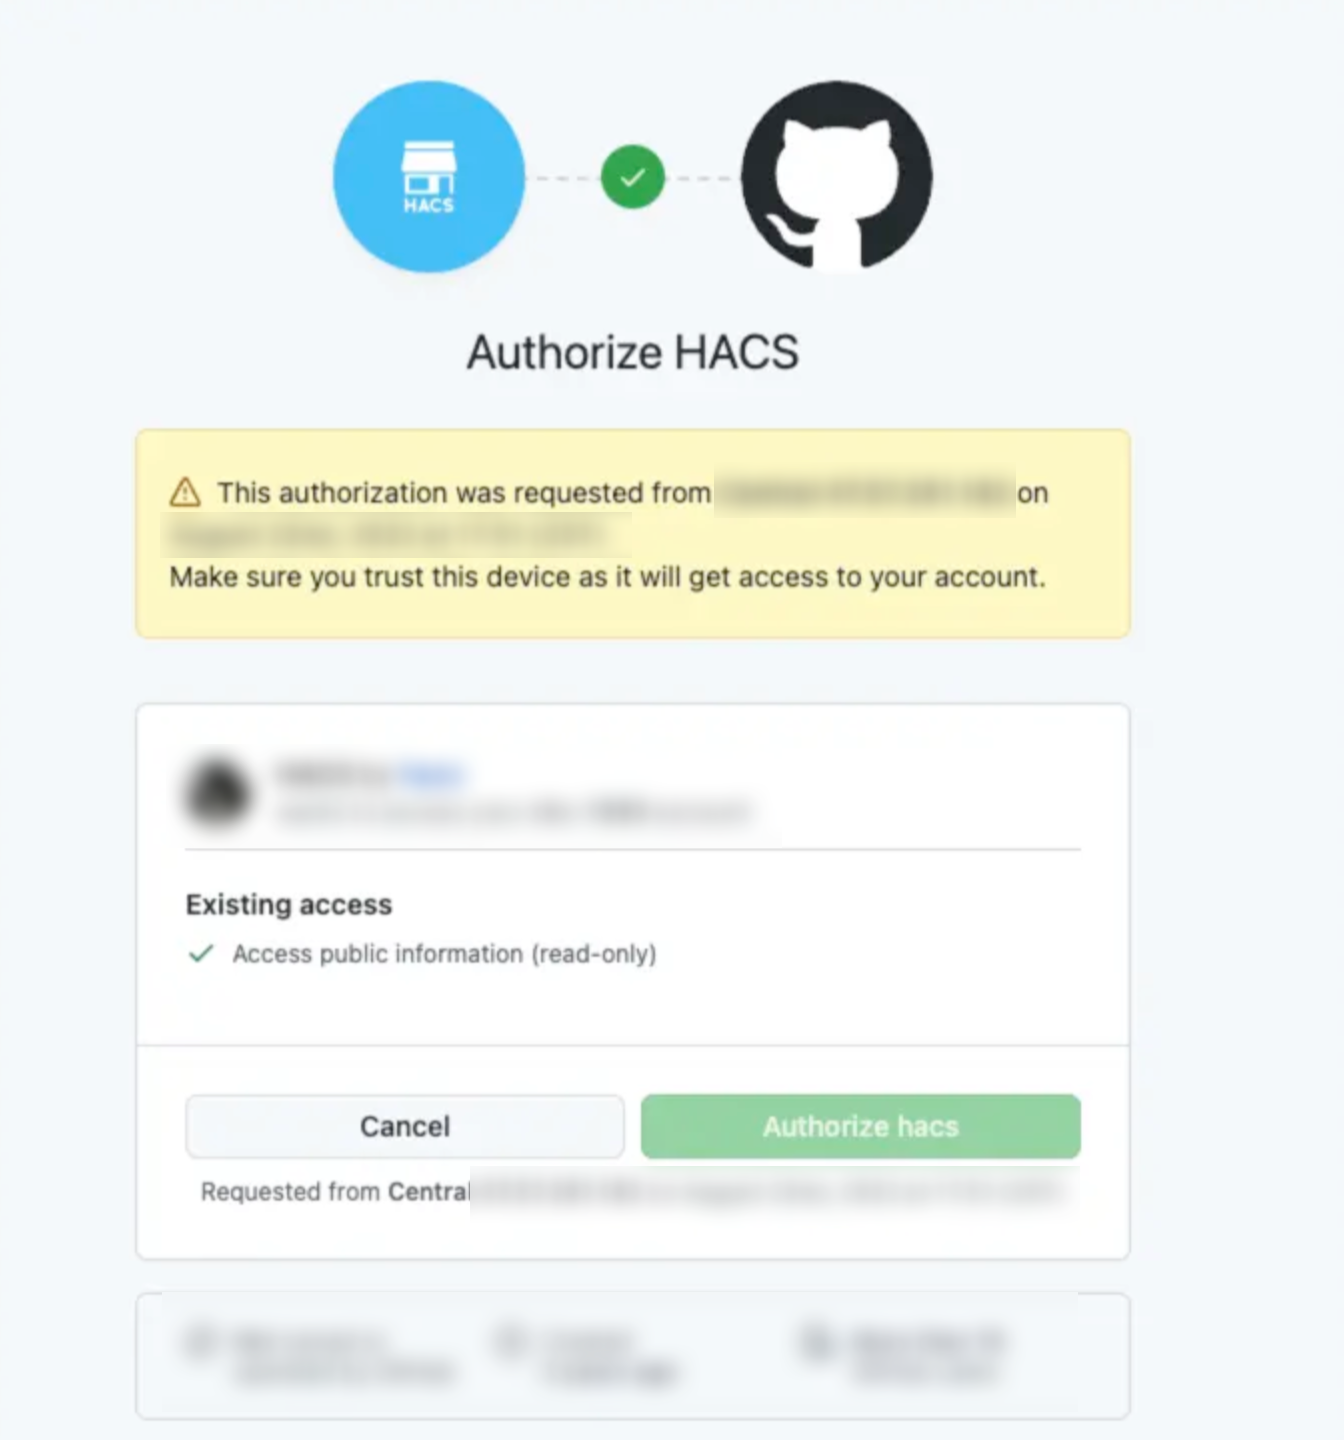
- 返回 HASS,点击完成安装成功
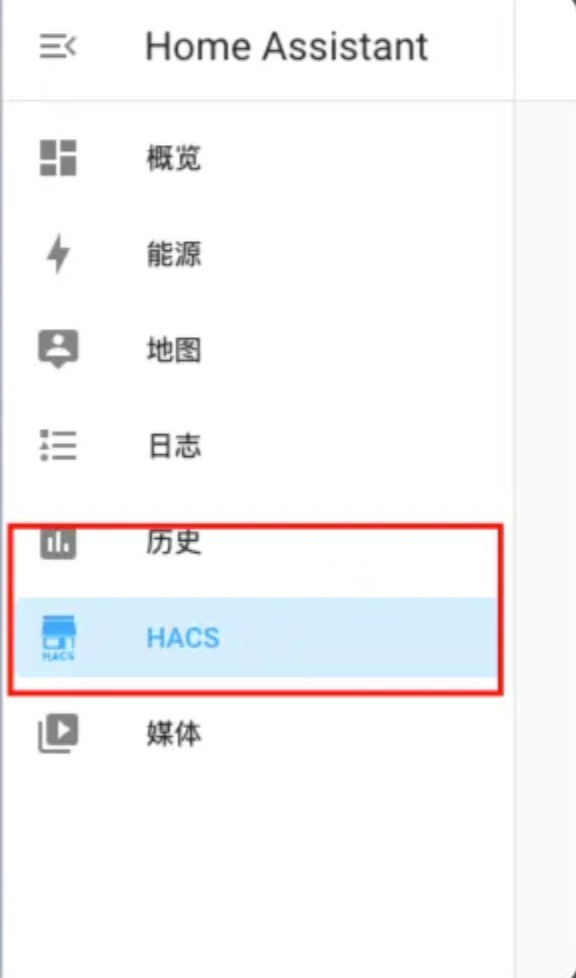
HACS 添加集成
以 Local Tuya 为例
- 前往 HACS 商店并点击右上角的 清除
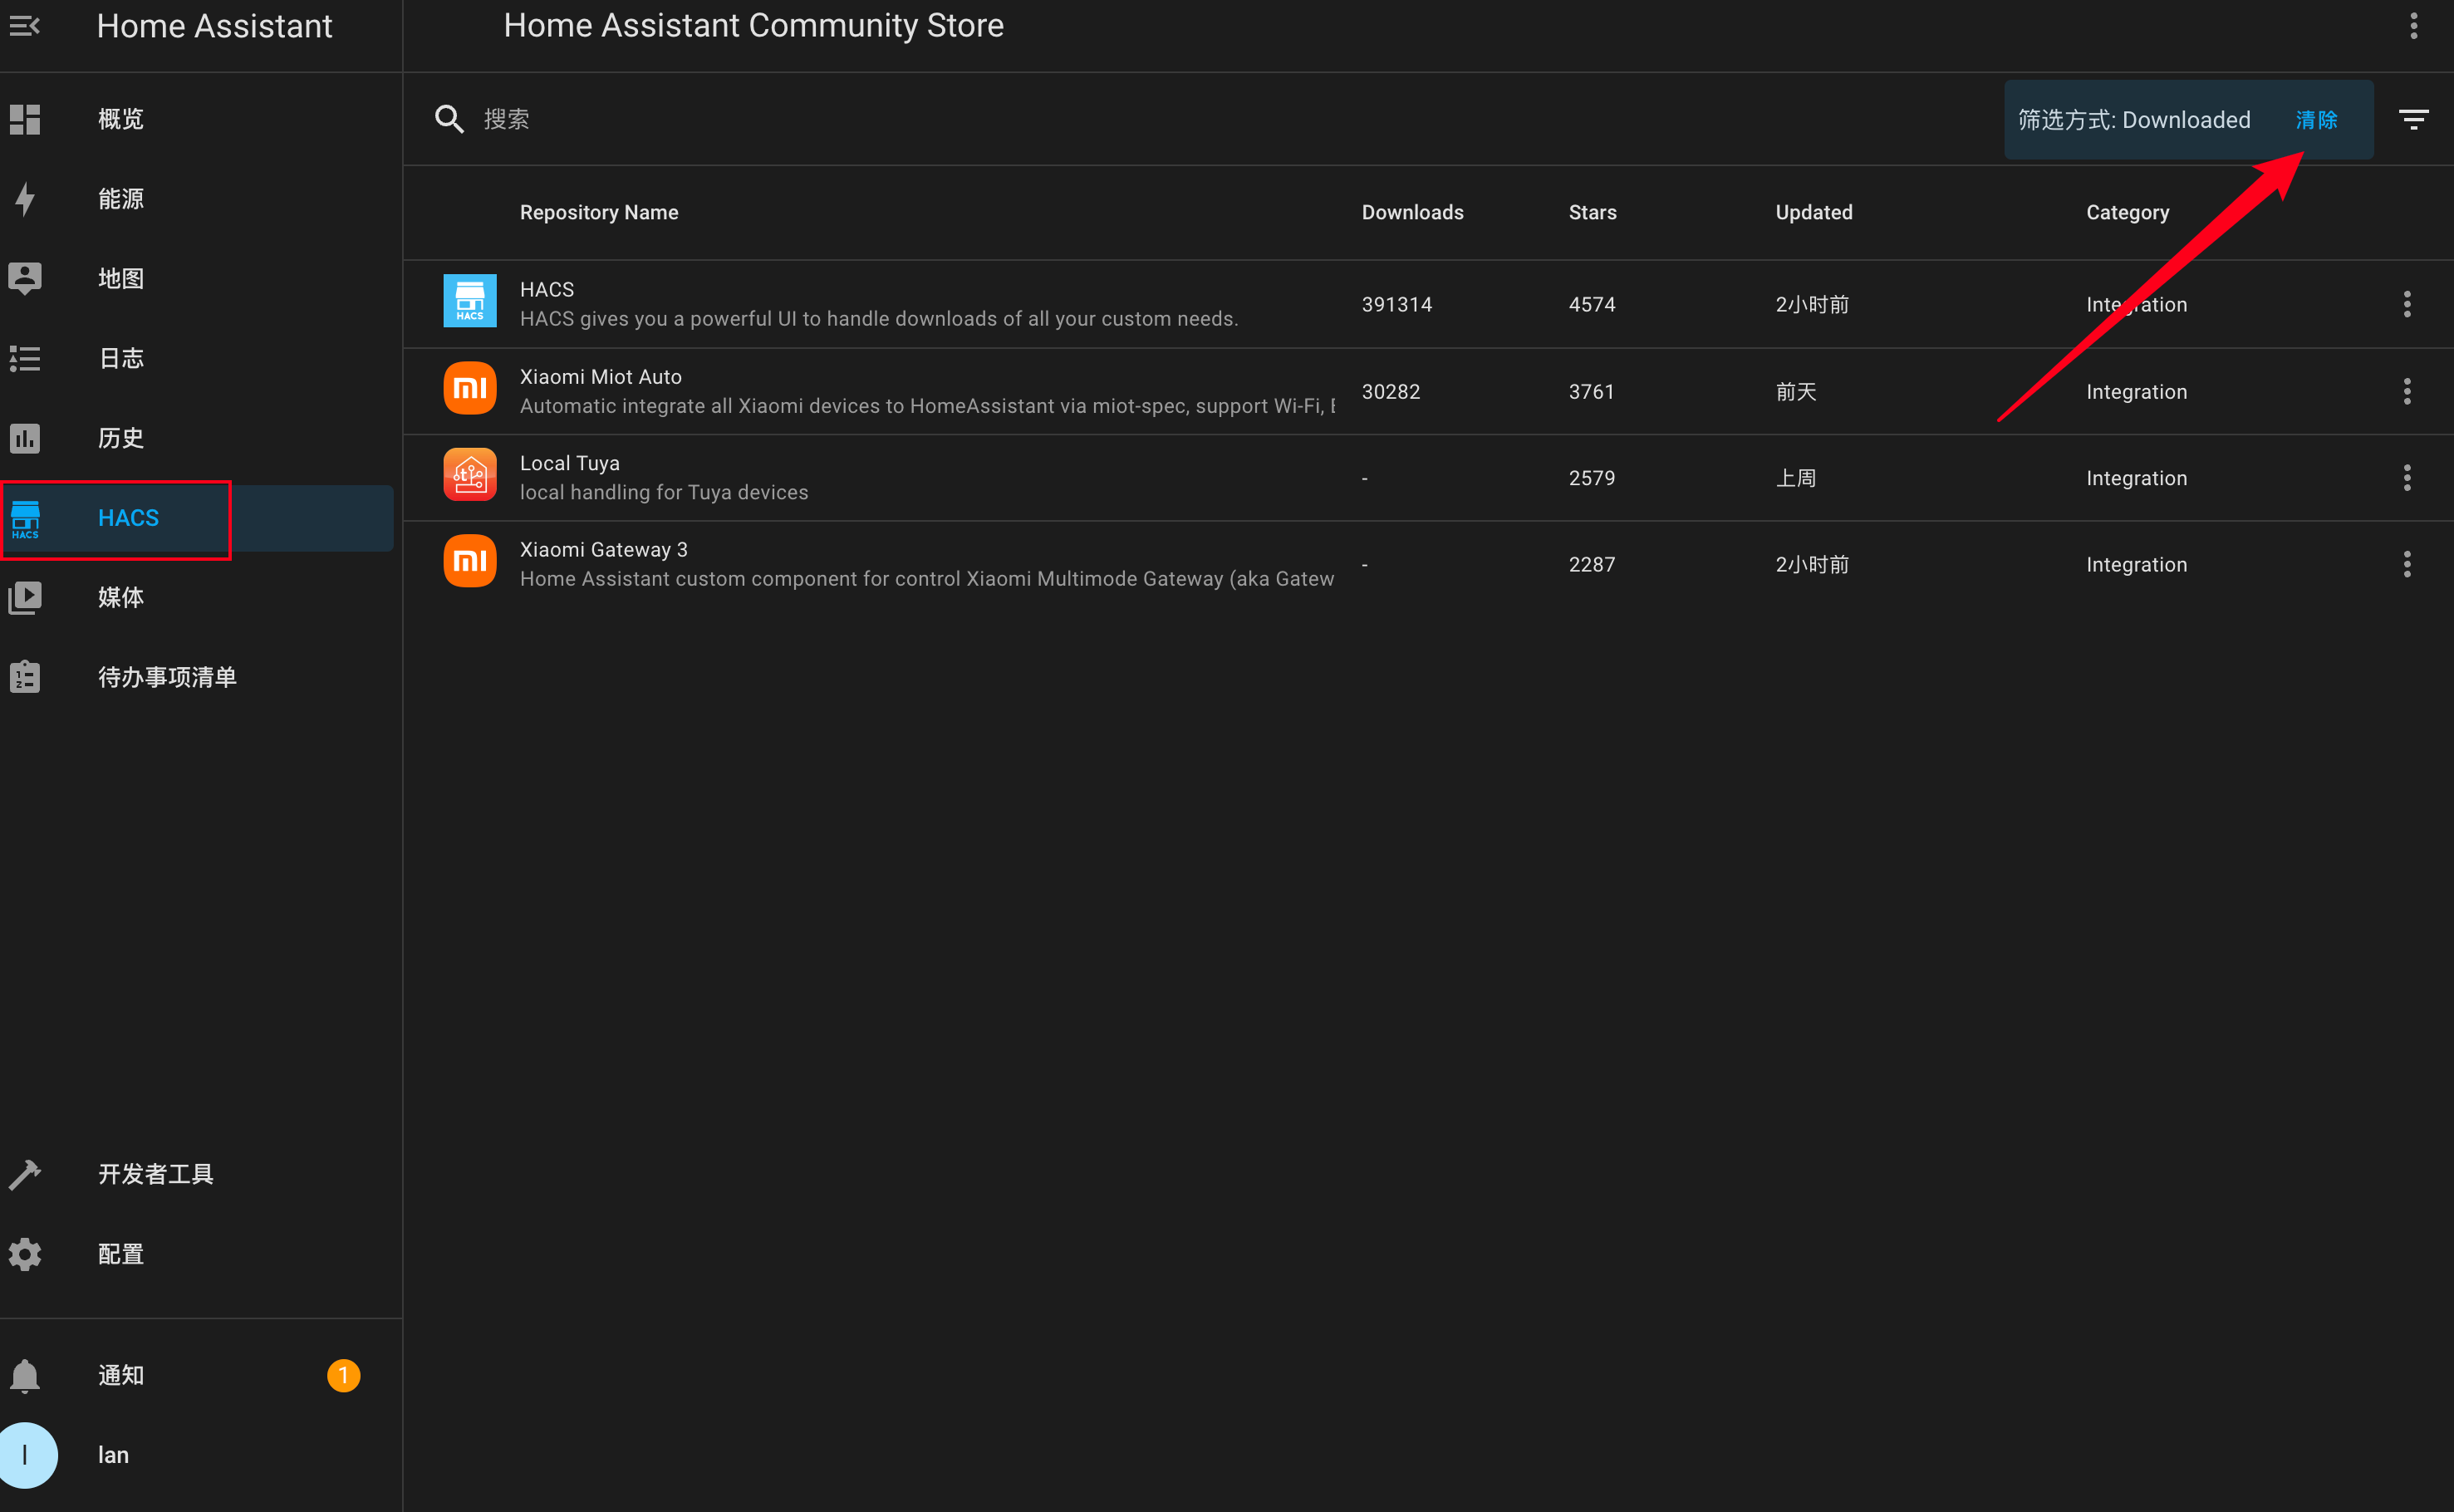
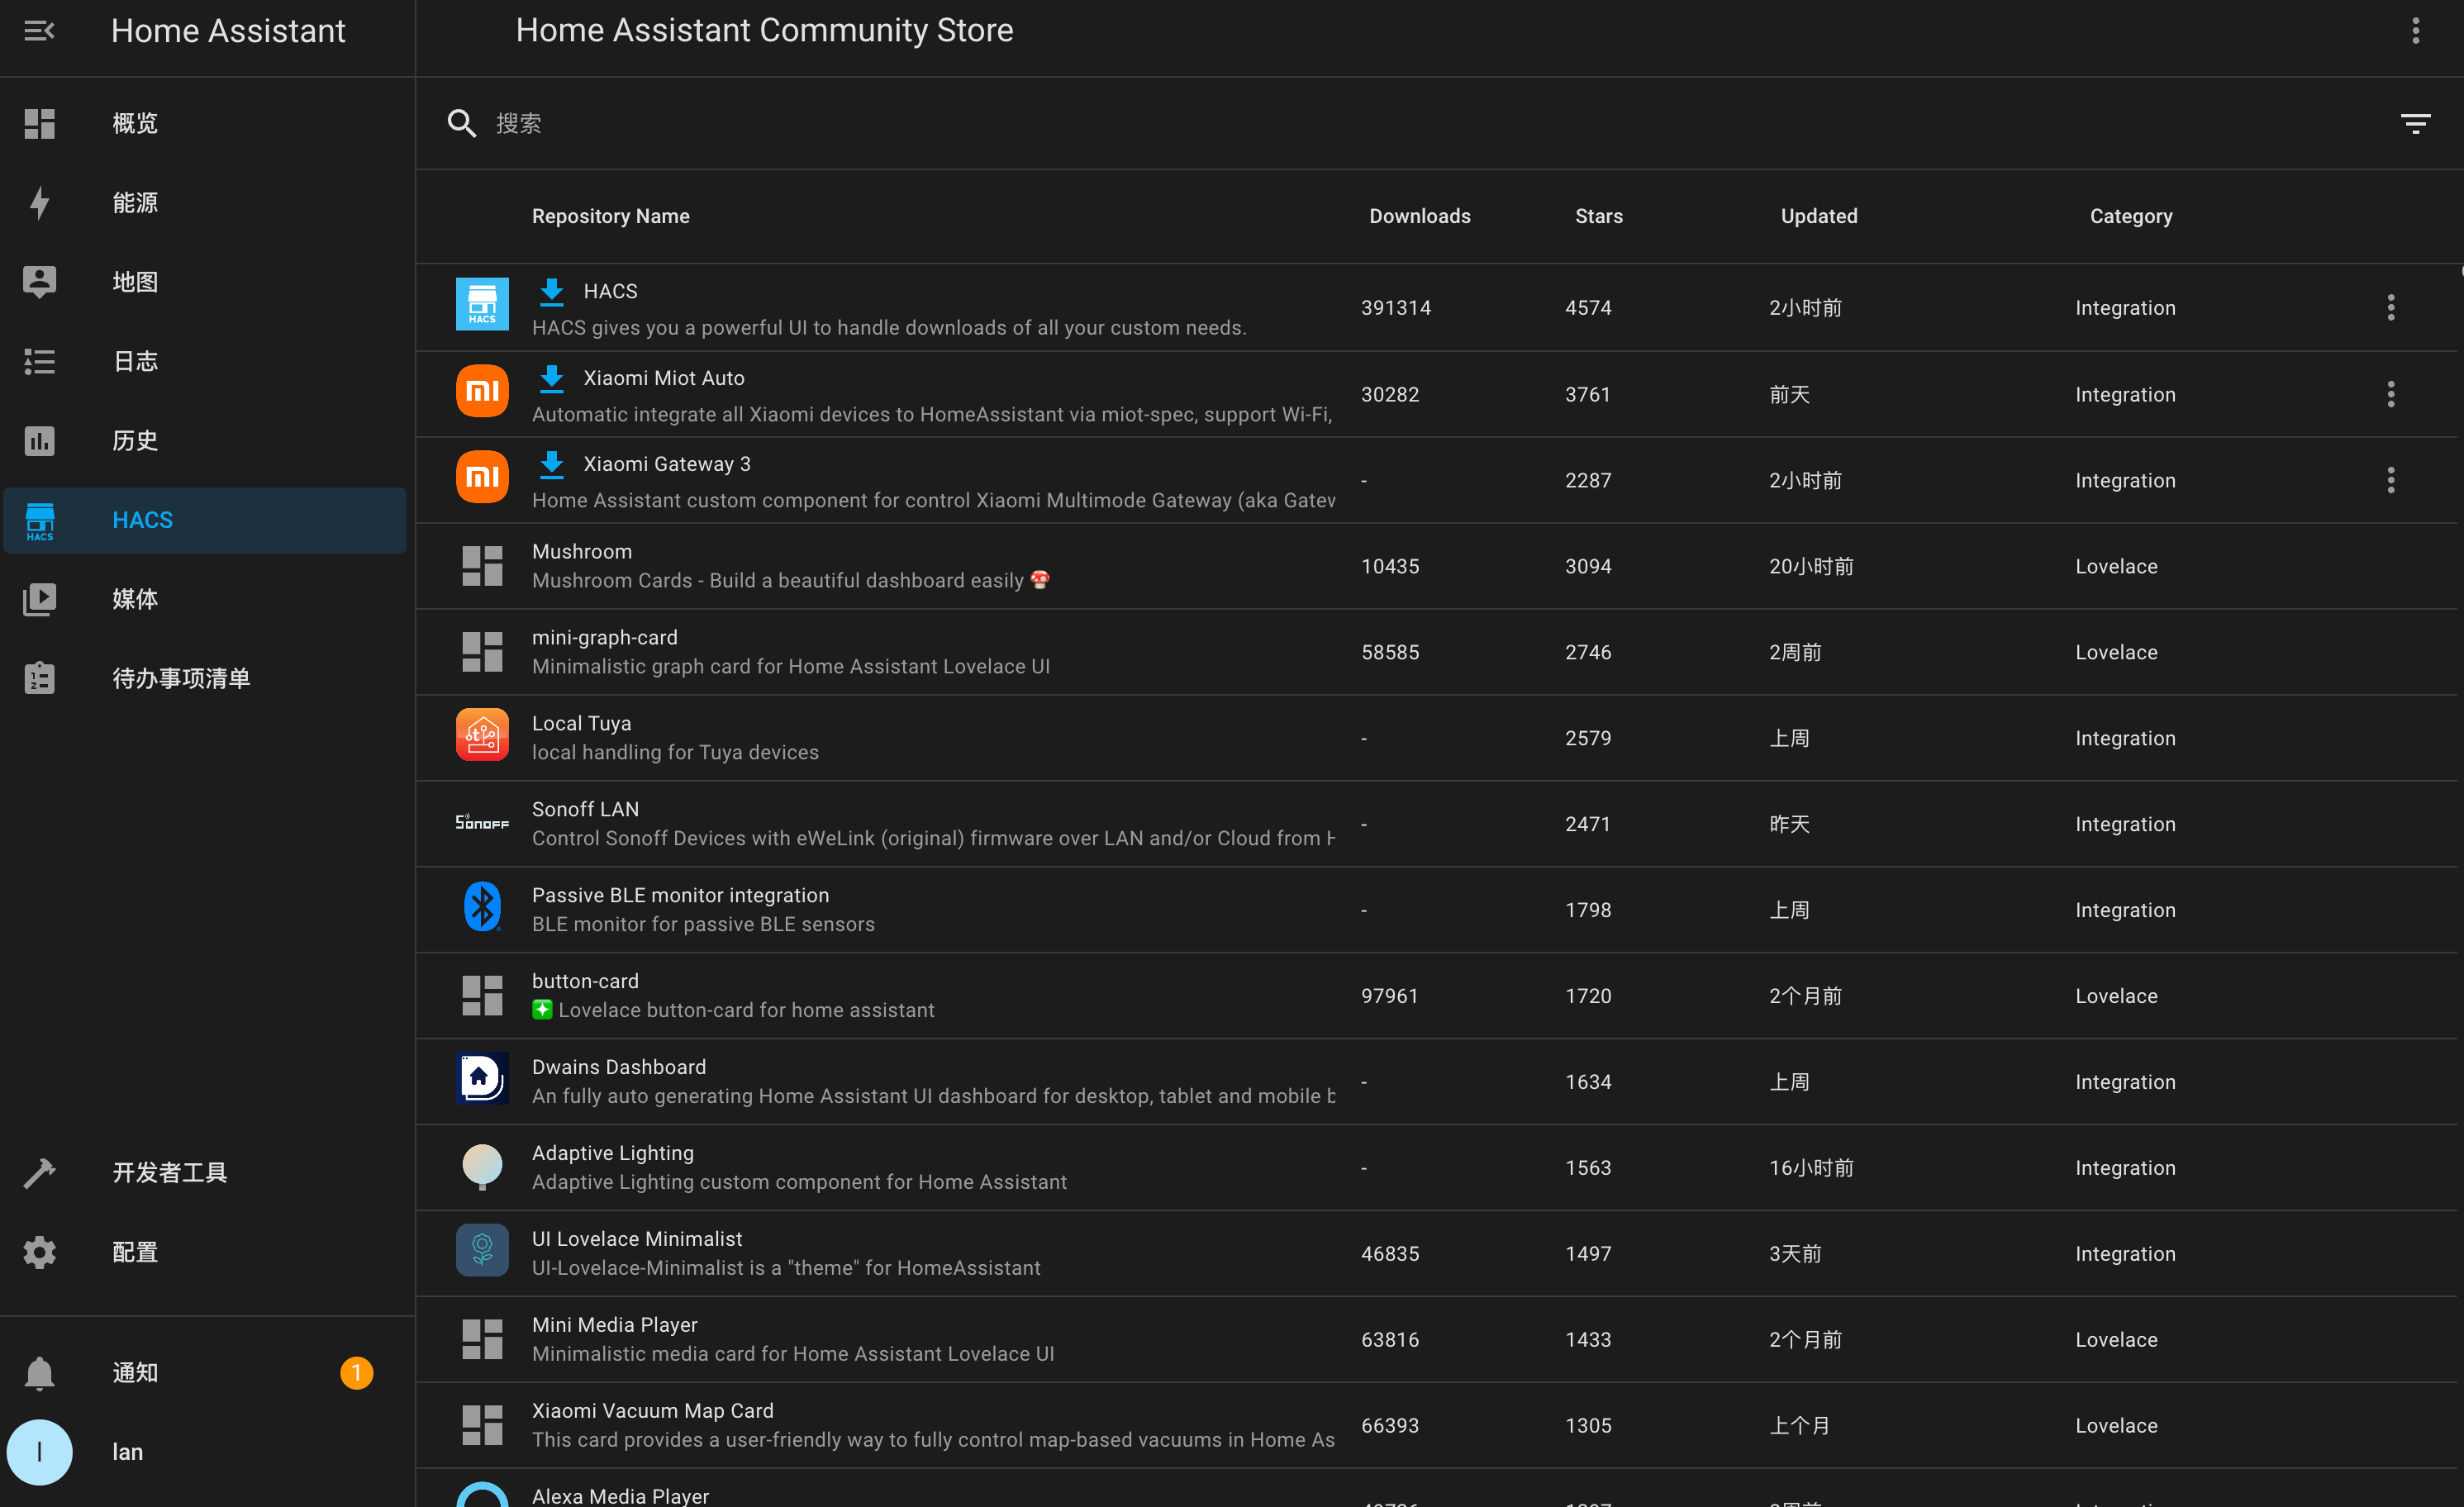
- 搜索 tuya
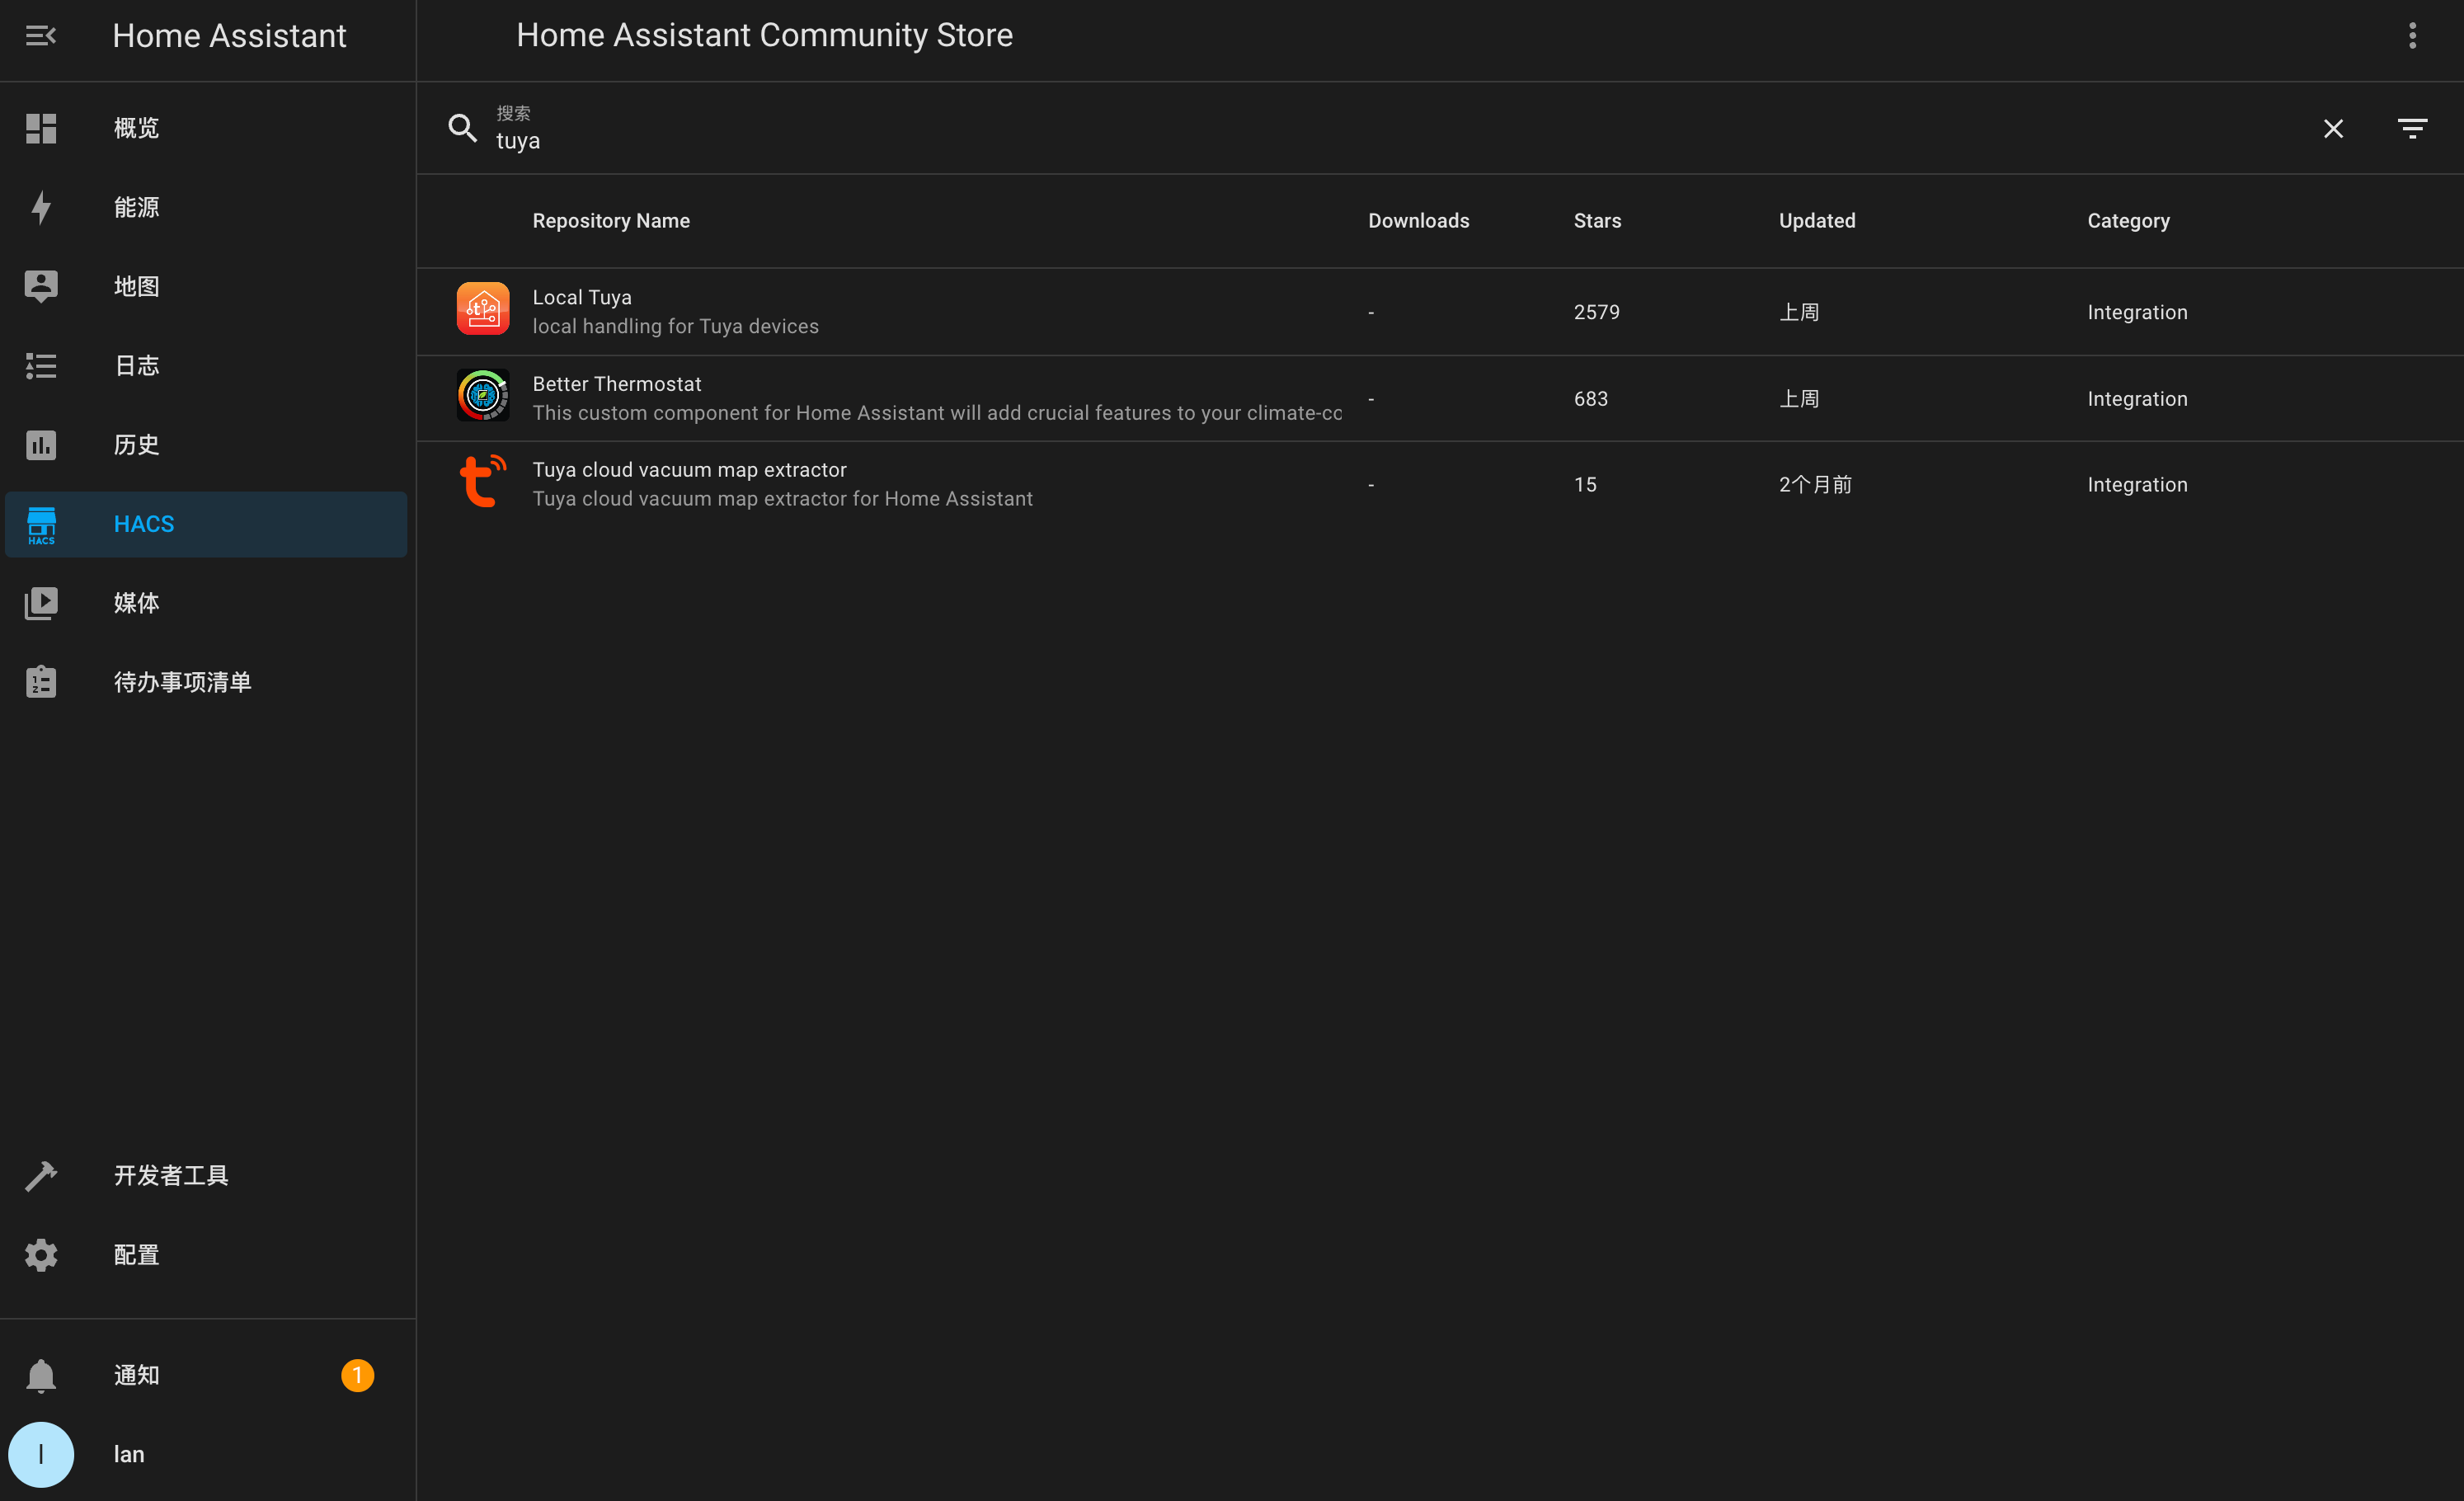
- 单击下载
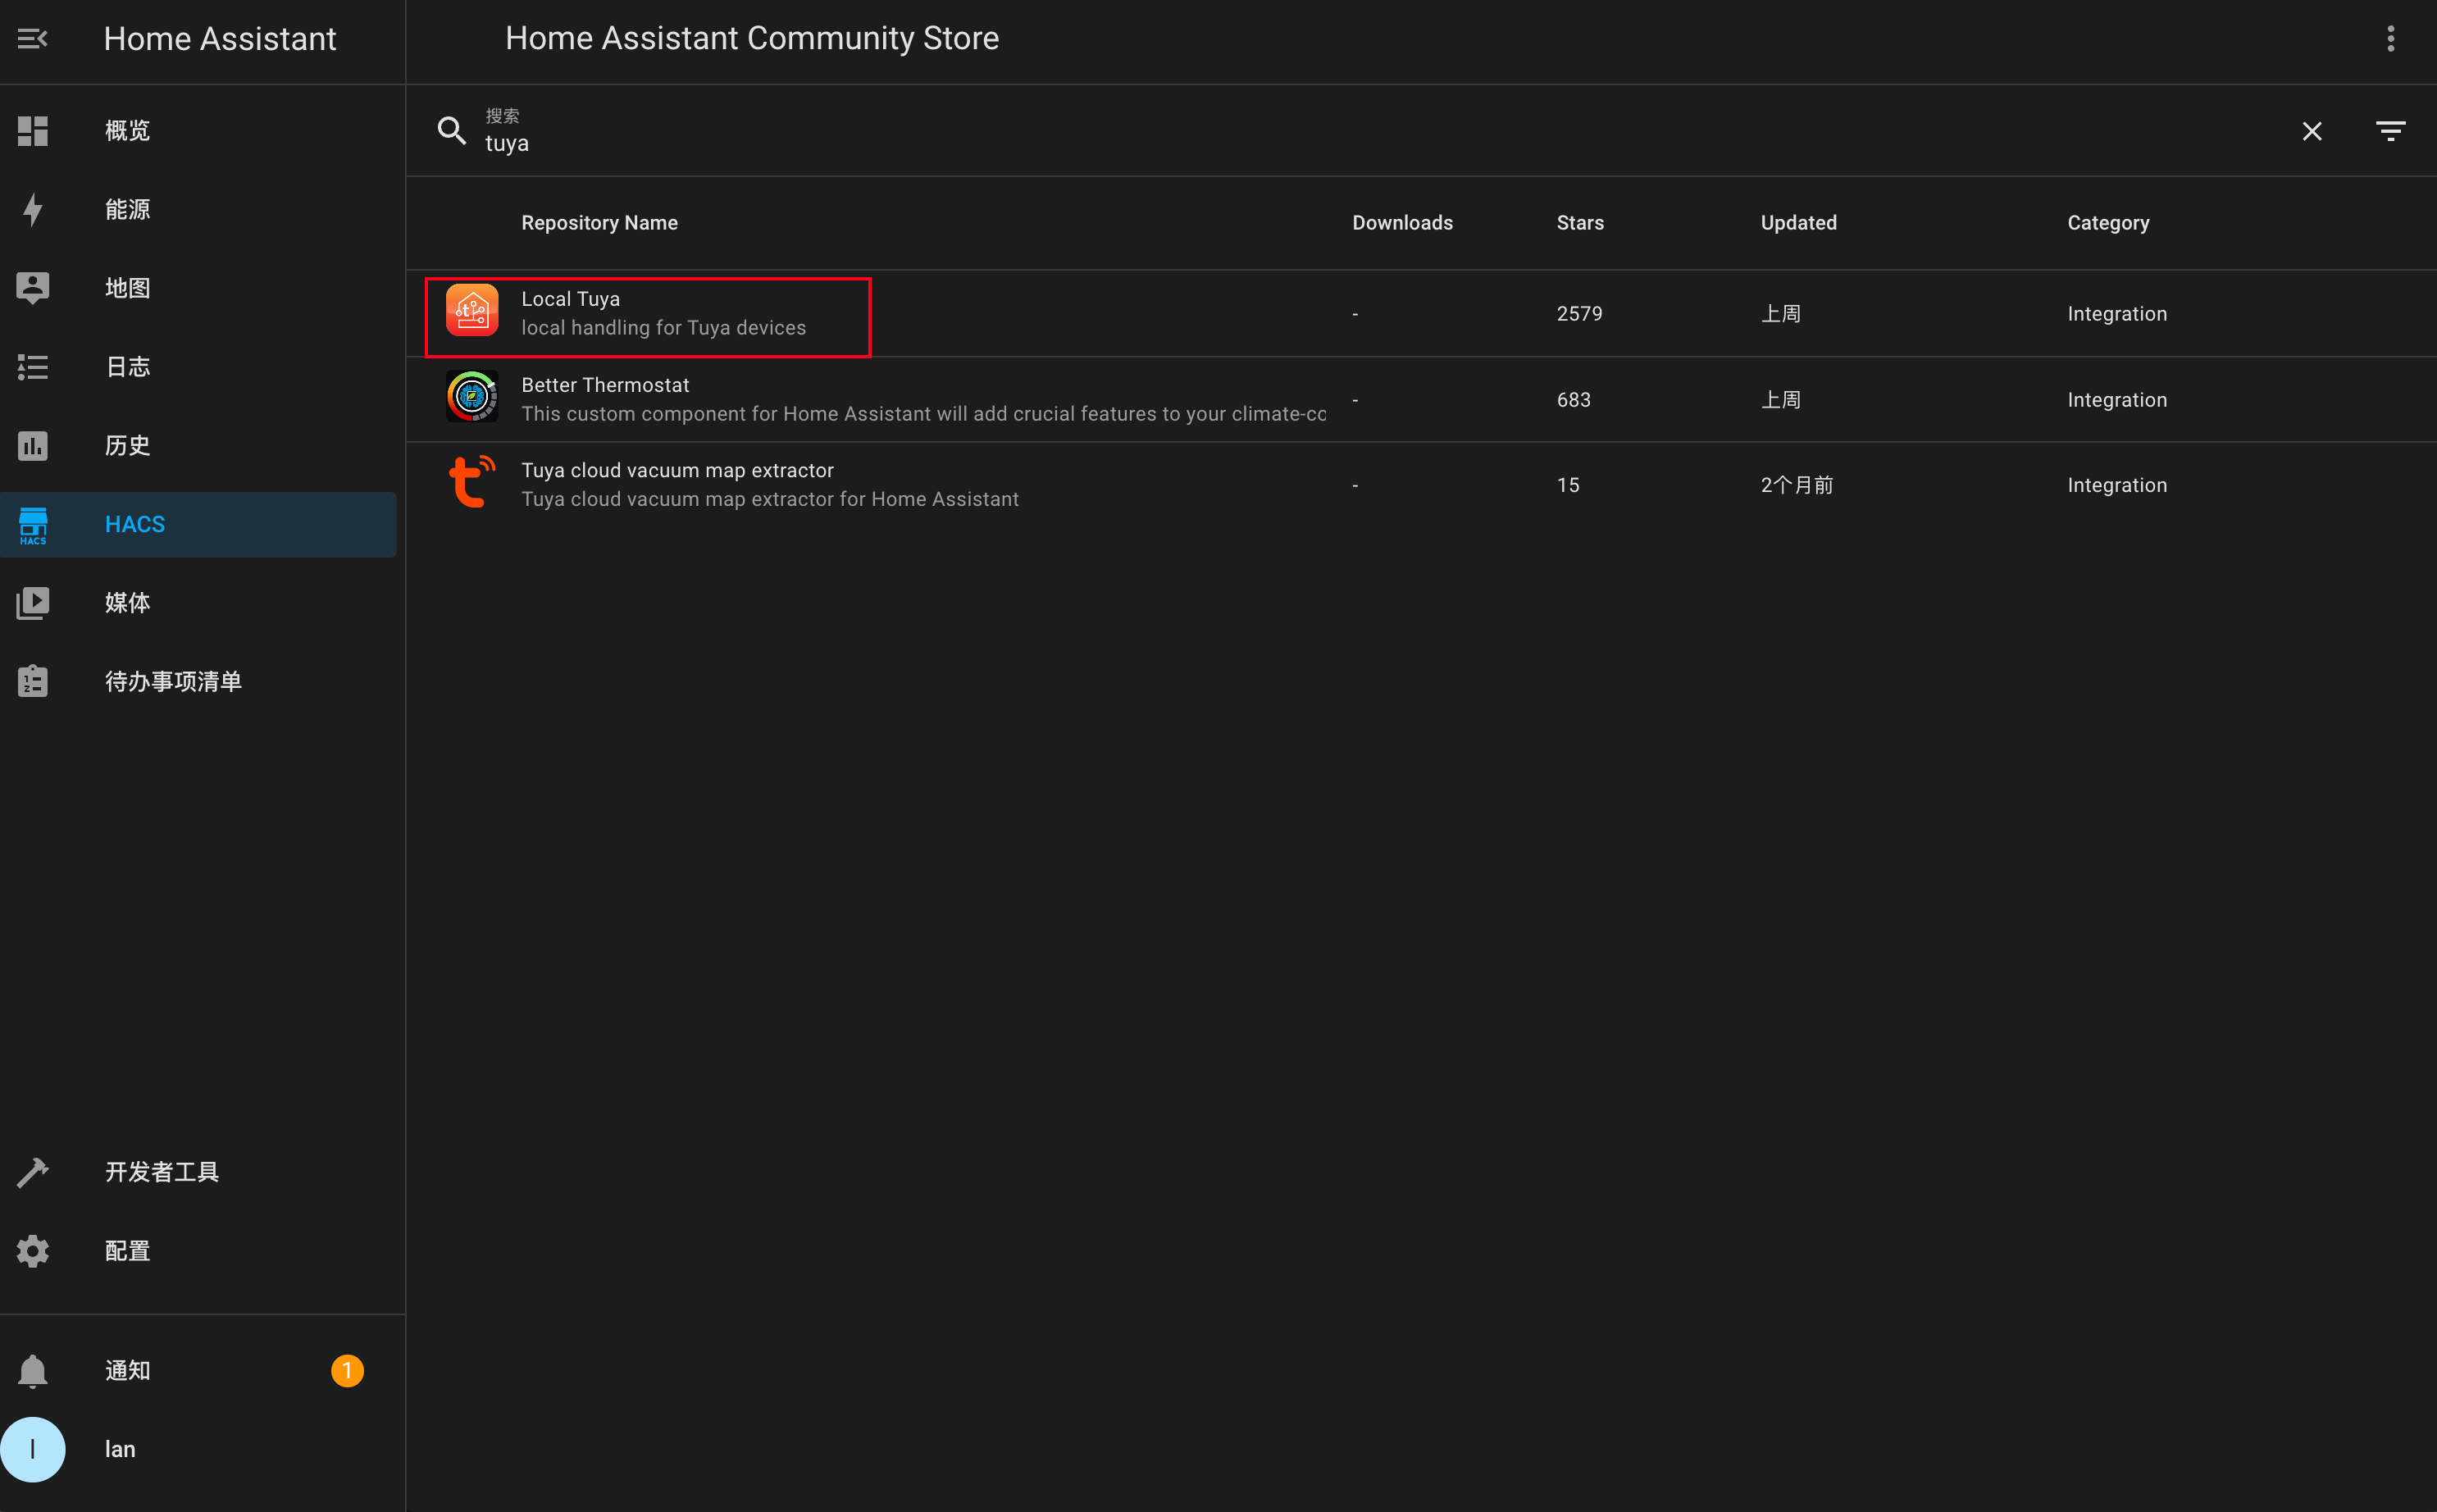
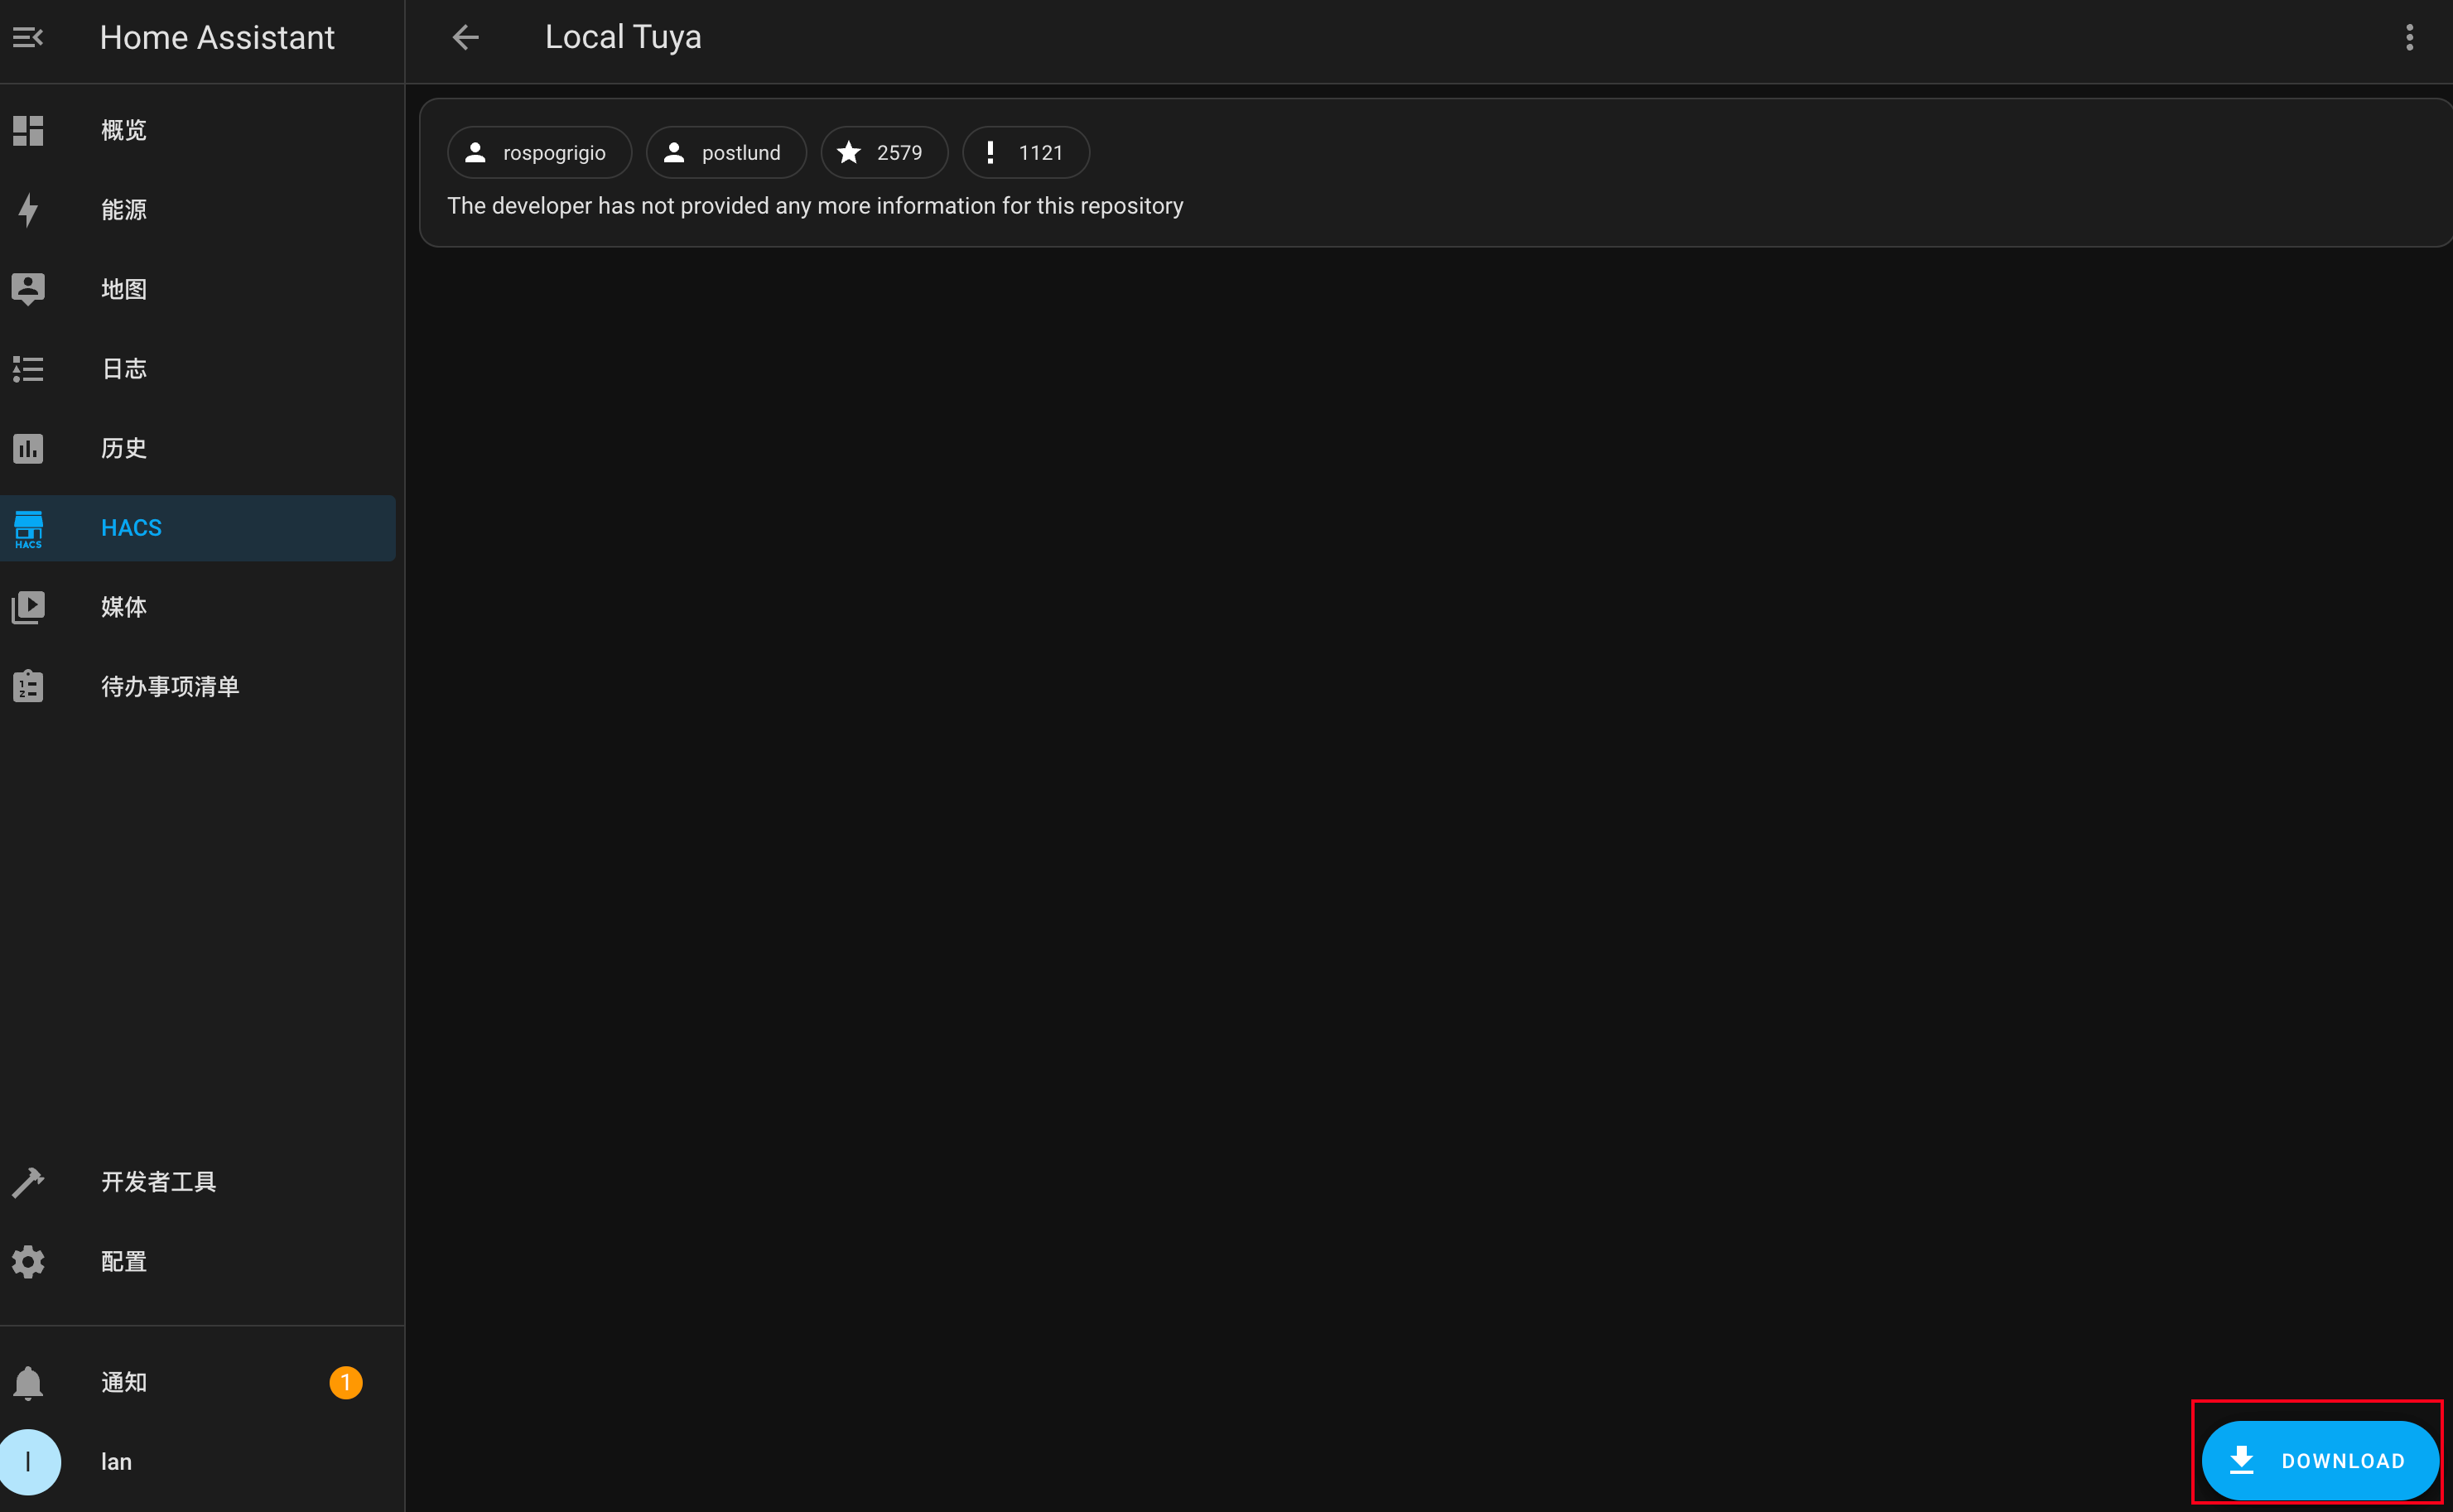
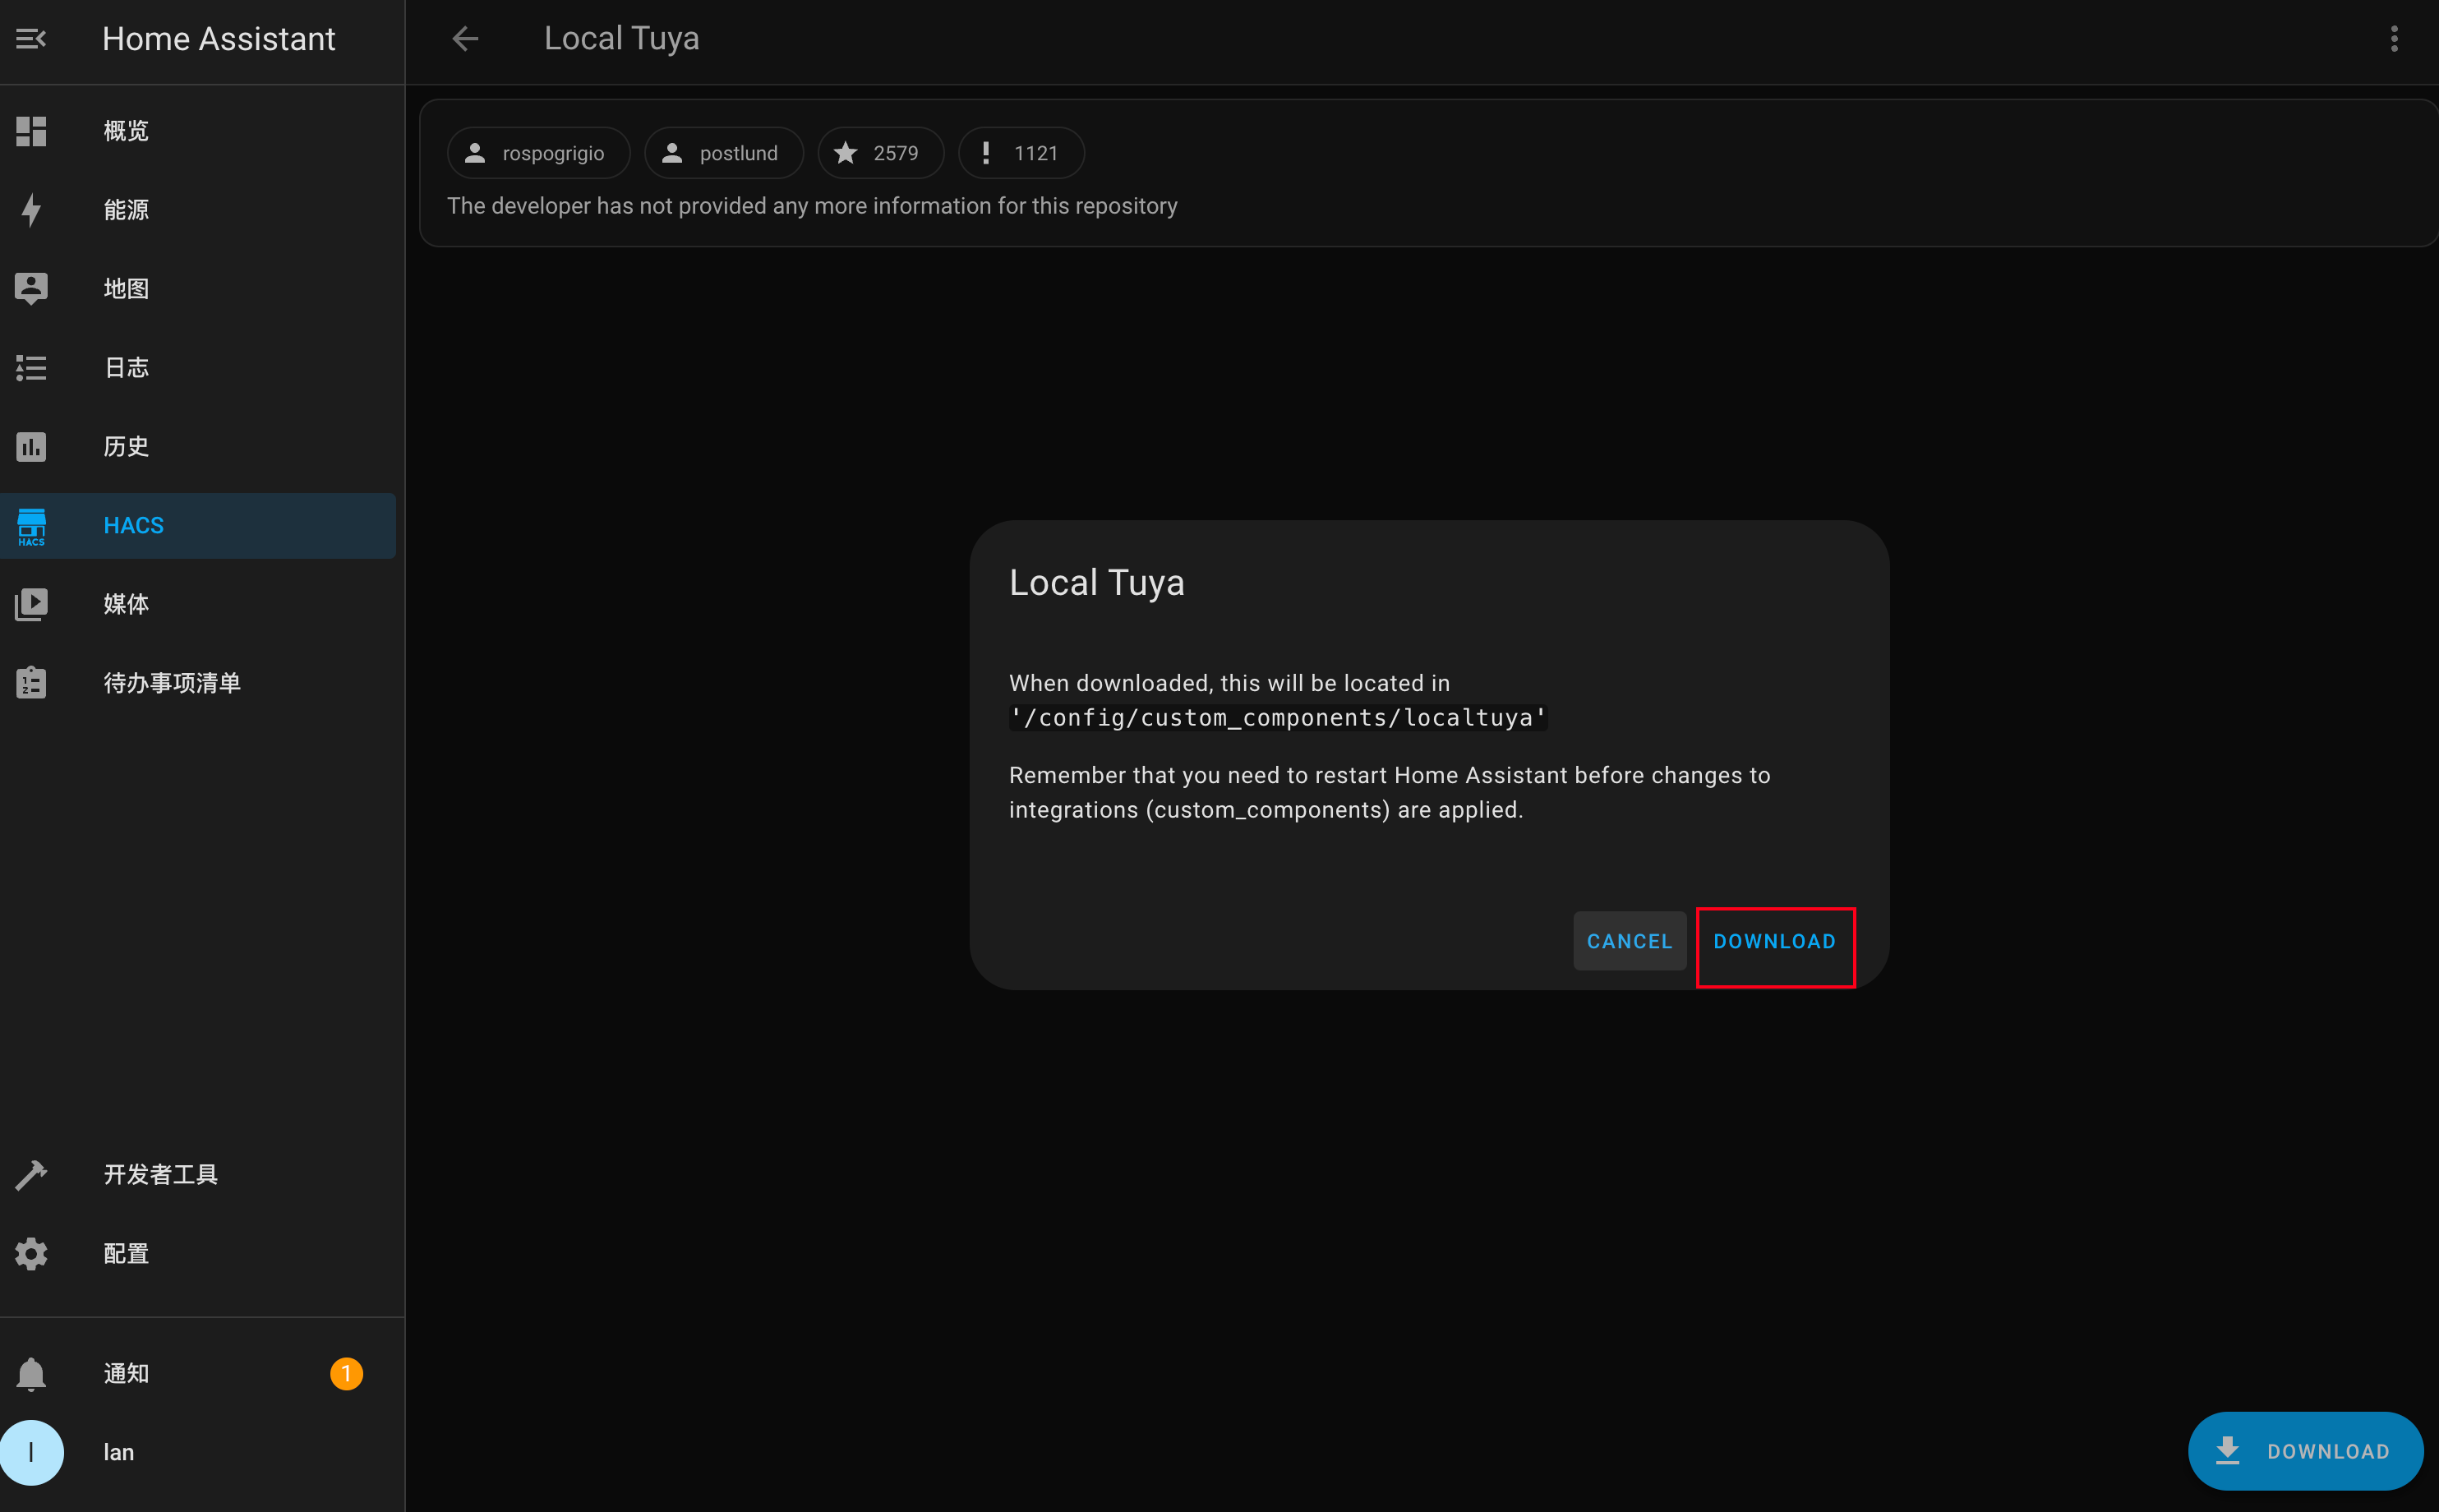
- 重启 HASS
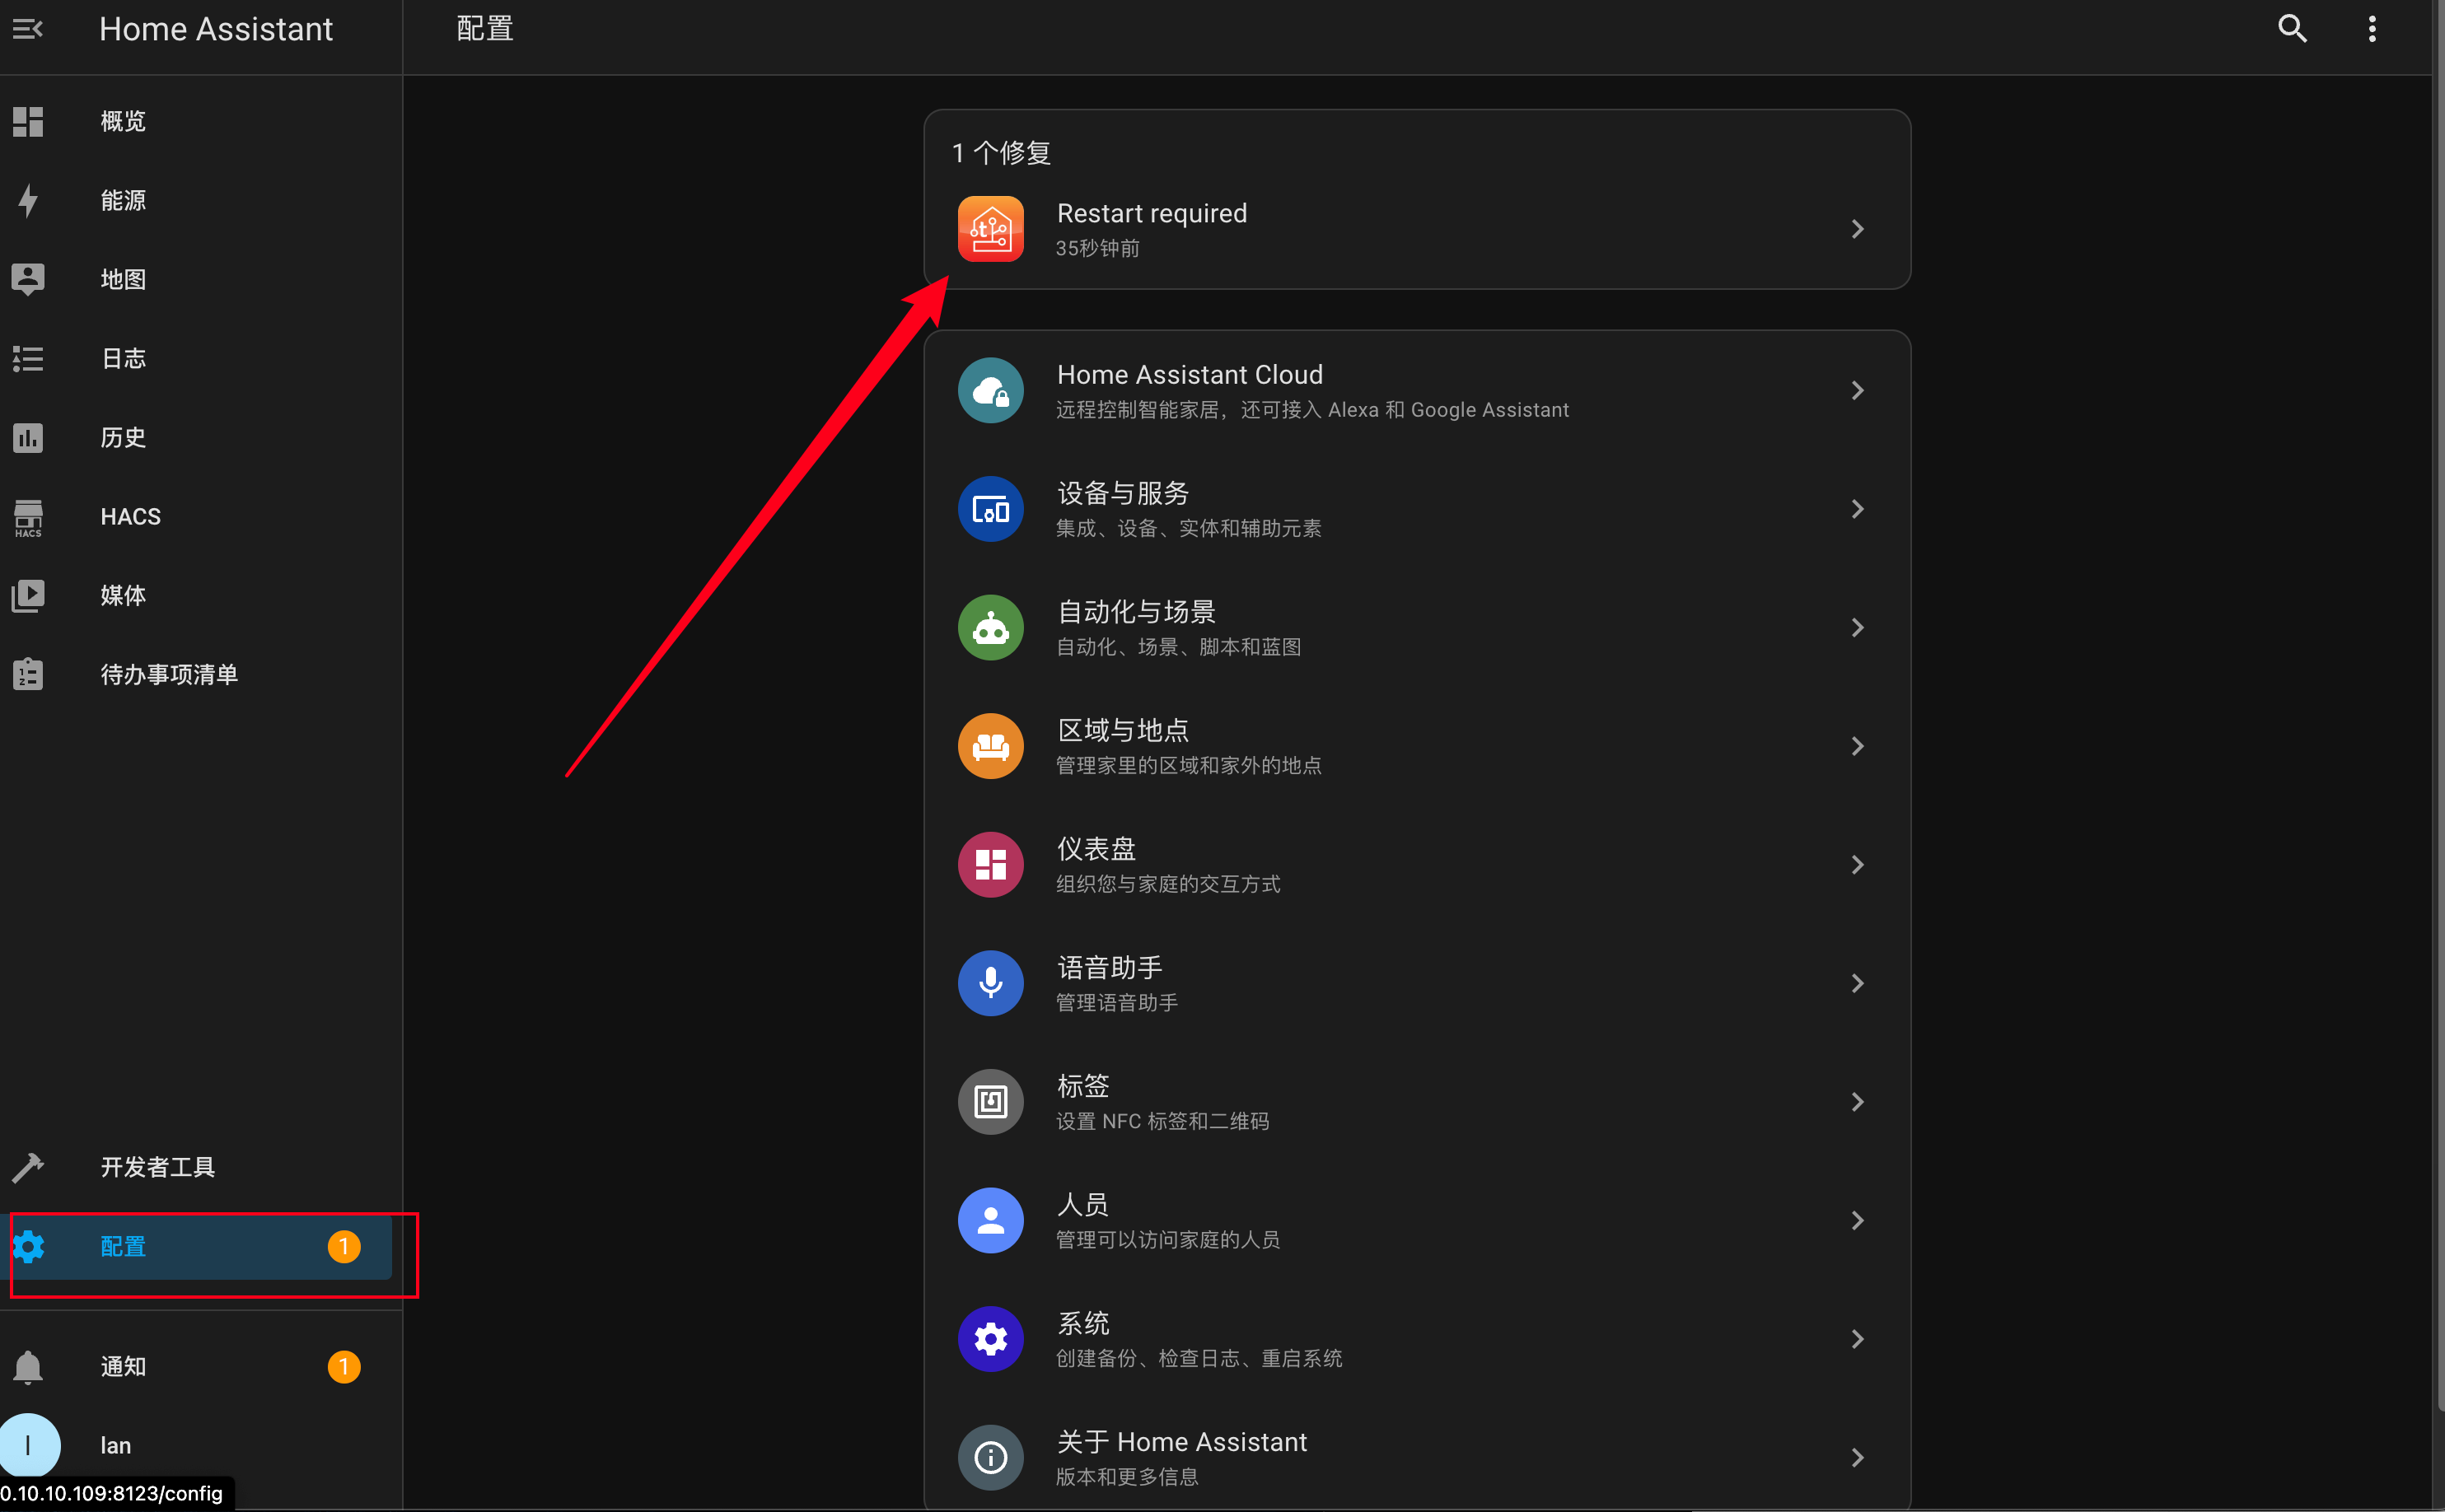
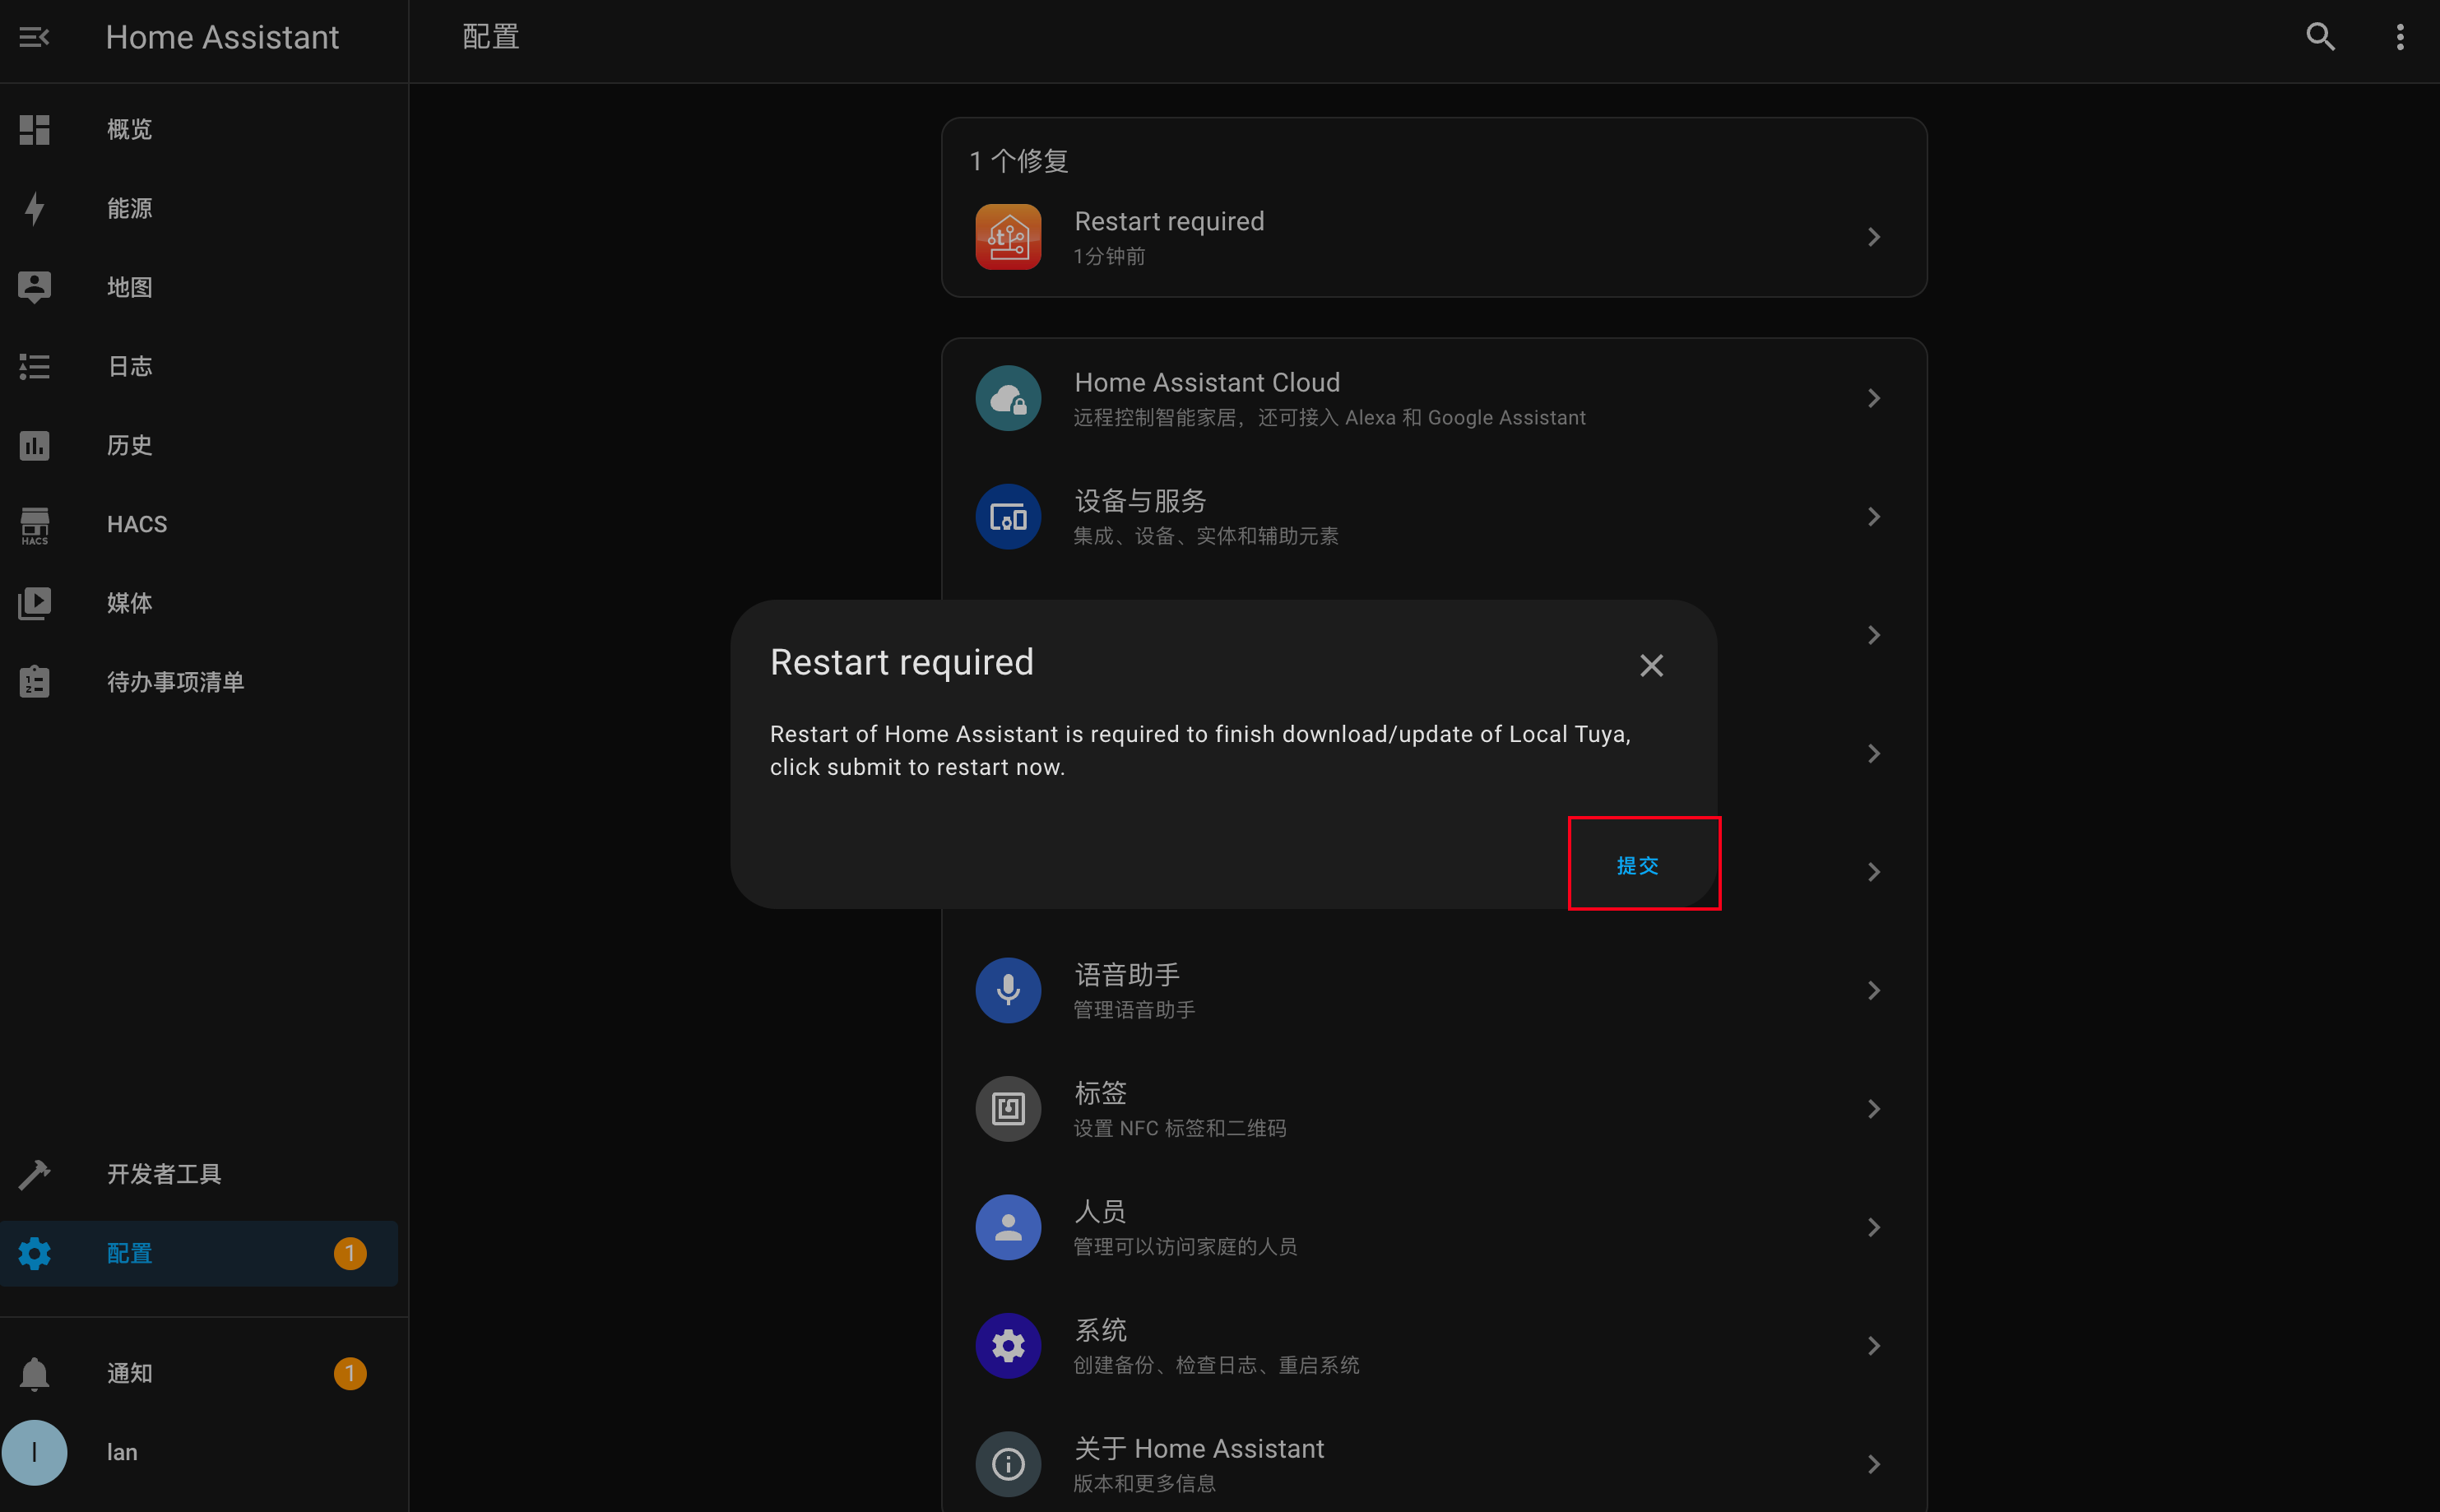
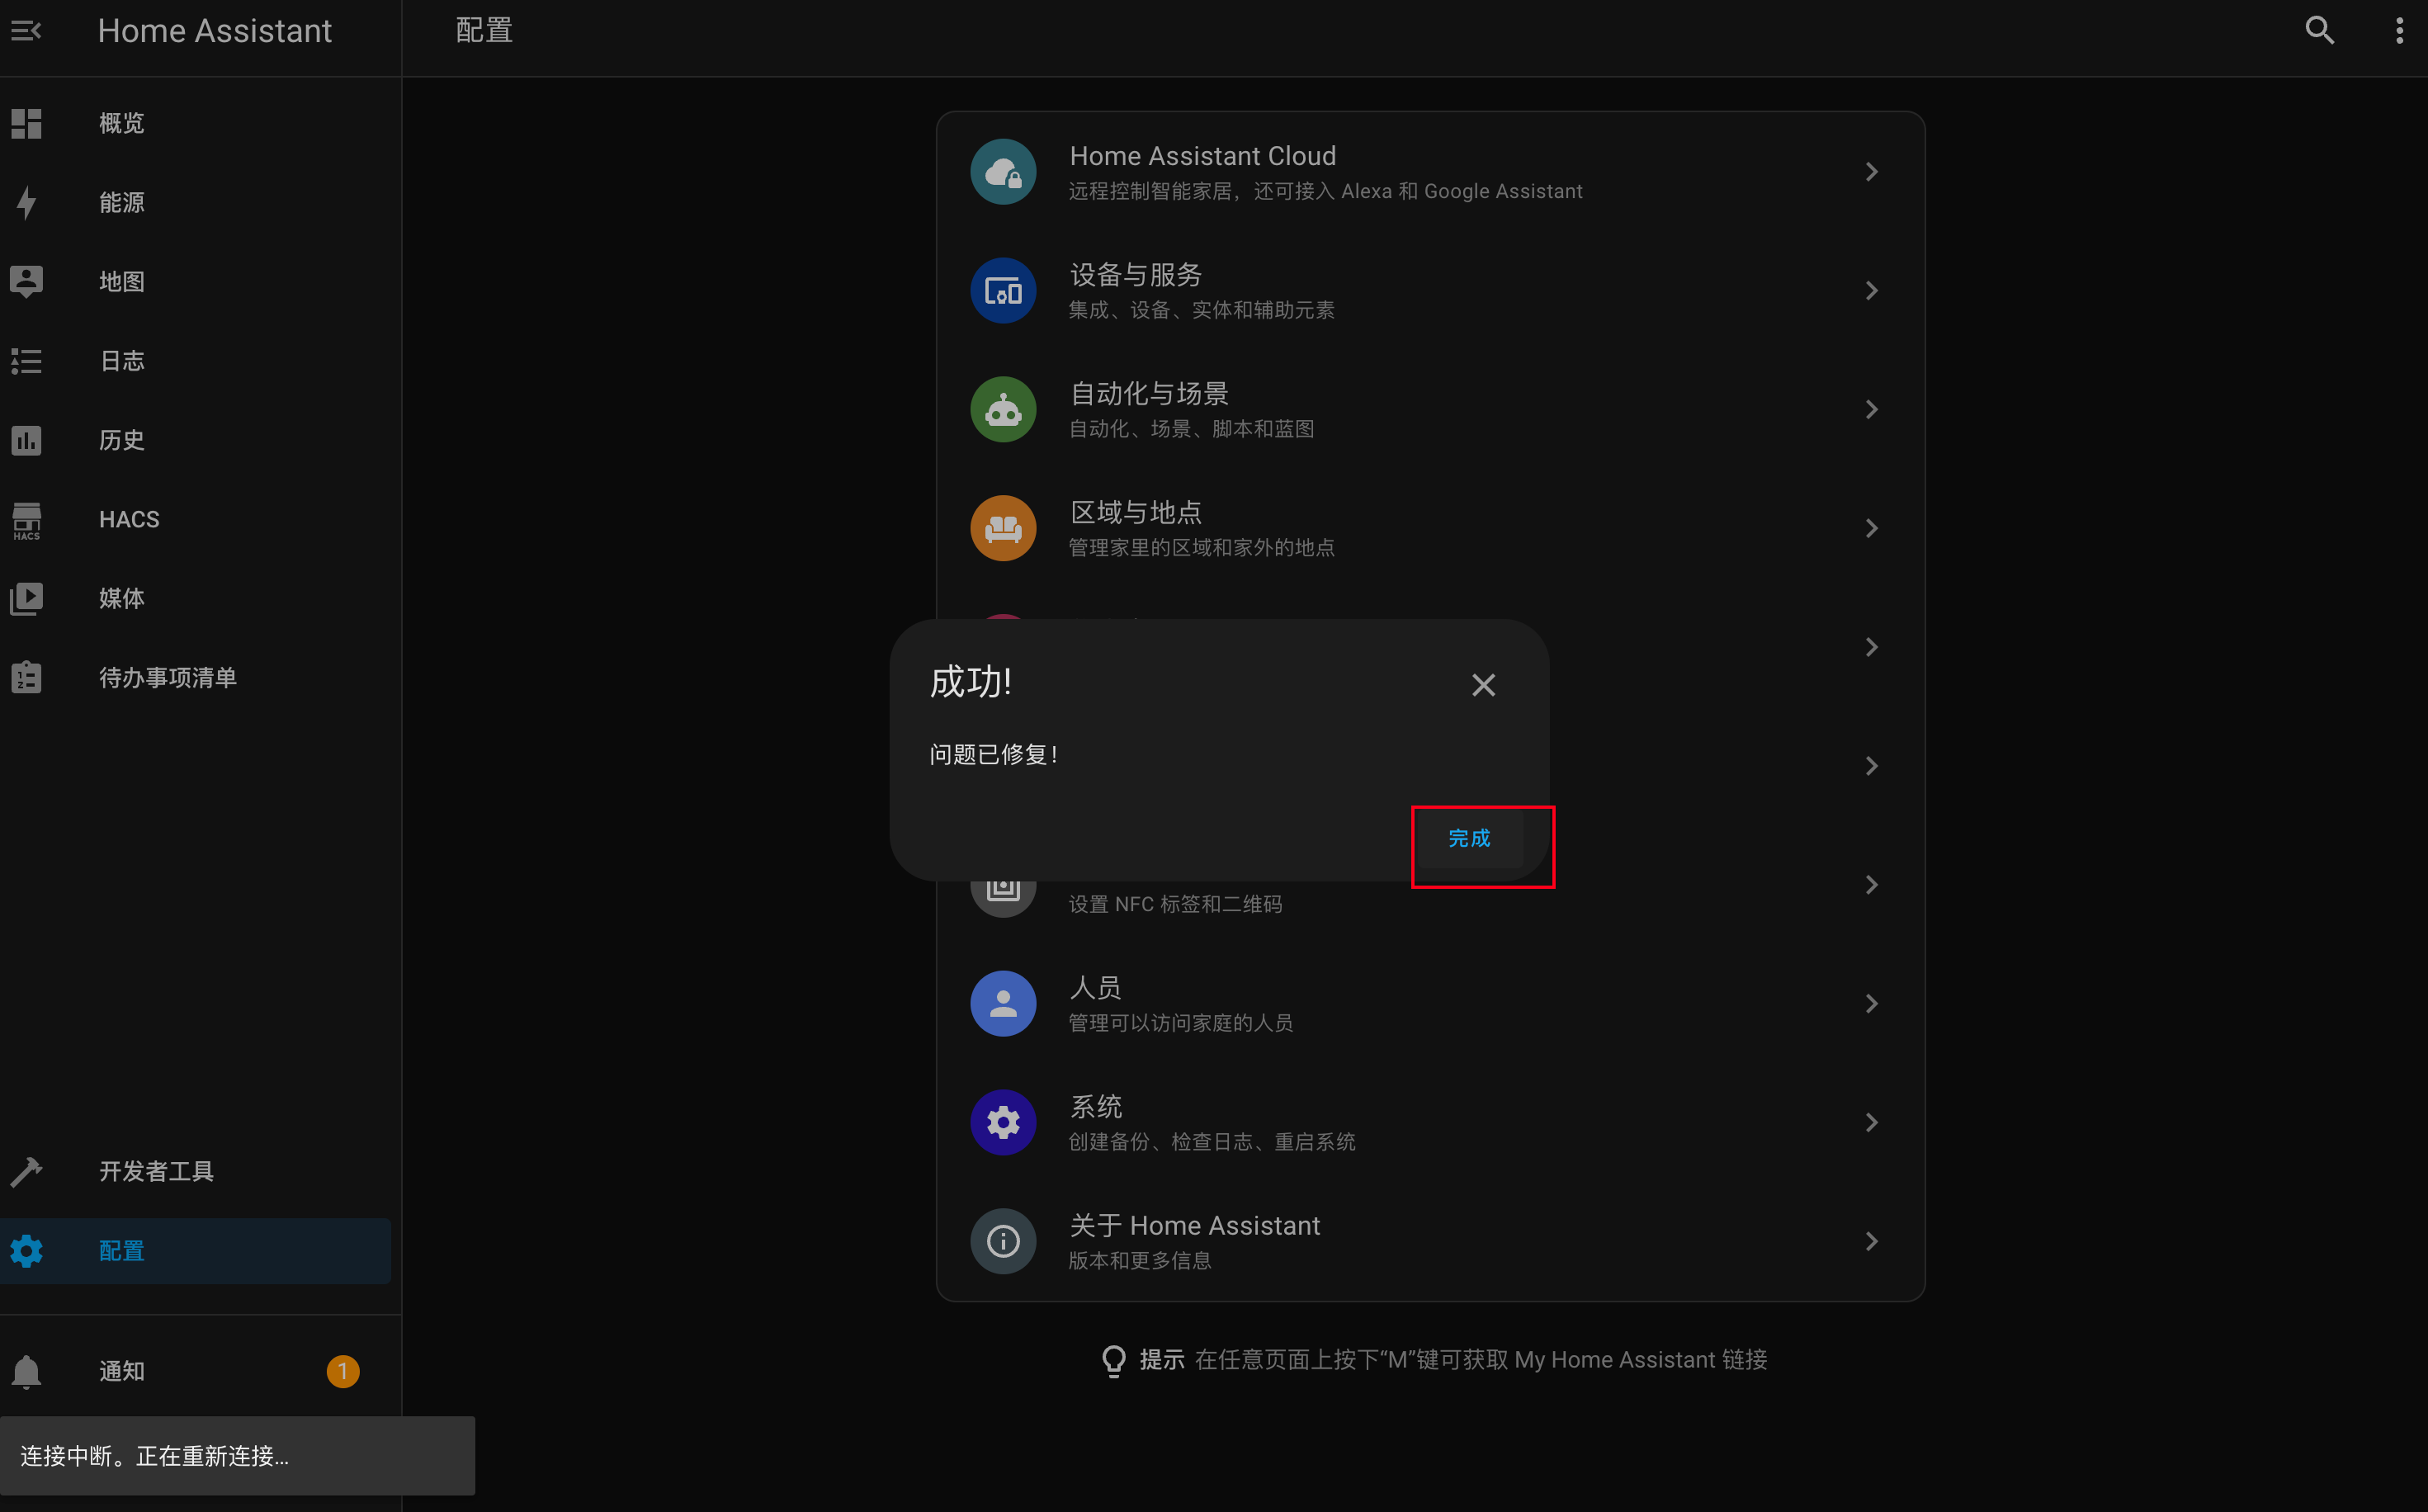
- 等待重启
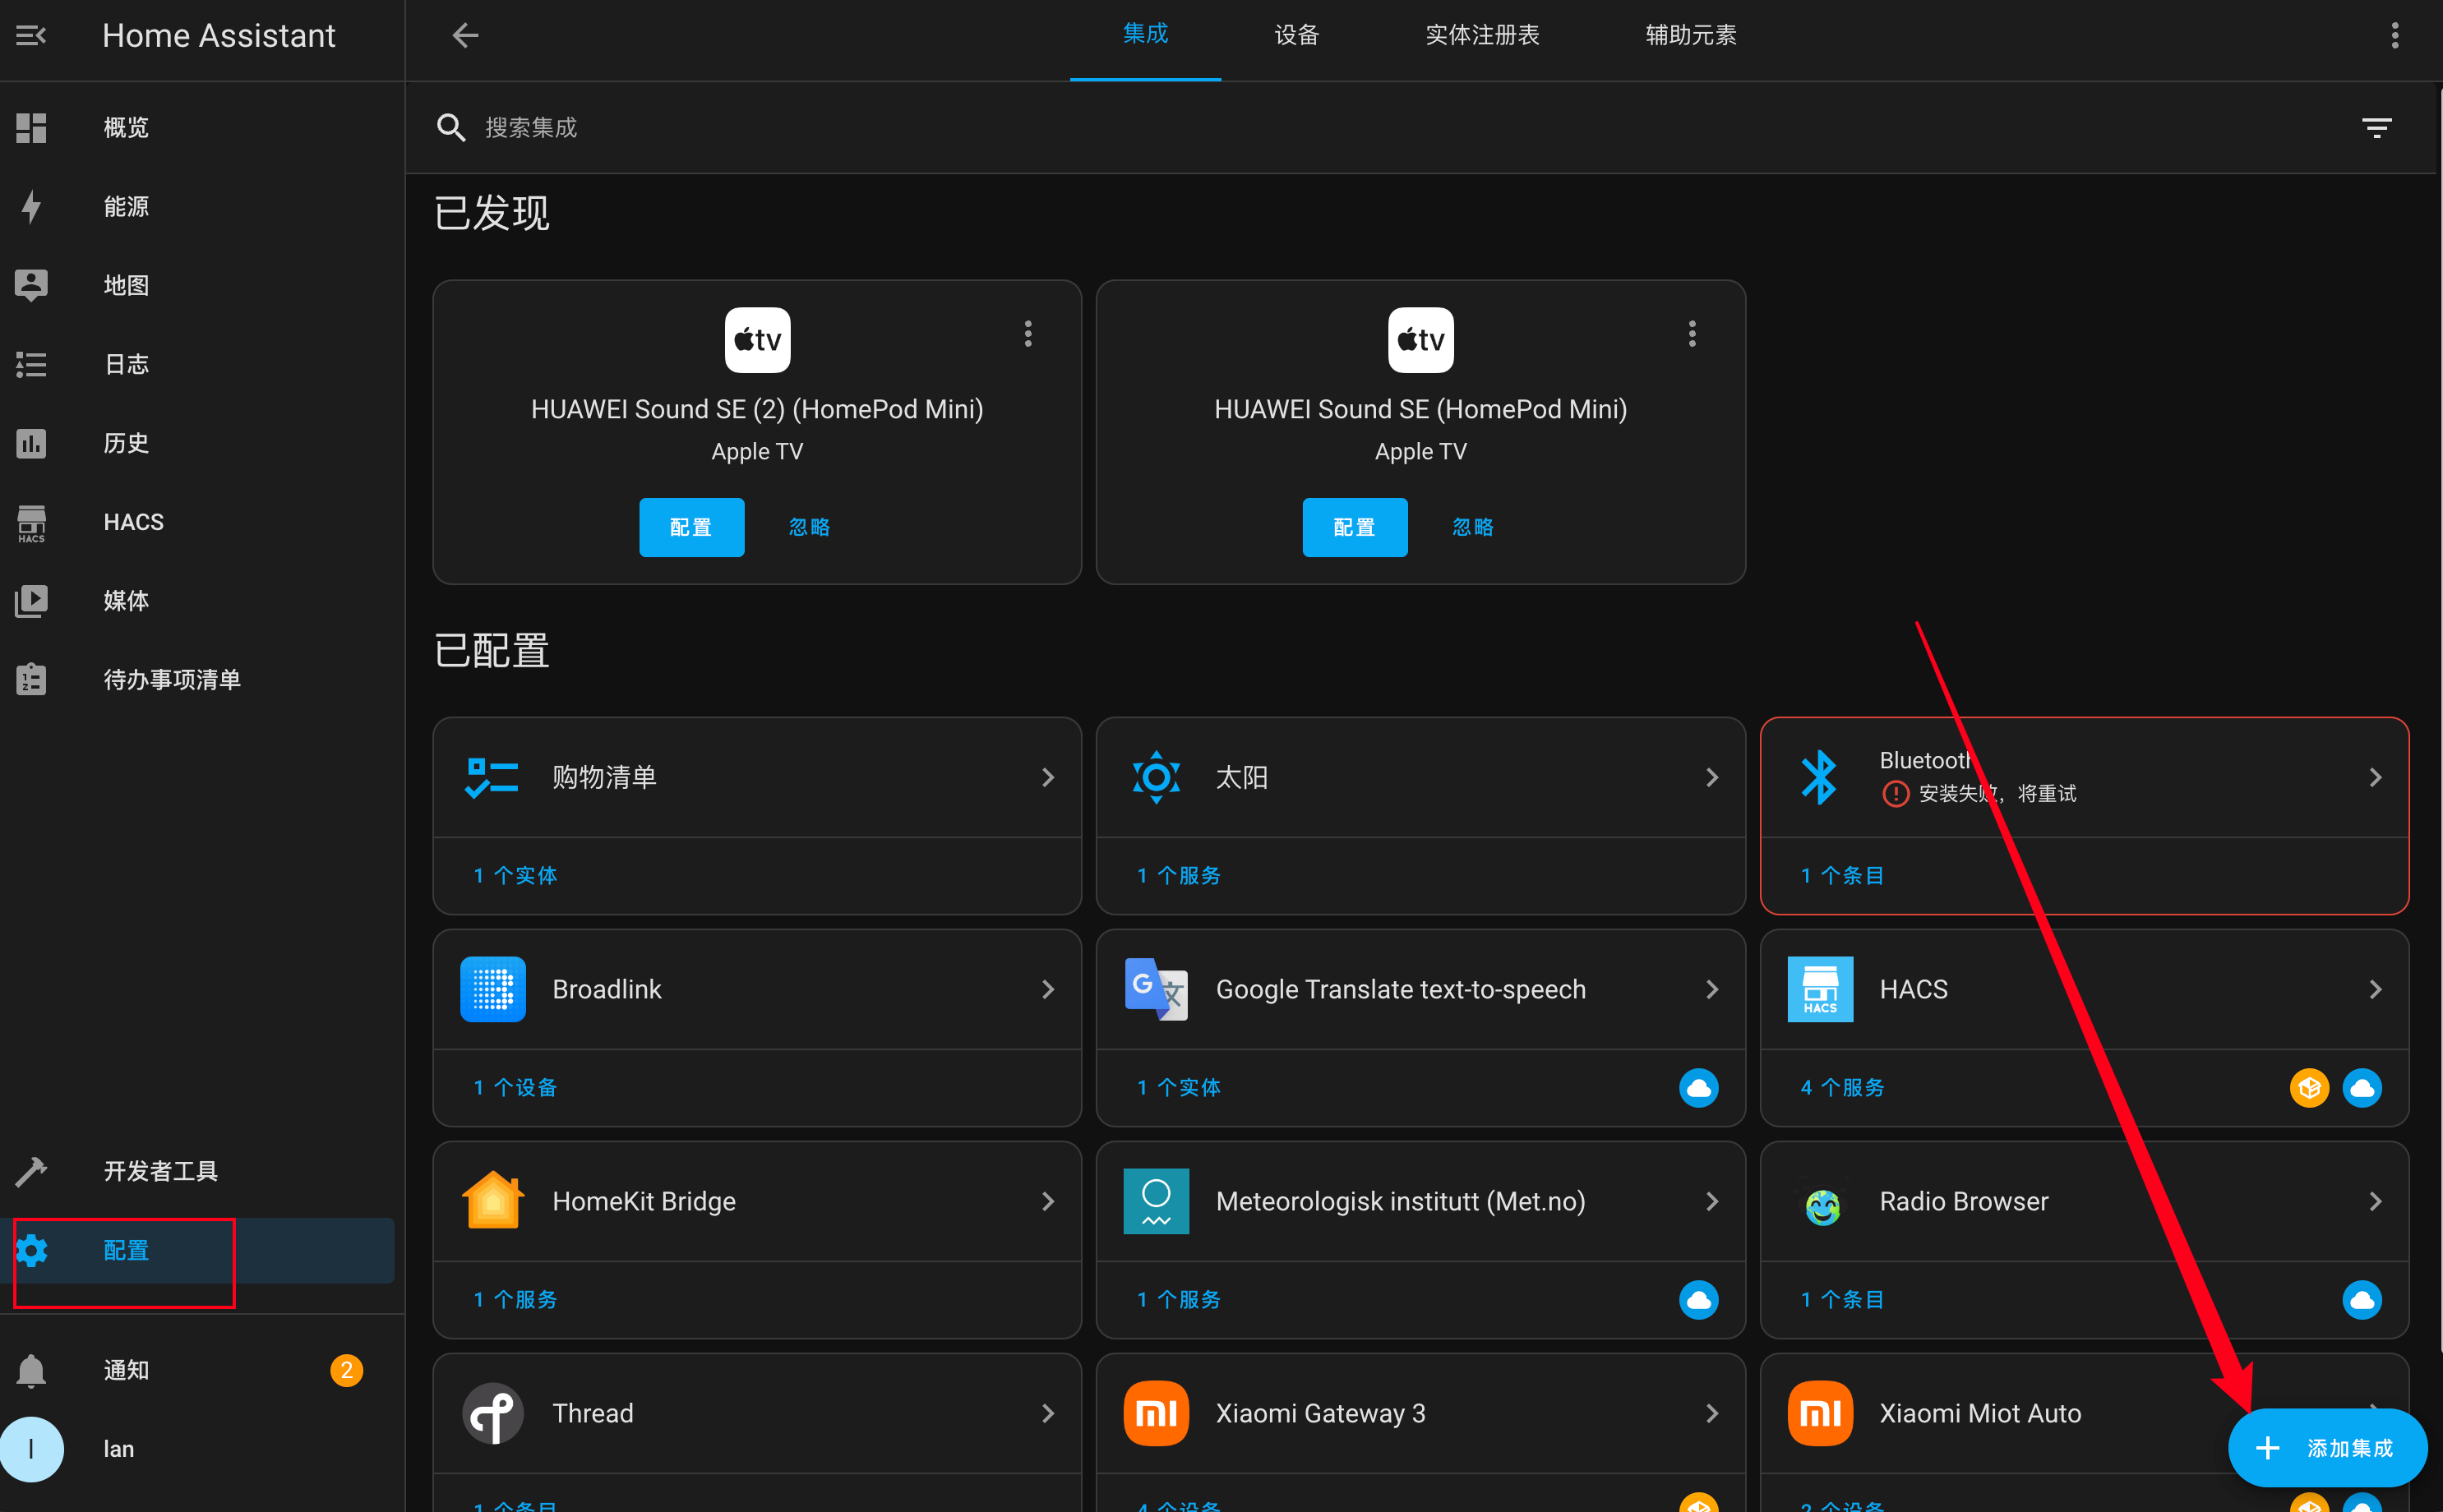
- 添加集成
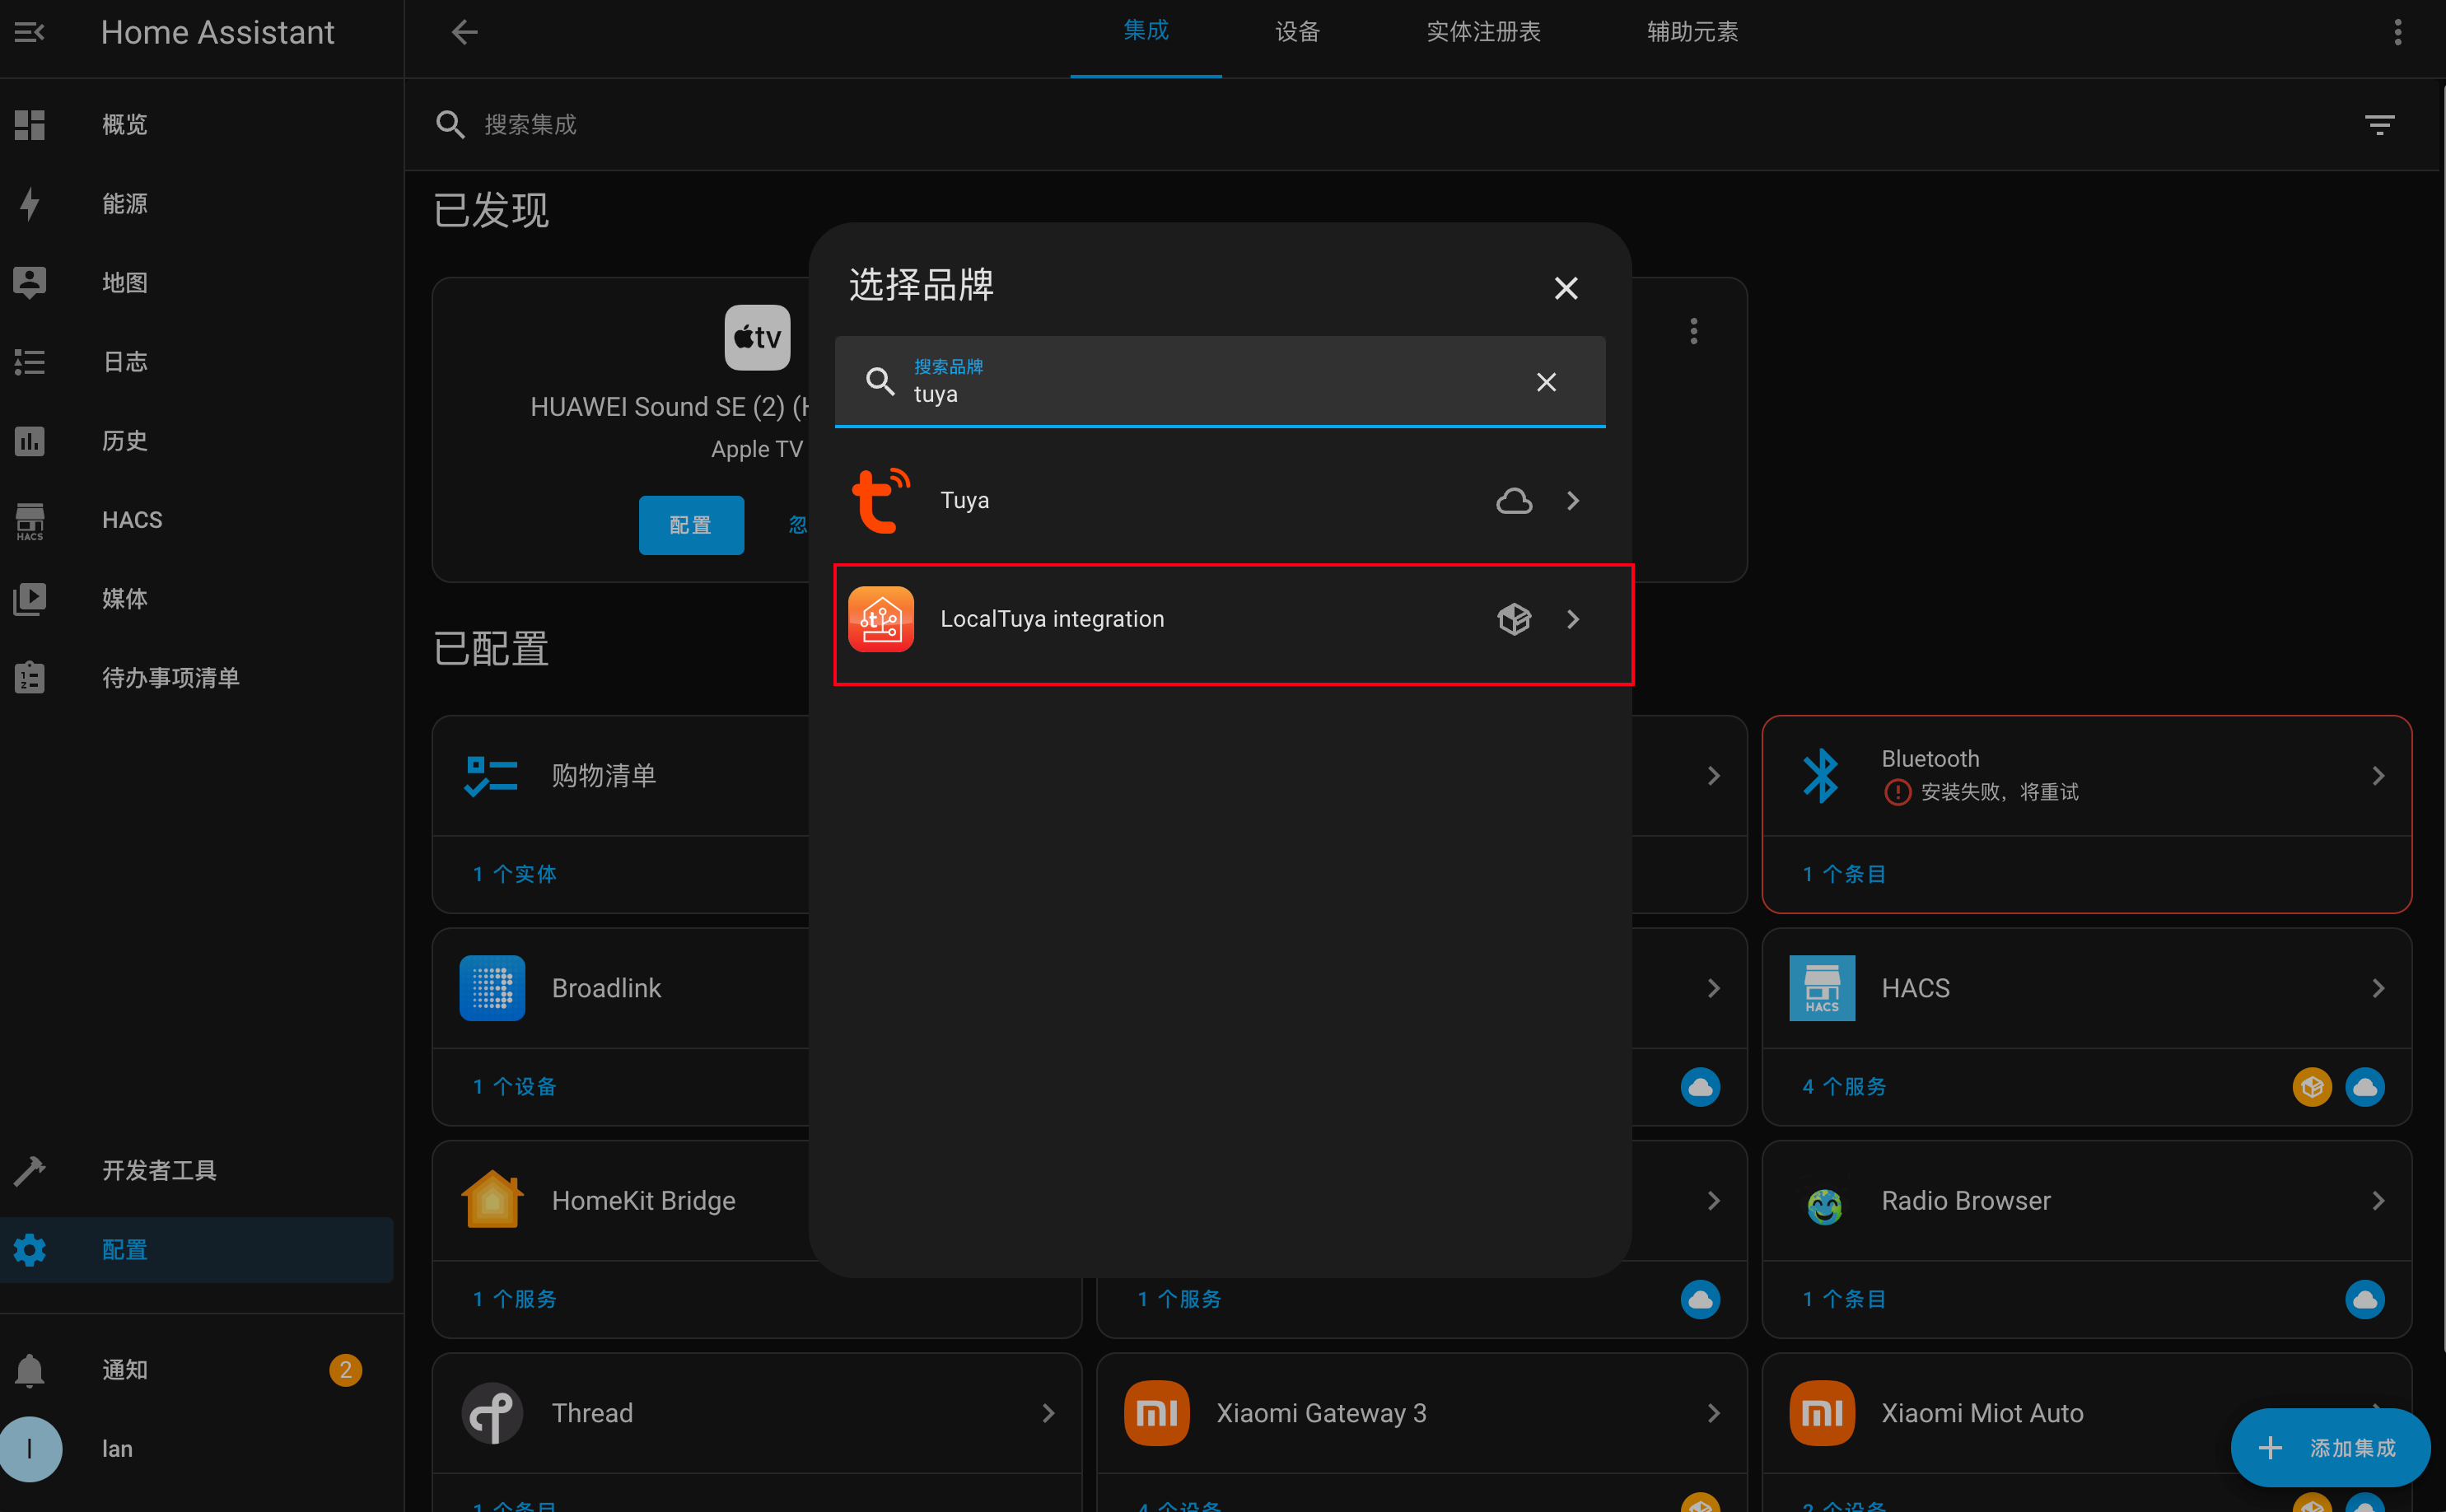
- 搜索 tuya 单击即可添加
各家设备本地接入 HASS
米家
Xiaomi Gateway 3
本集成用来接入网关管理下的设备,项目地址:https://github.com/AlexxIT/XiaomiGateway
以小米多模网关为例,上文已经讲过打开 telnet 和降级 / 刷 MOD 版
添加集成时选择
Add Mi Cloud Account
添加小米云账号并验证
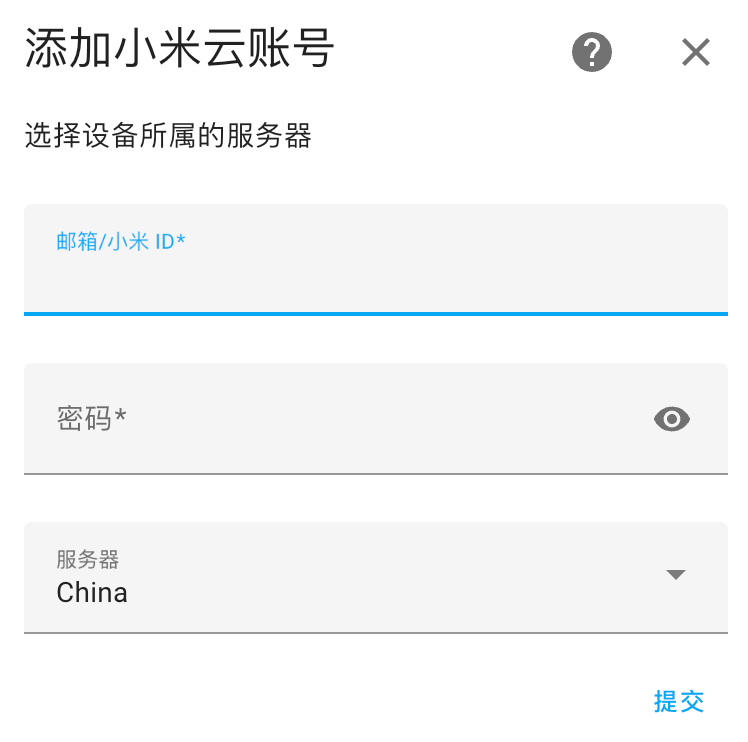
添加完账号之后,再重复添加集成,就能看见局域网中的网关了
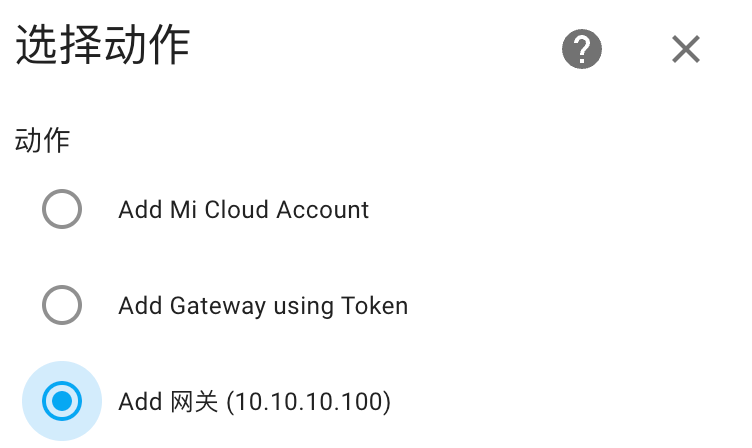
添加网关
须网关打开 telnet
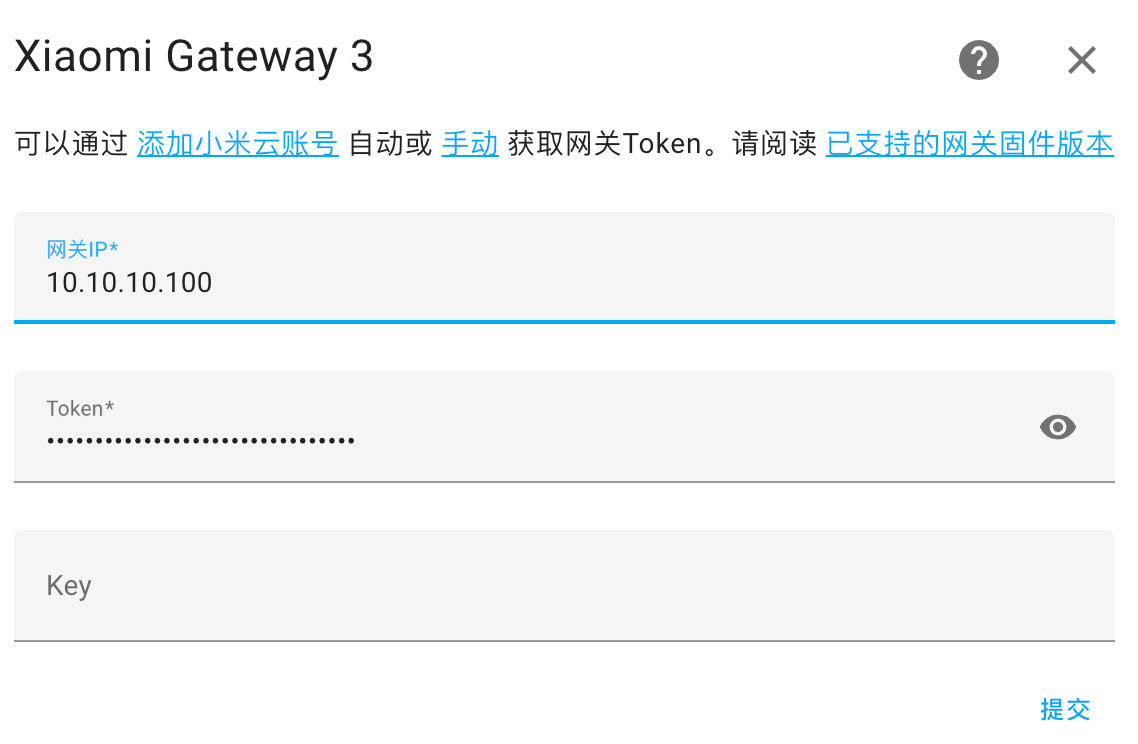
Xiaomi Miot Auto
本集成用来本地接入 Wi-Fi 设备,项目地址:https://github.com/al-one/hass-xiaomi-miot
且需要配合集成 Xiaomi Gateway 3,在 Gateway 3 中找到设备的 IP 和 Token
- 进入集成 Xiaomi Gateway 3,选择手机号码后面的
选项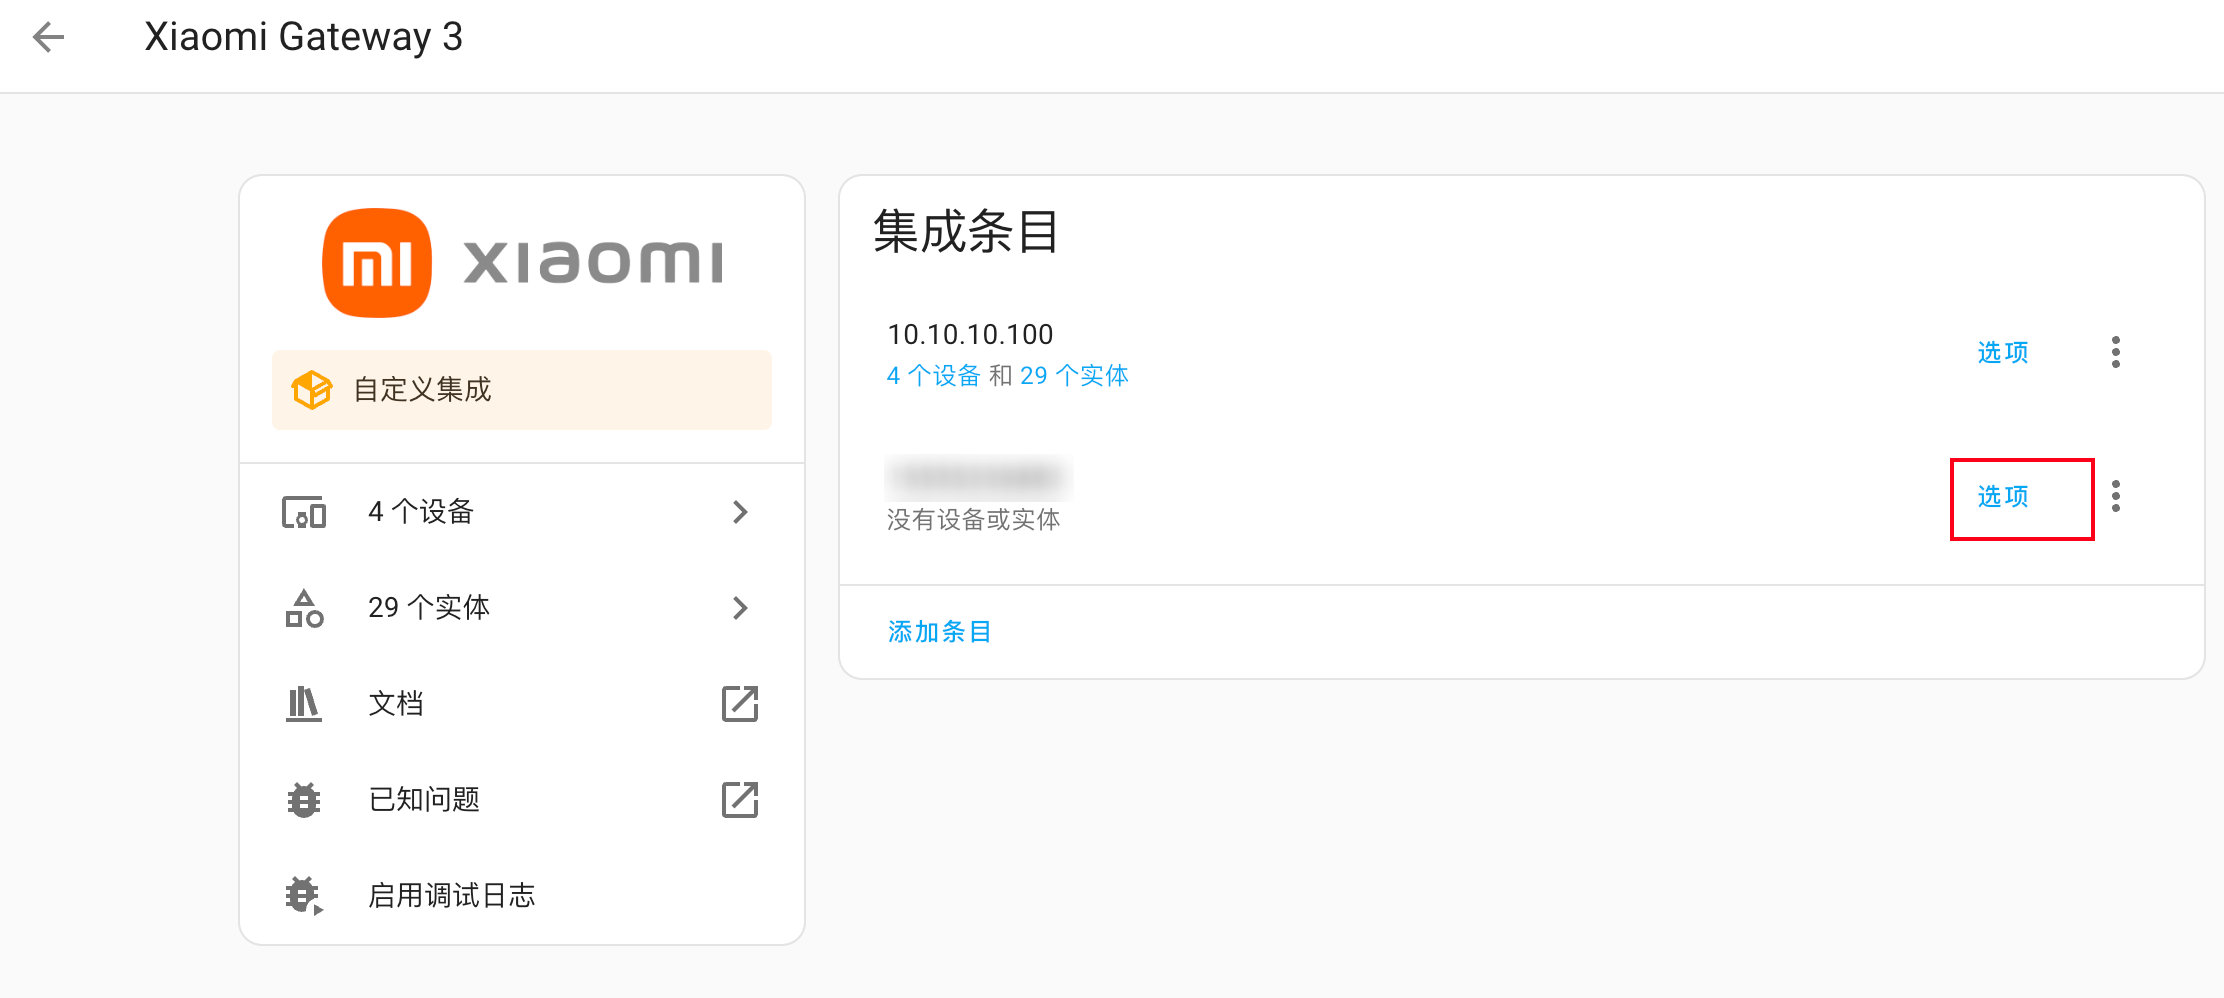
- 选择要查看的设备并提交
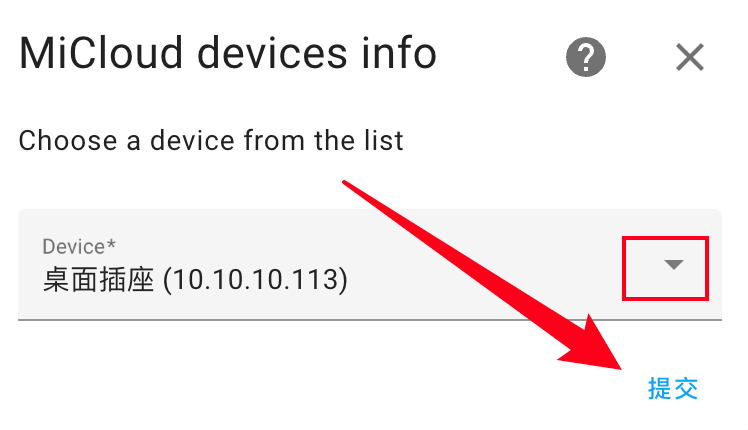
- 记下设备的 IP 和 Token
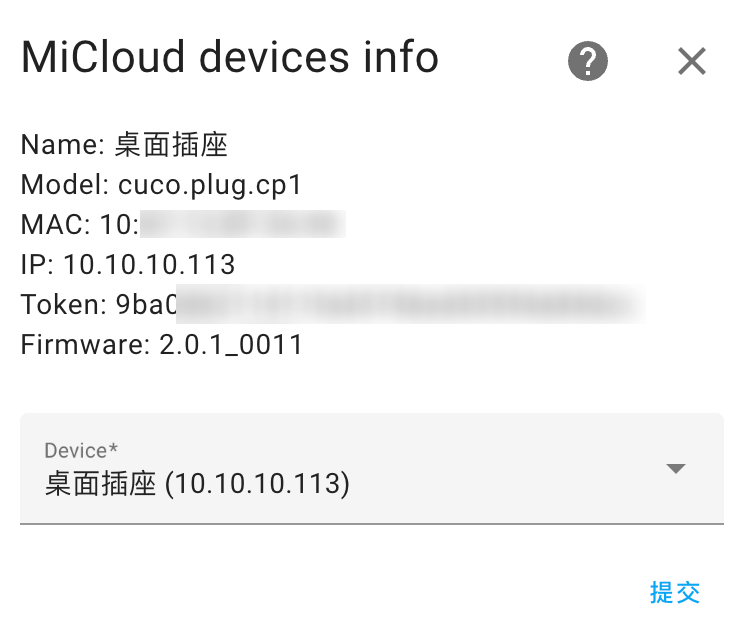
- 添加集成 Xiaomi Miot Auto 时, 选择局域网集成
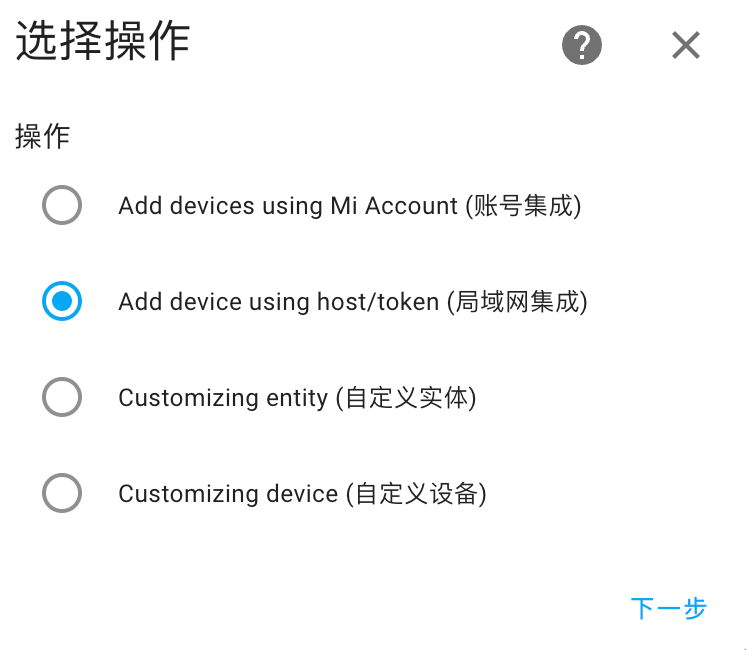
- 输入刚才查询到的
IP、Token,并修改名称,即可成功添加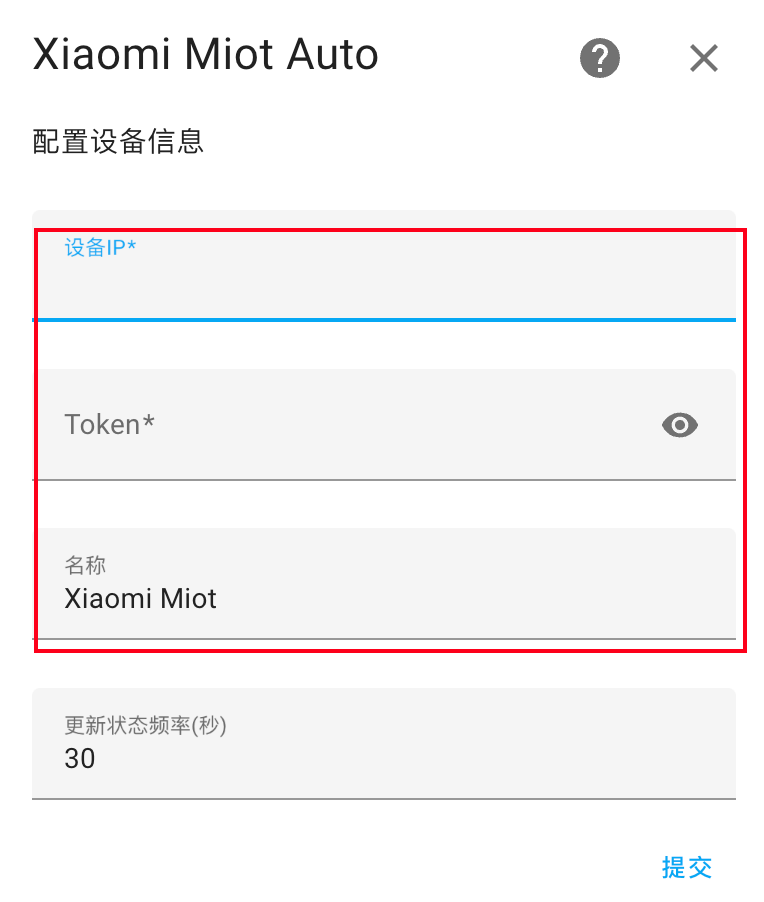
涂鸦
设置涂鸦平台账号并在其中添加设备
注册登录 https://iot.tuya.com
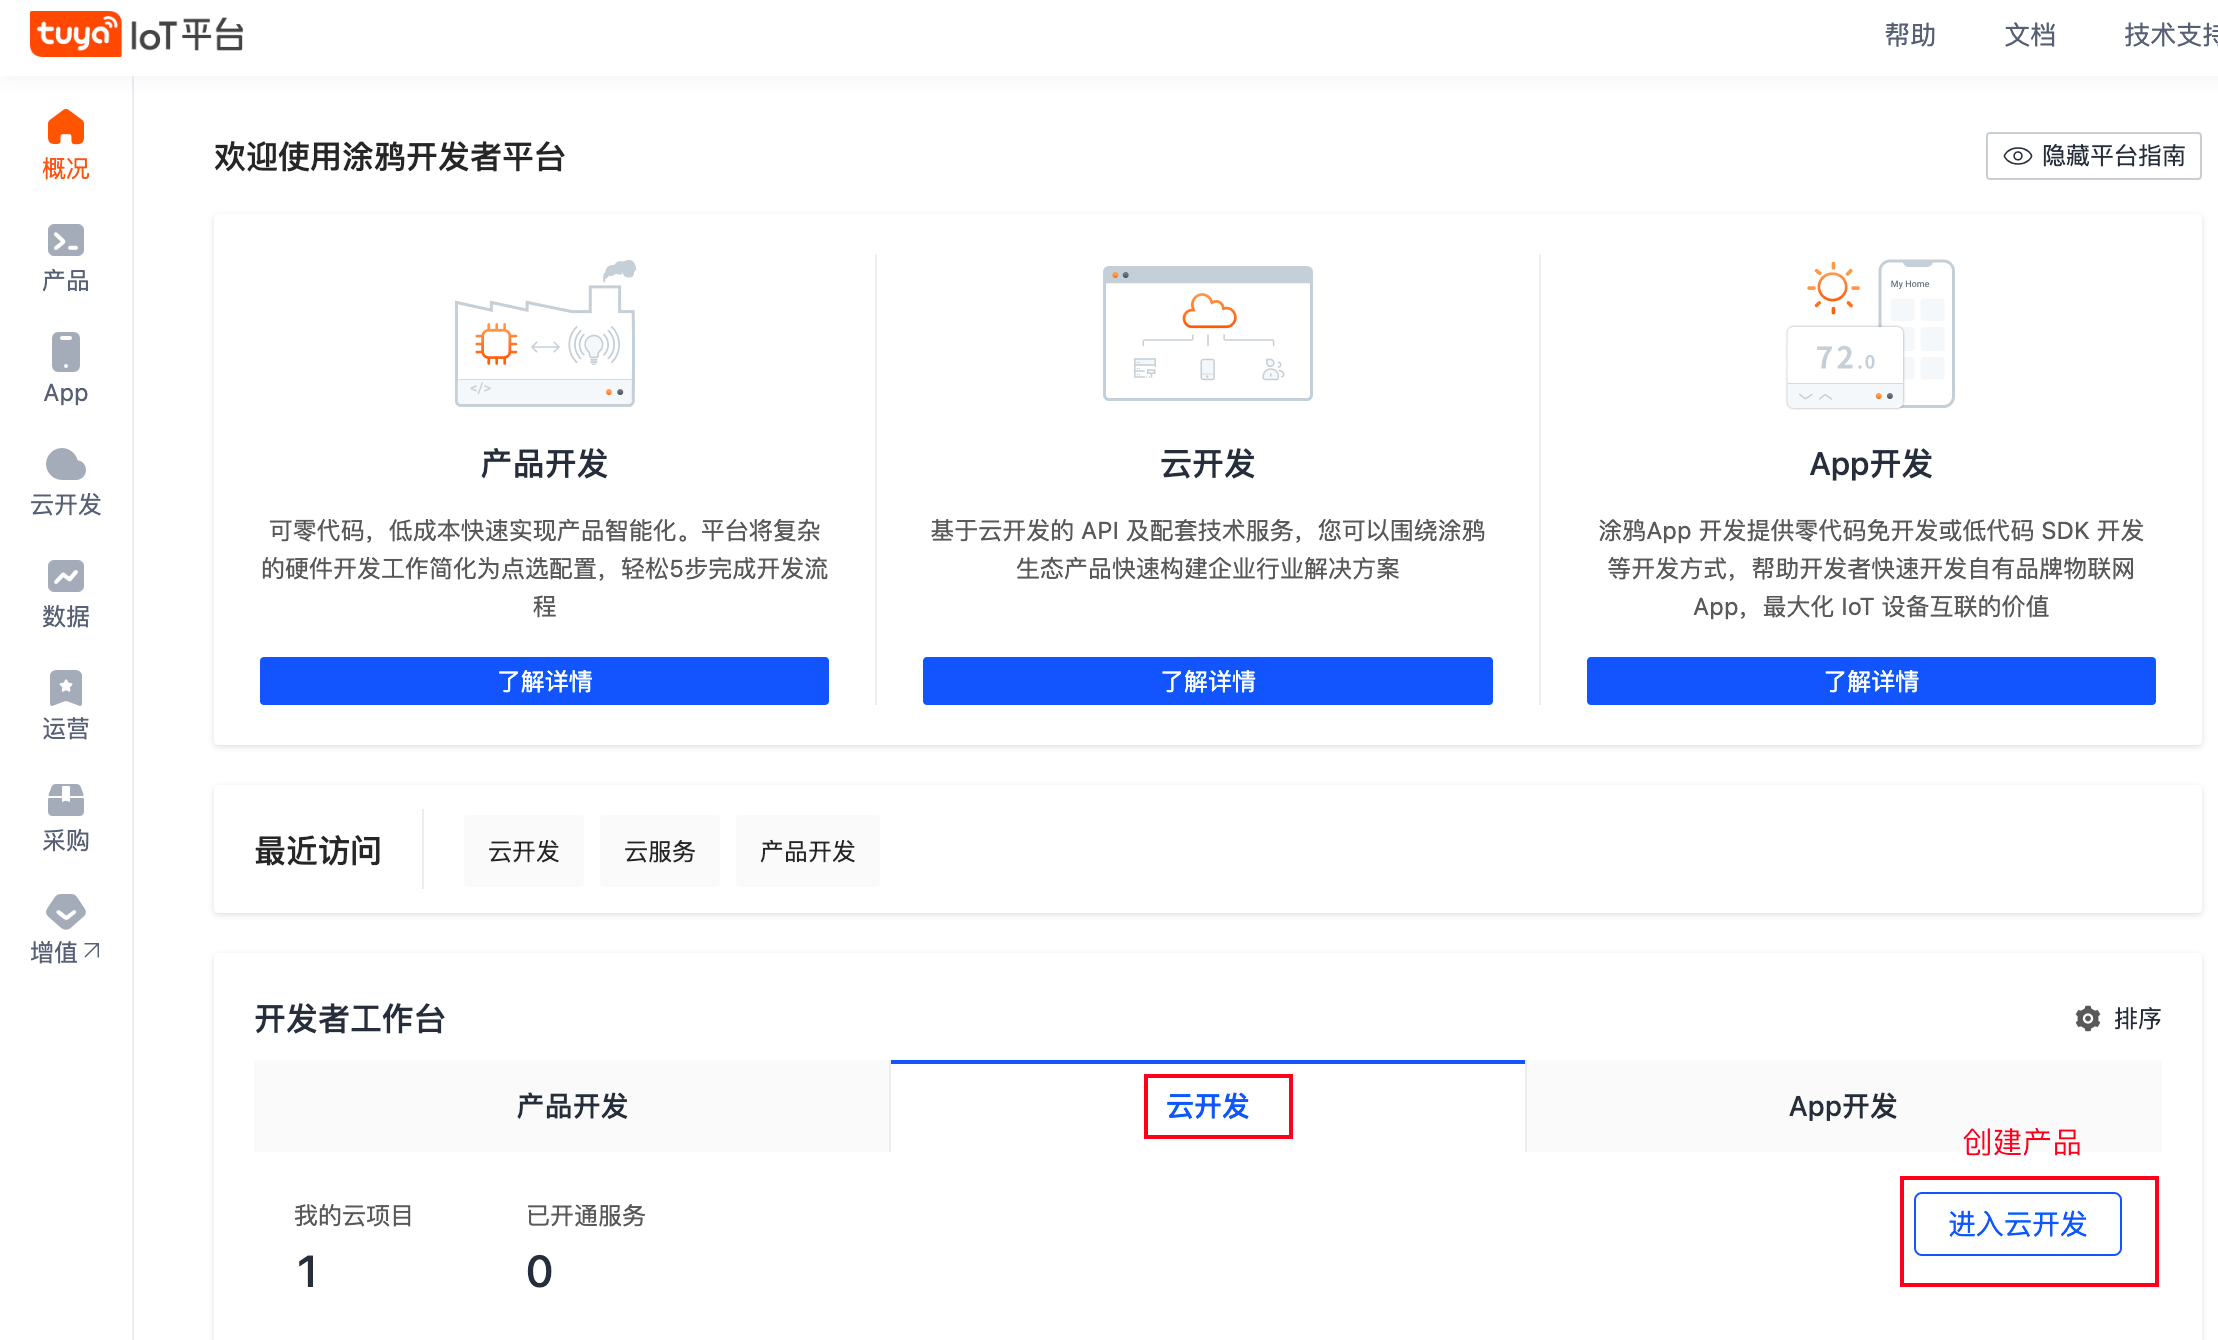
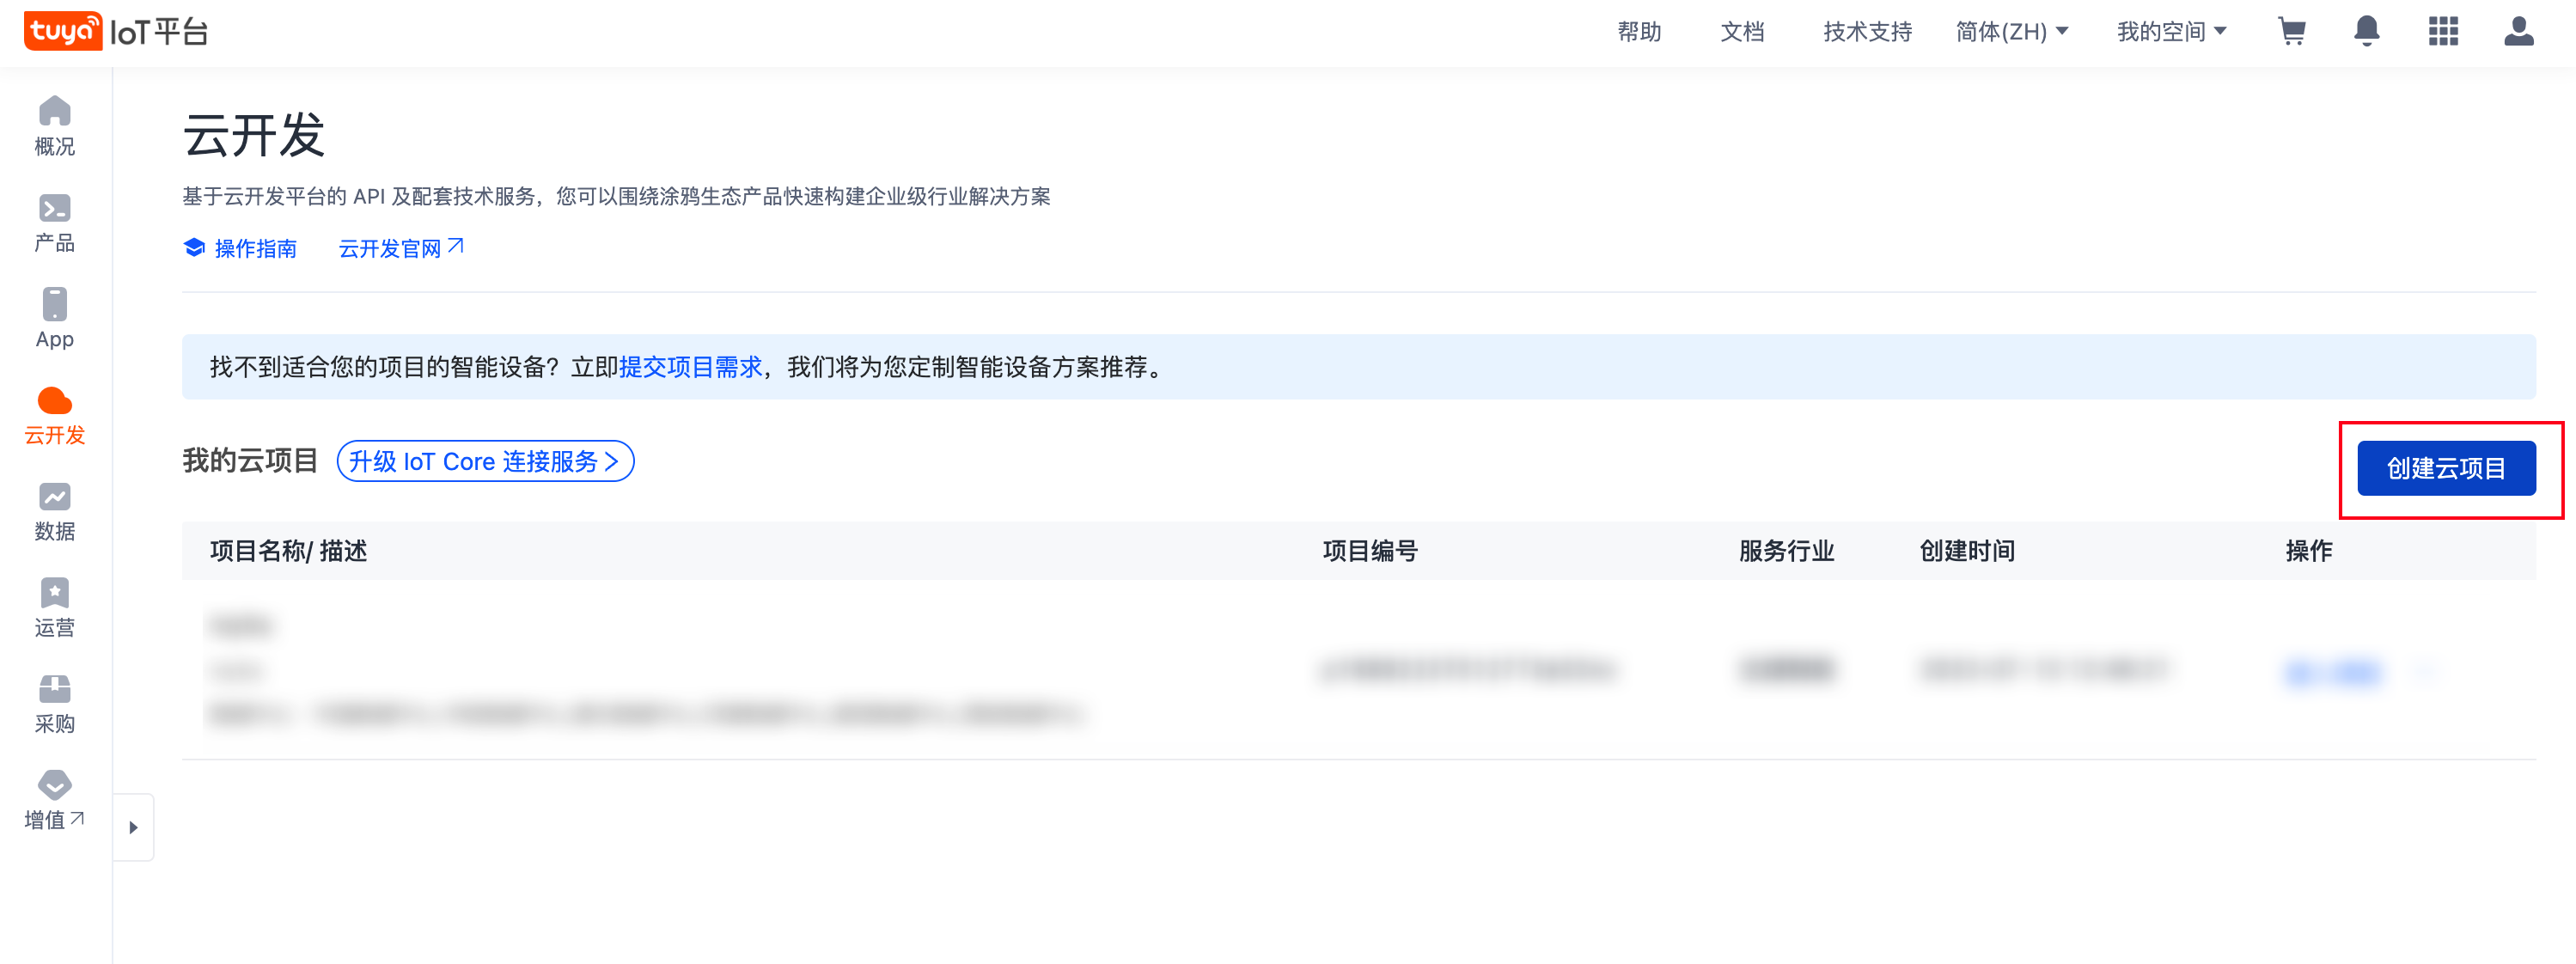
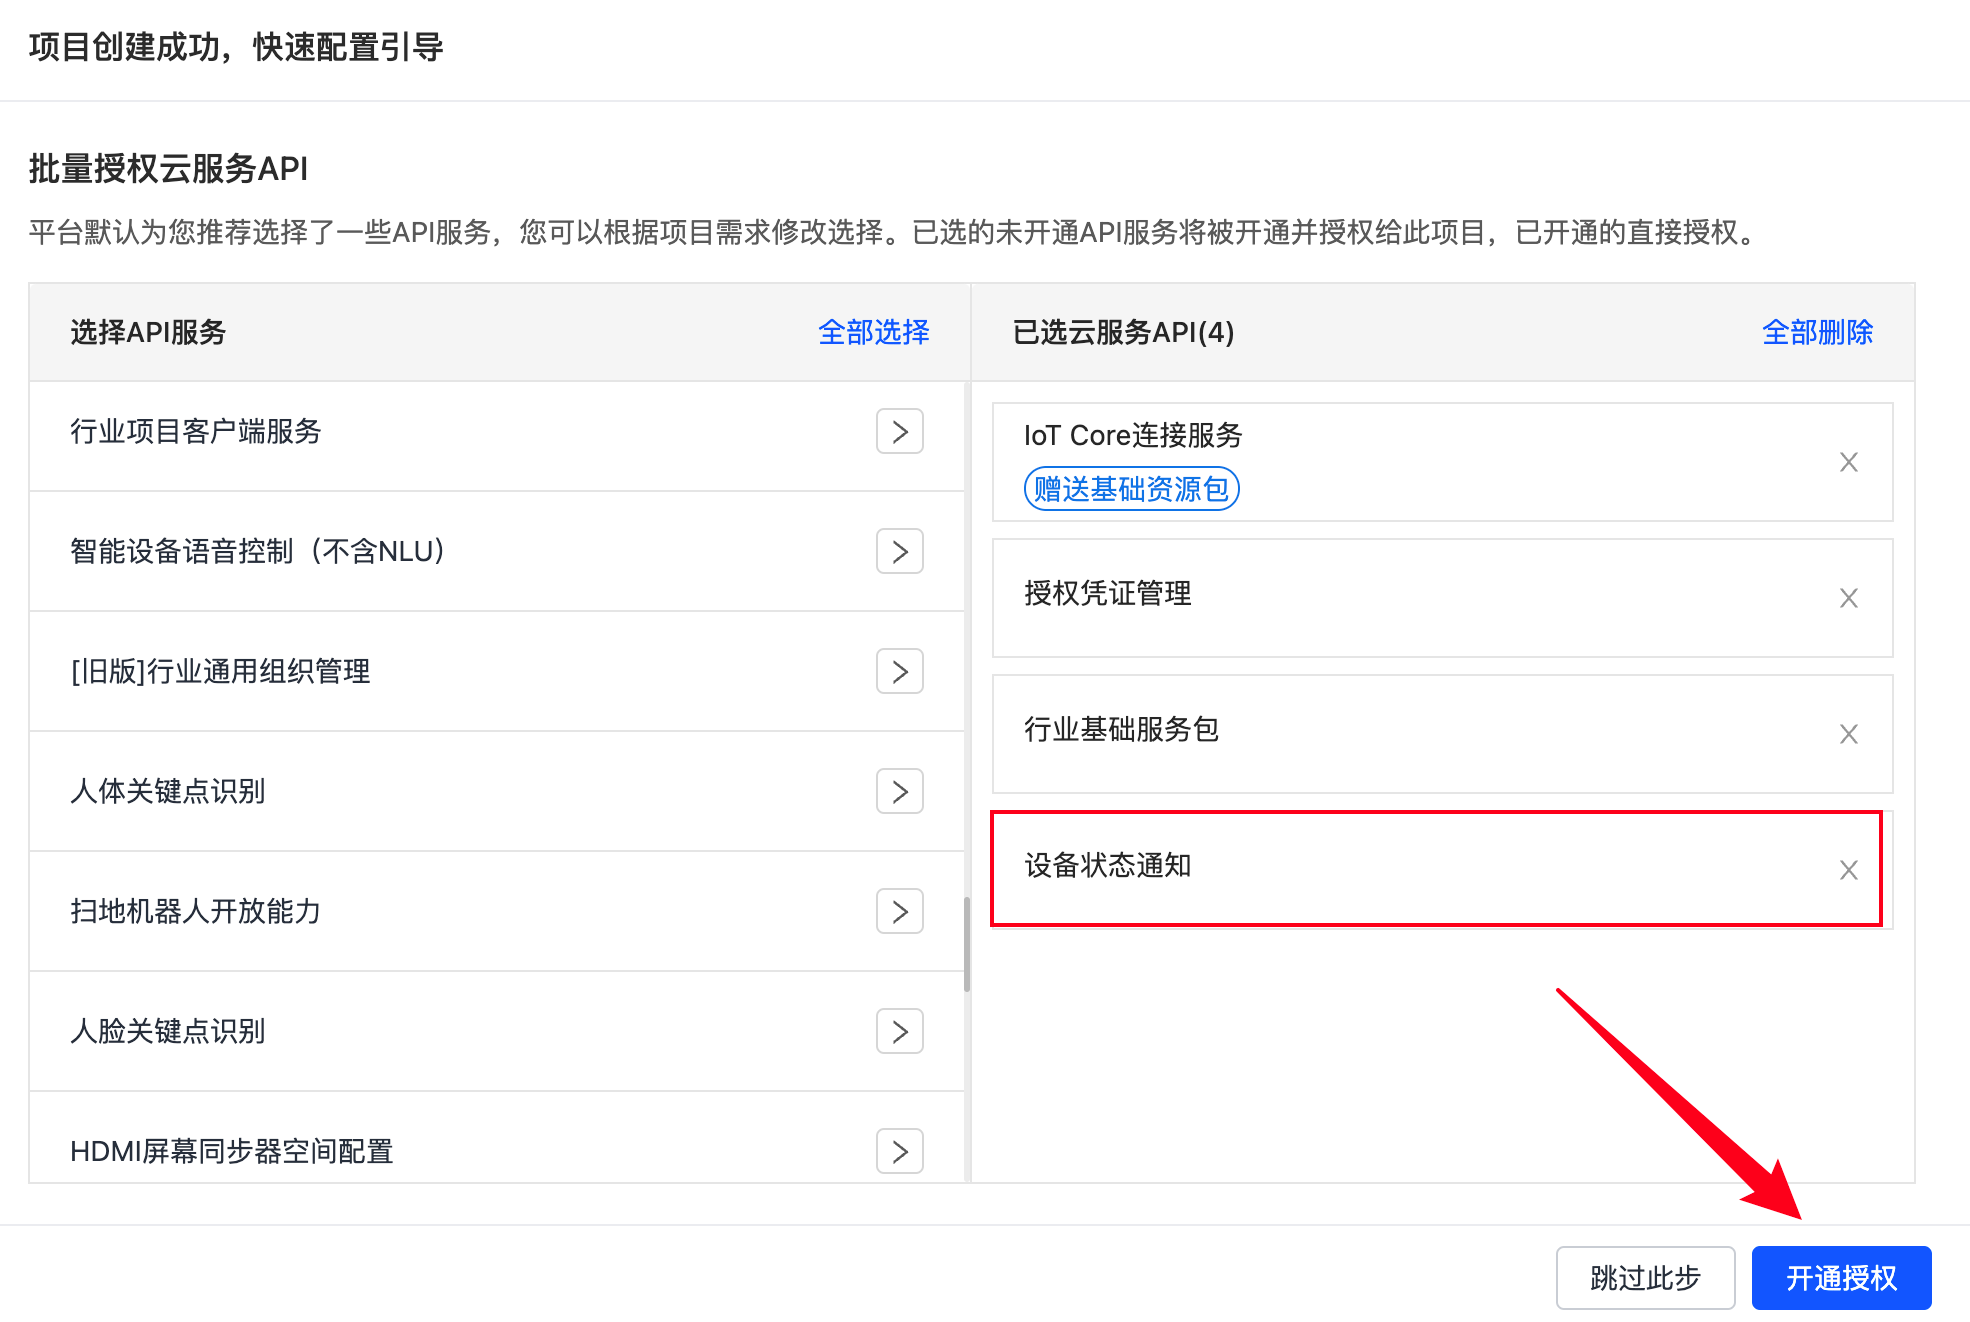
选择云开发 -> 进入云开发 -> 创建云项目
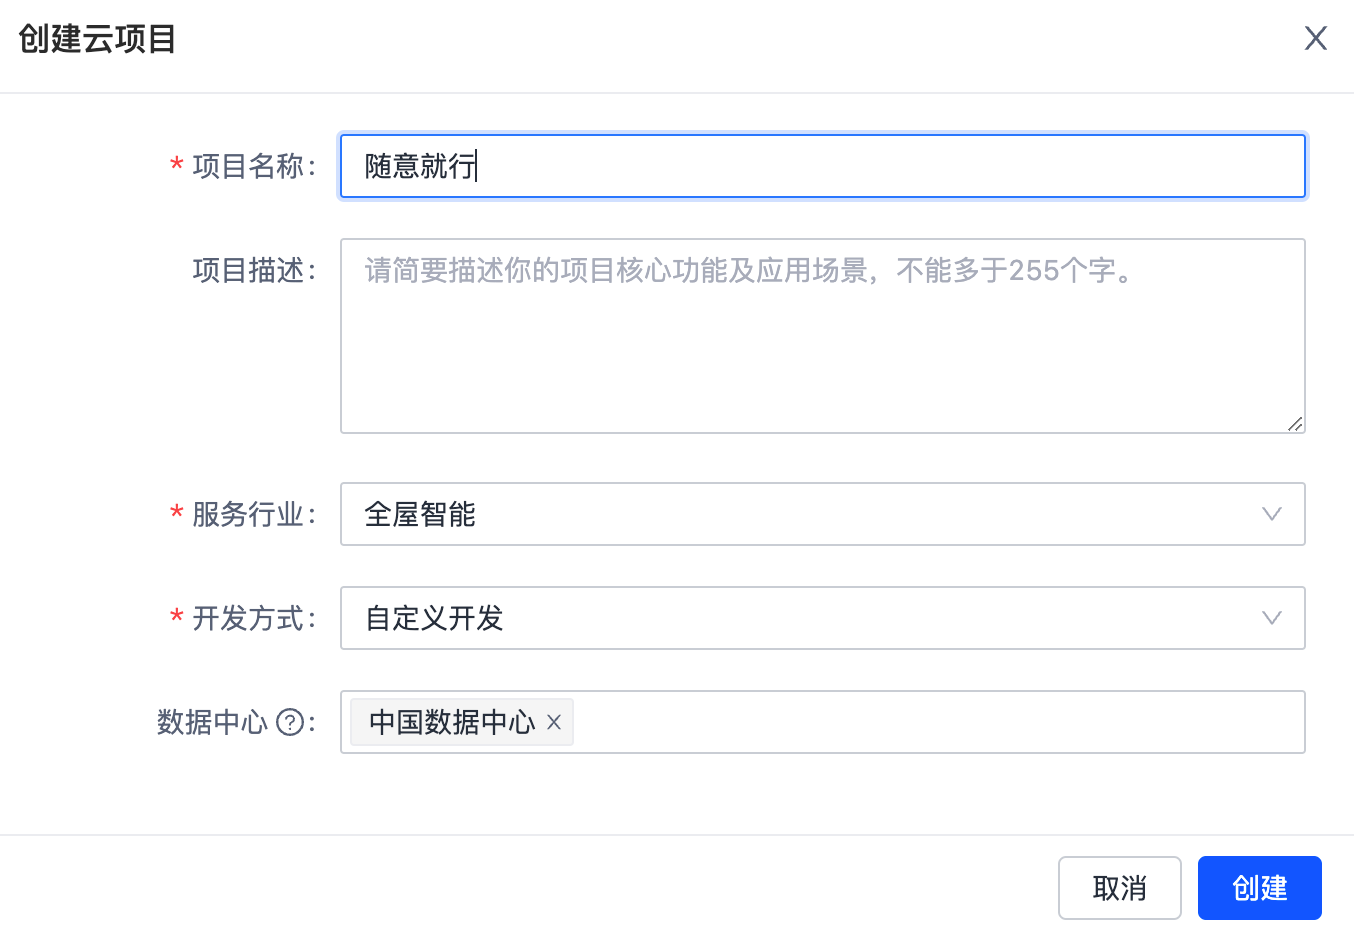
按照实际情况填写
记得加上
设备状态通知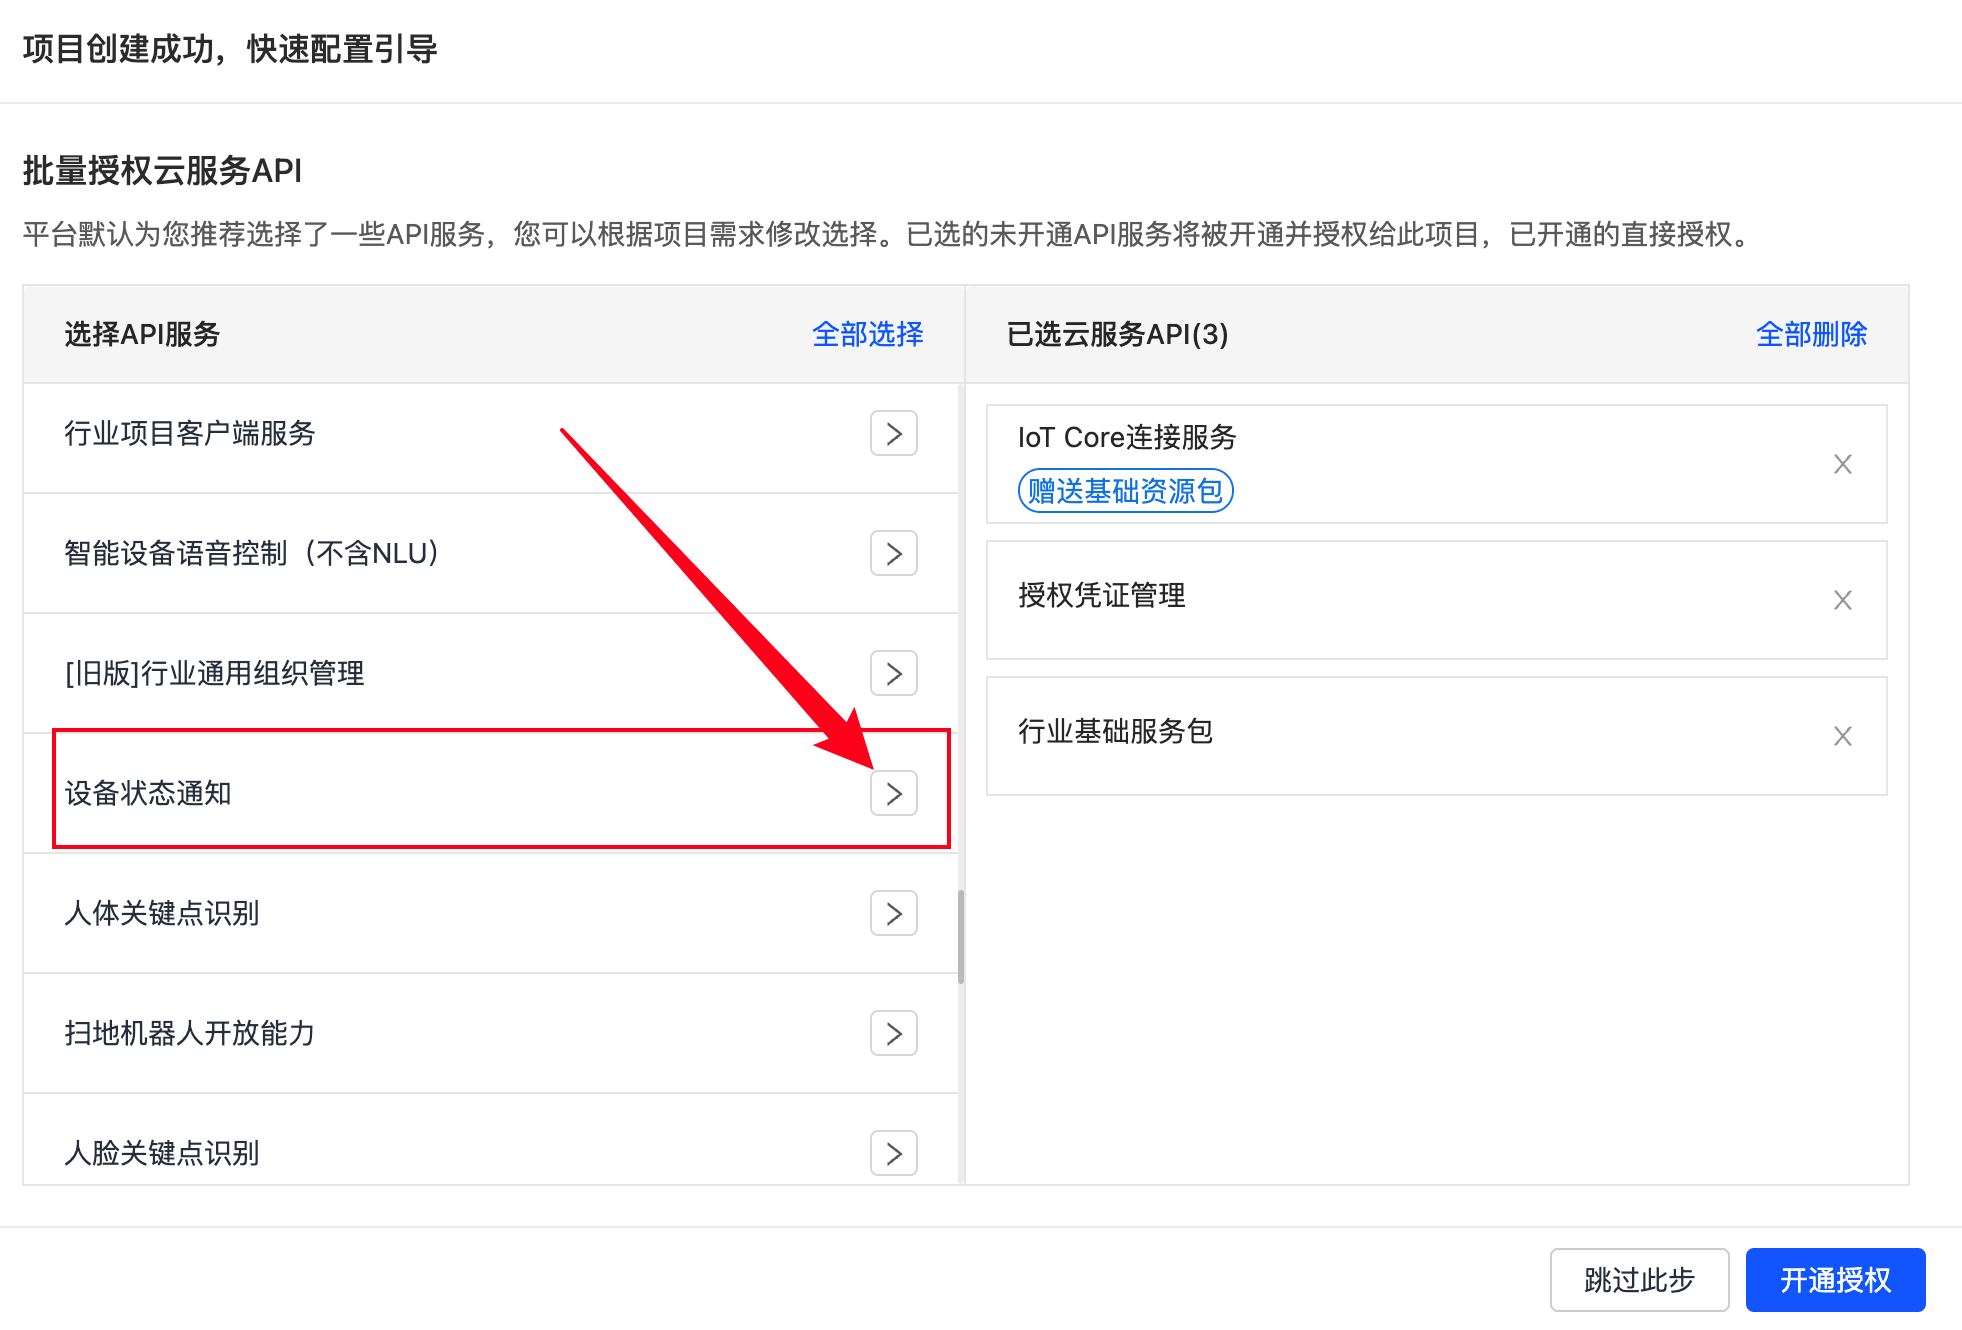
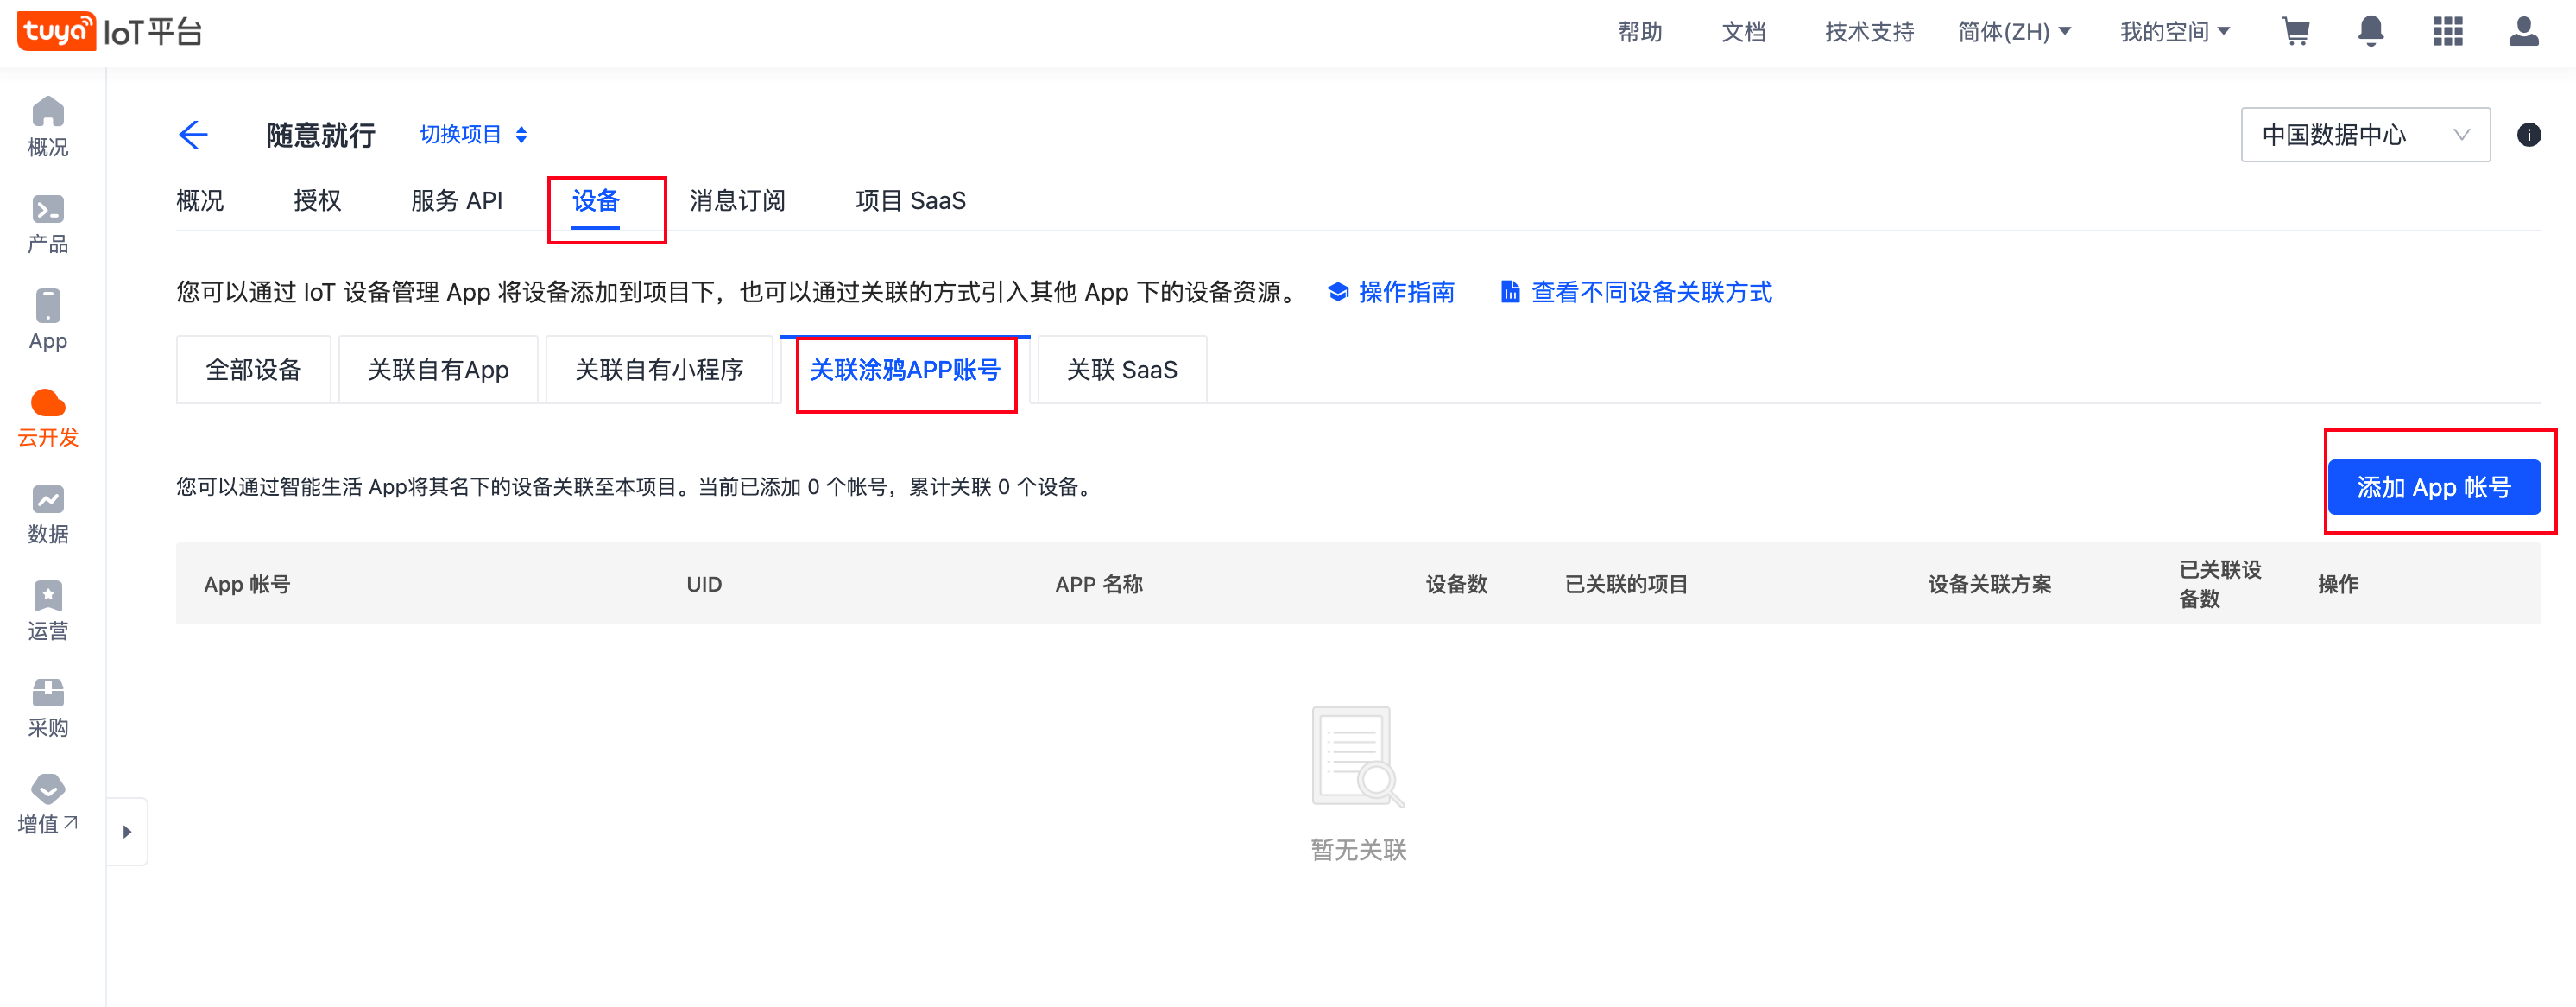
创建后进入项目,设备 -> 关联涂鸦APP账号 -> 添加 App 账号

绑定后可以在该账号管理下,关联你账号下的设备
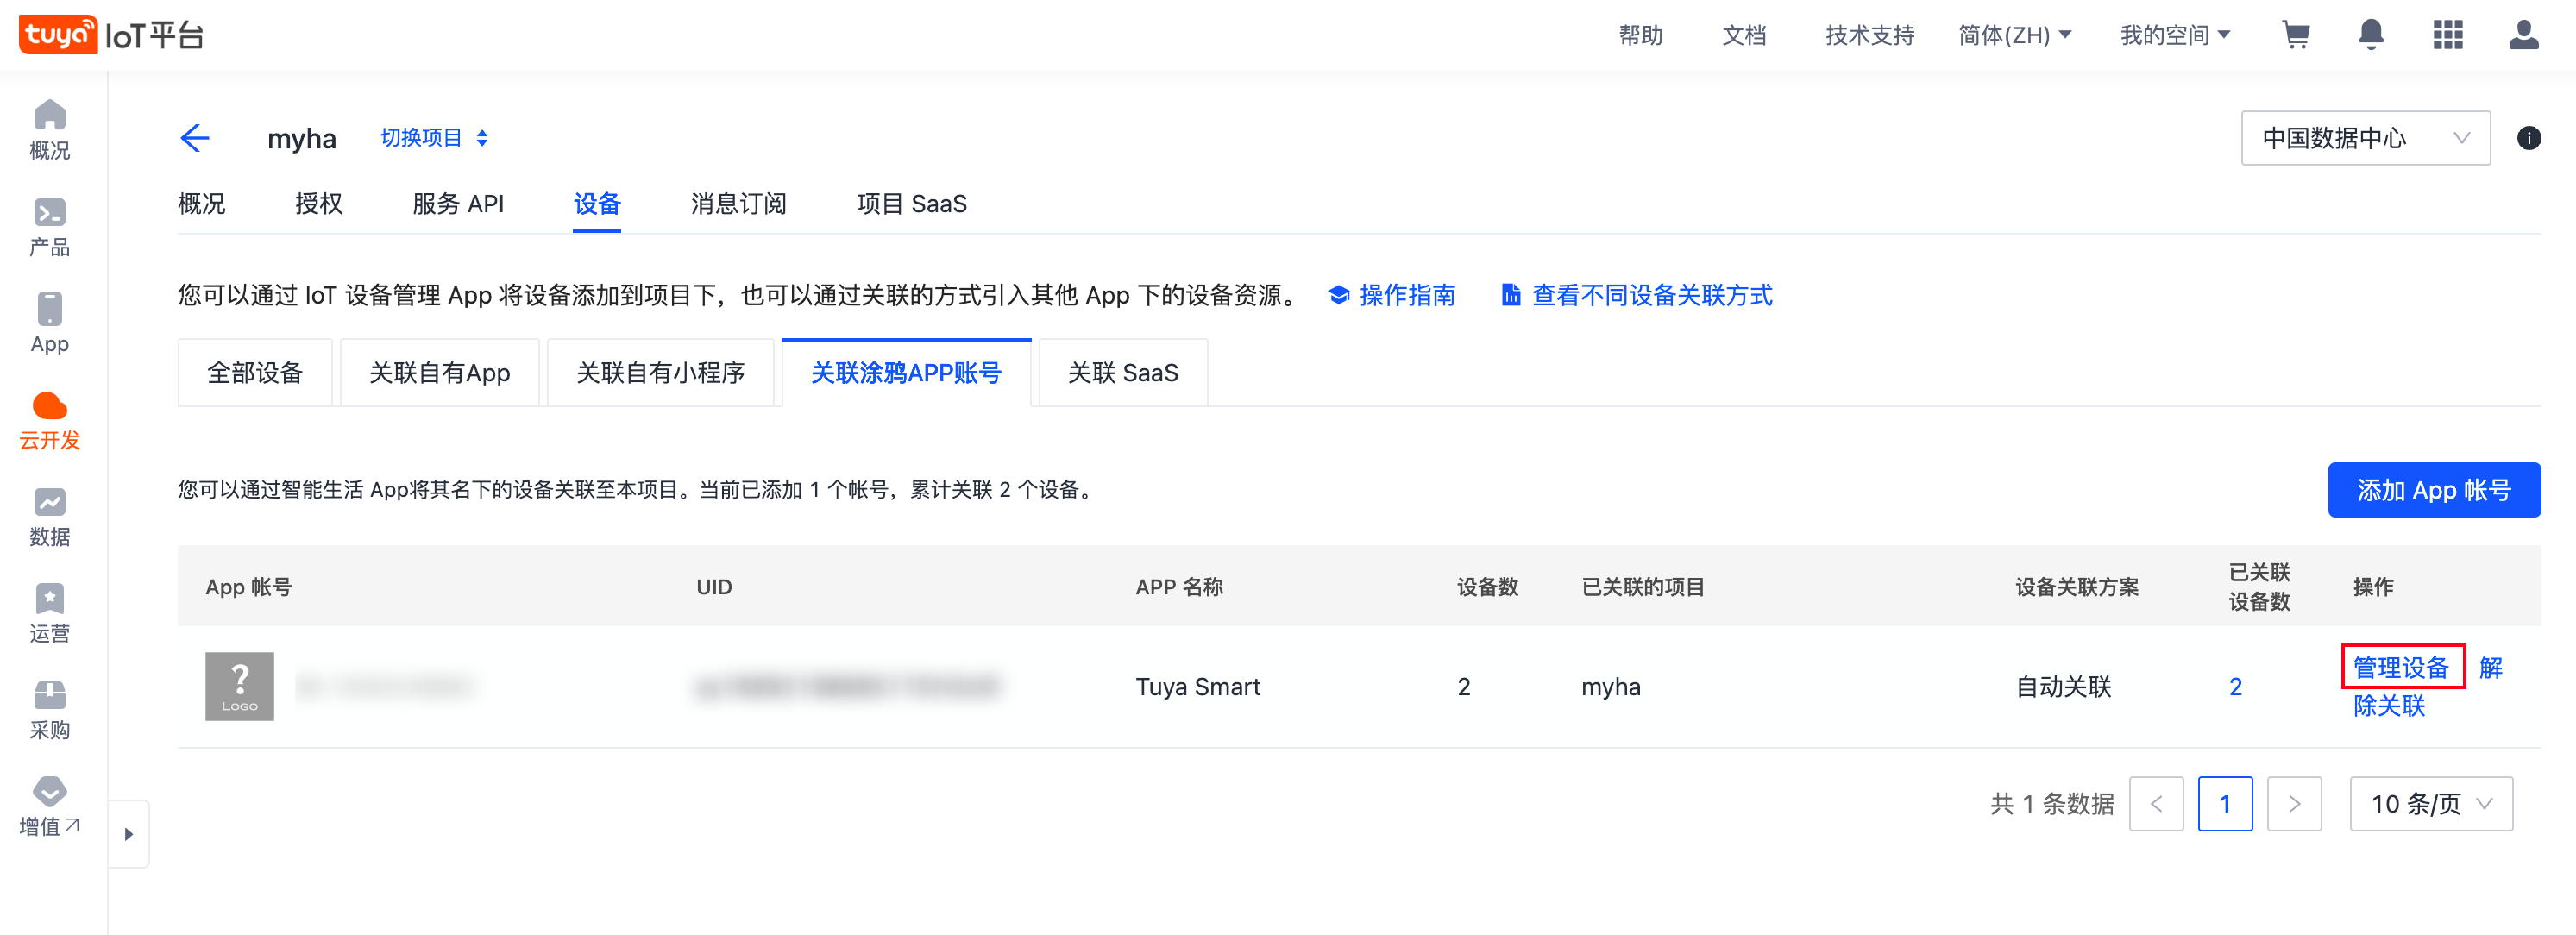
添加需要的设备即可
添加集成 LocalTuya intergration
- 按图添加所有参数(图内有错误,UID 应该填入 User ID)
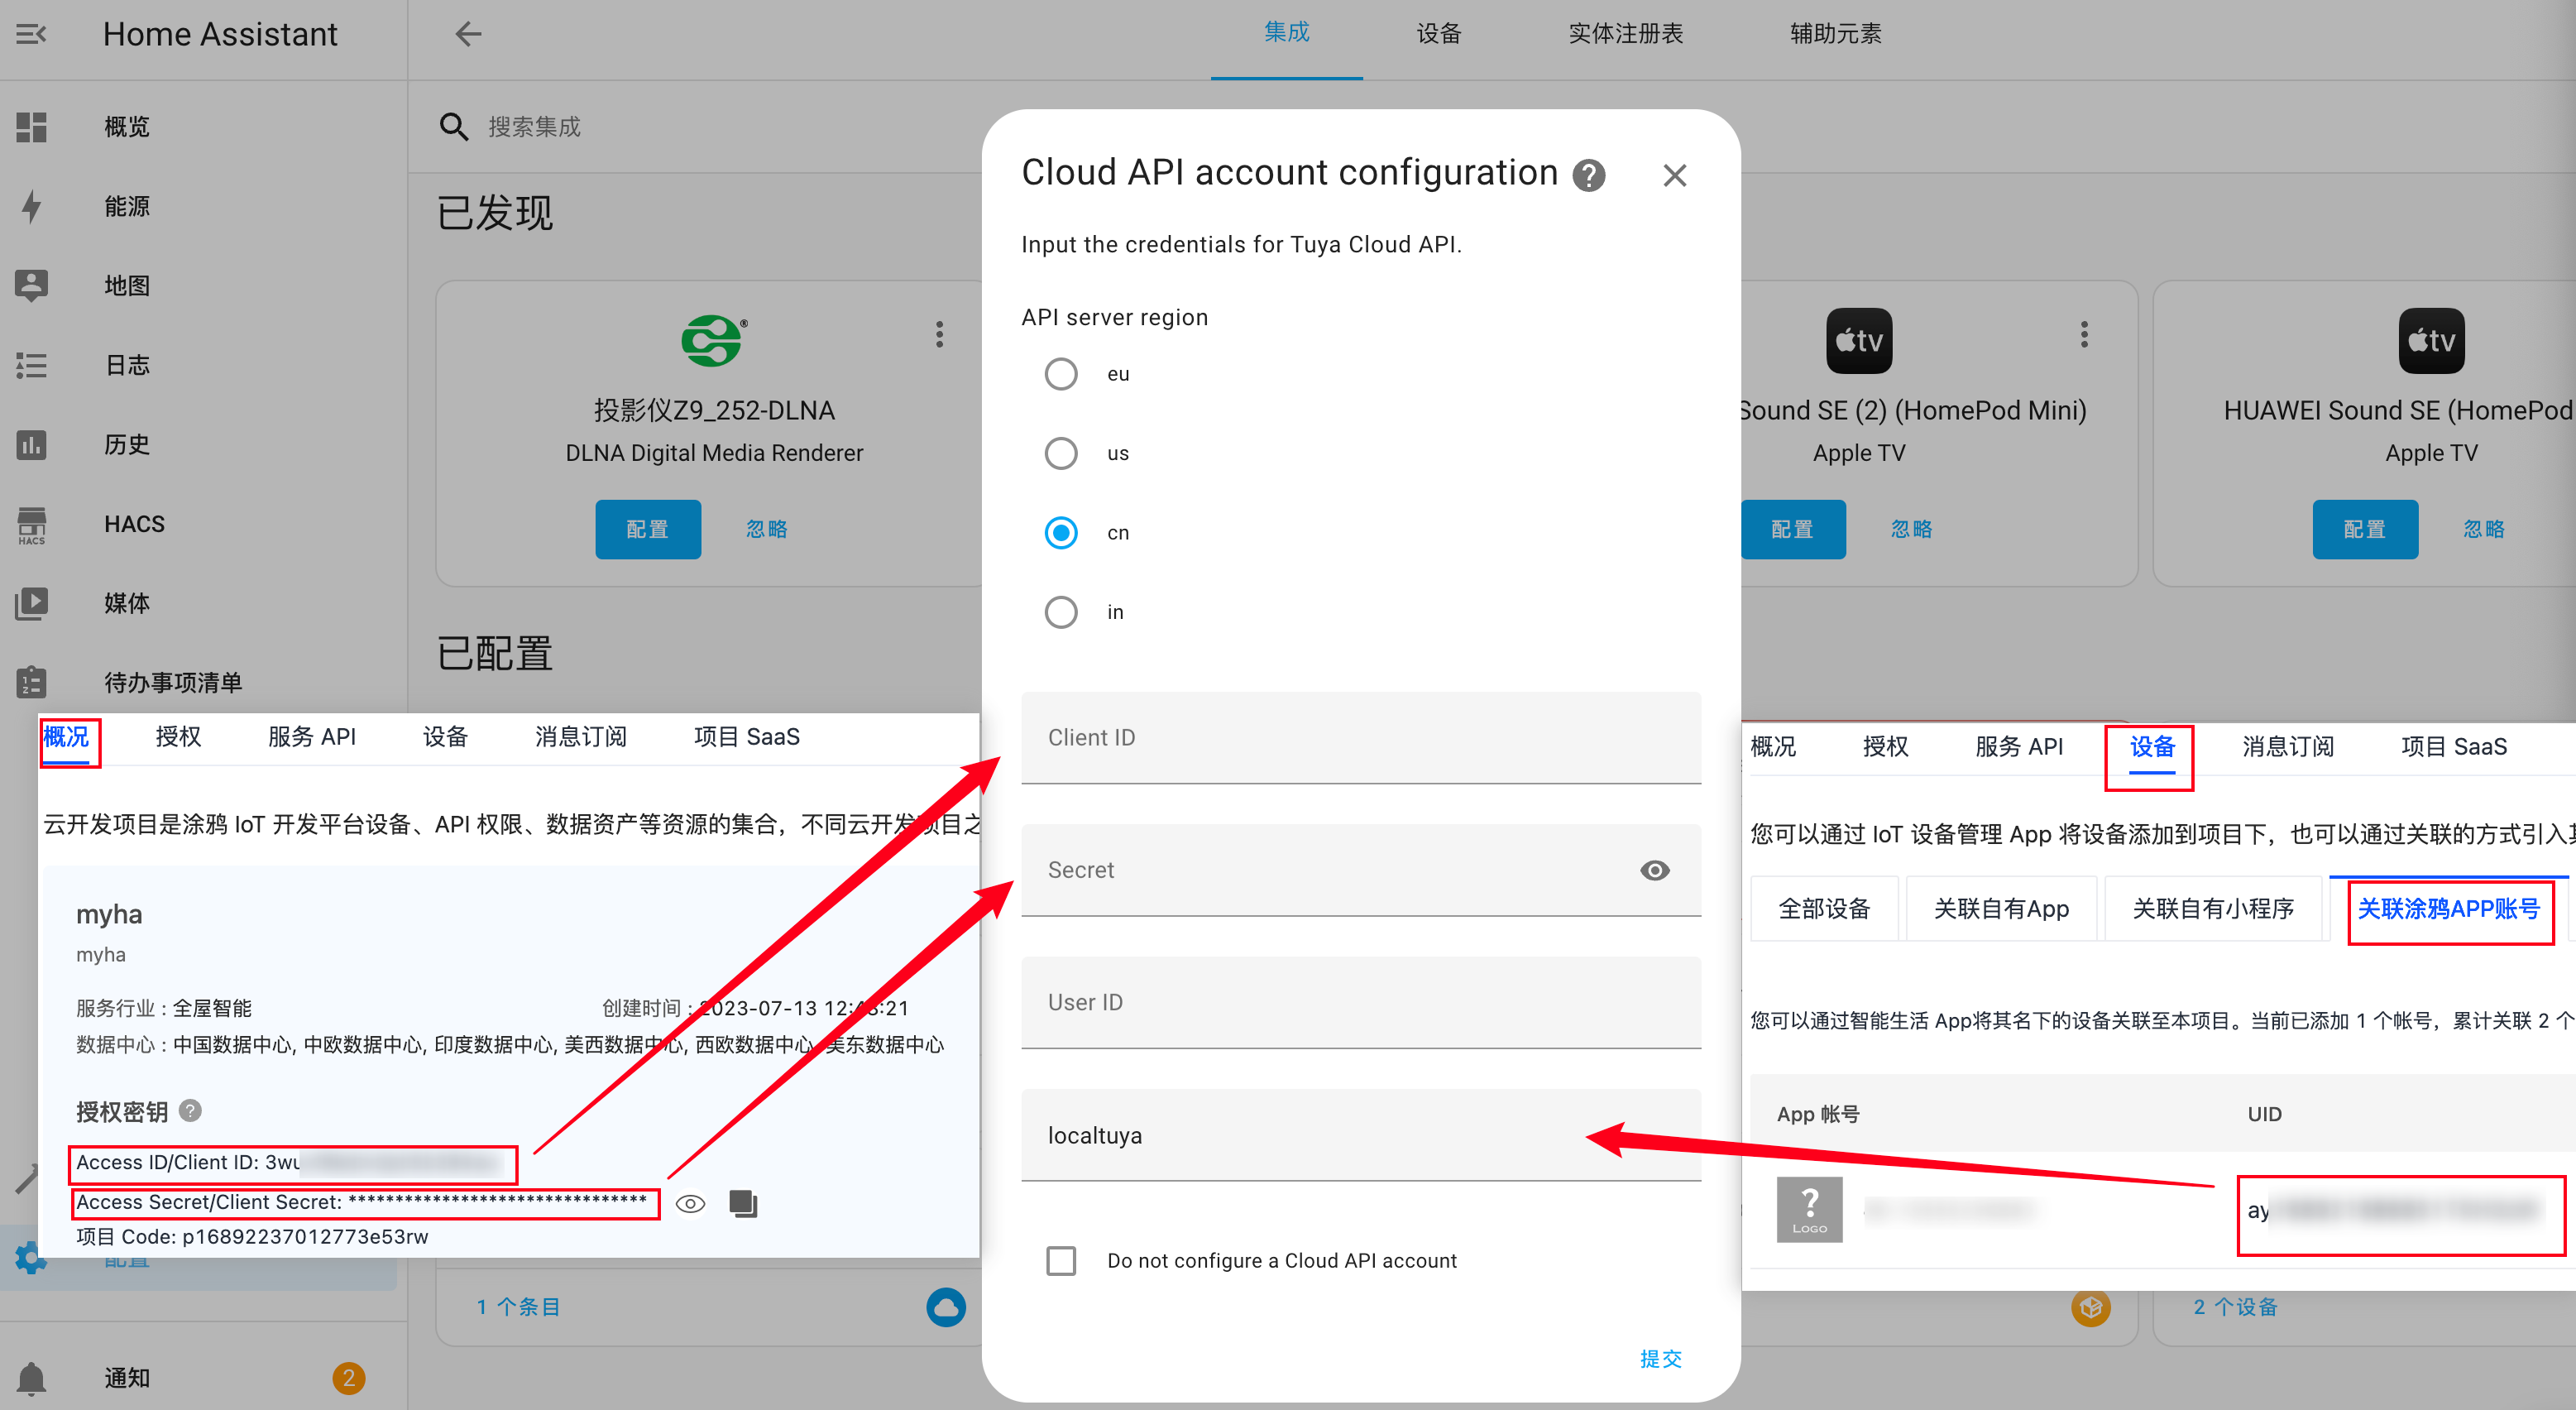
- 在添加的集成中选择
Add a new device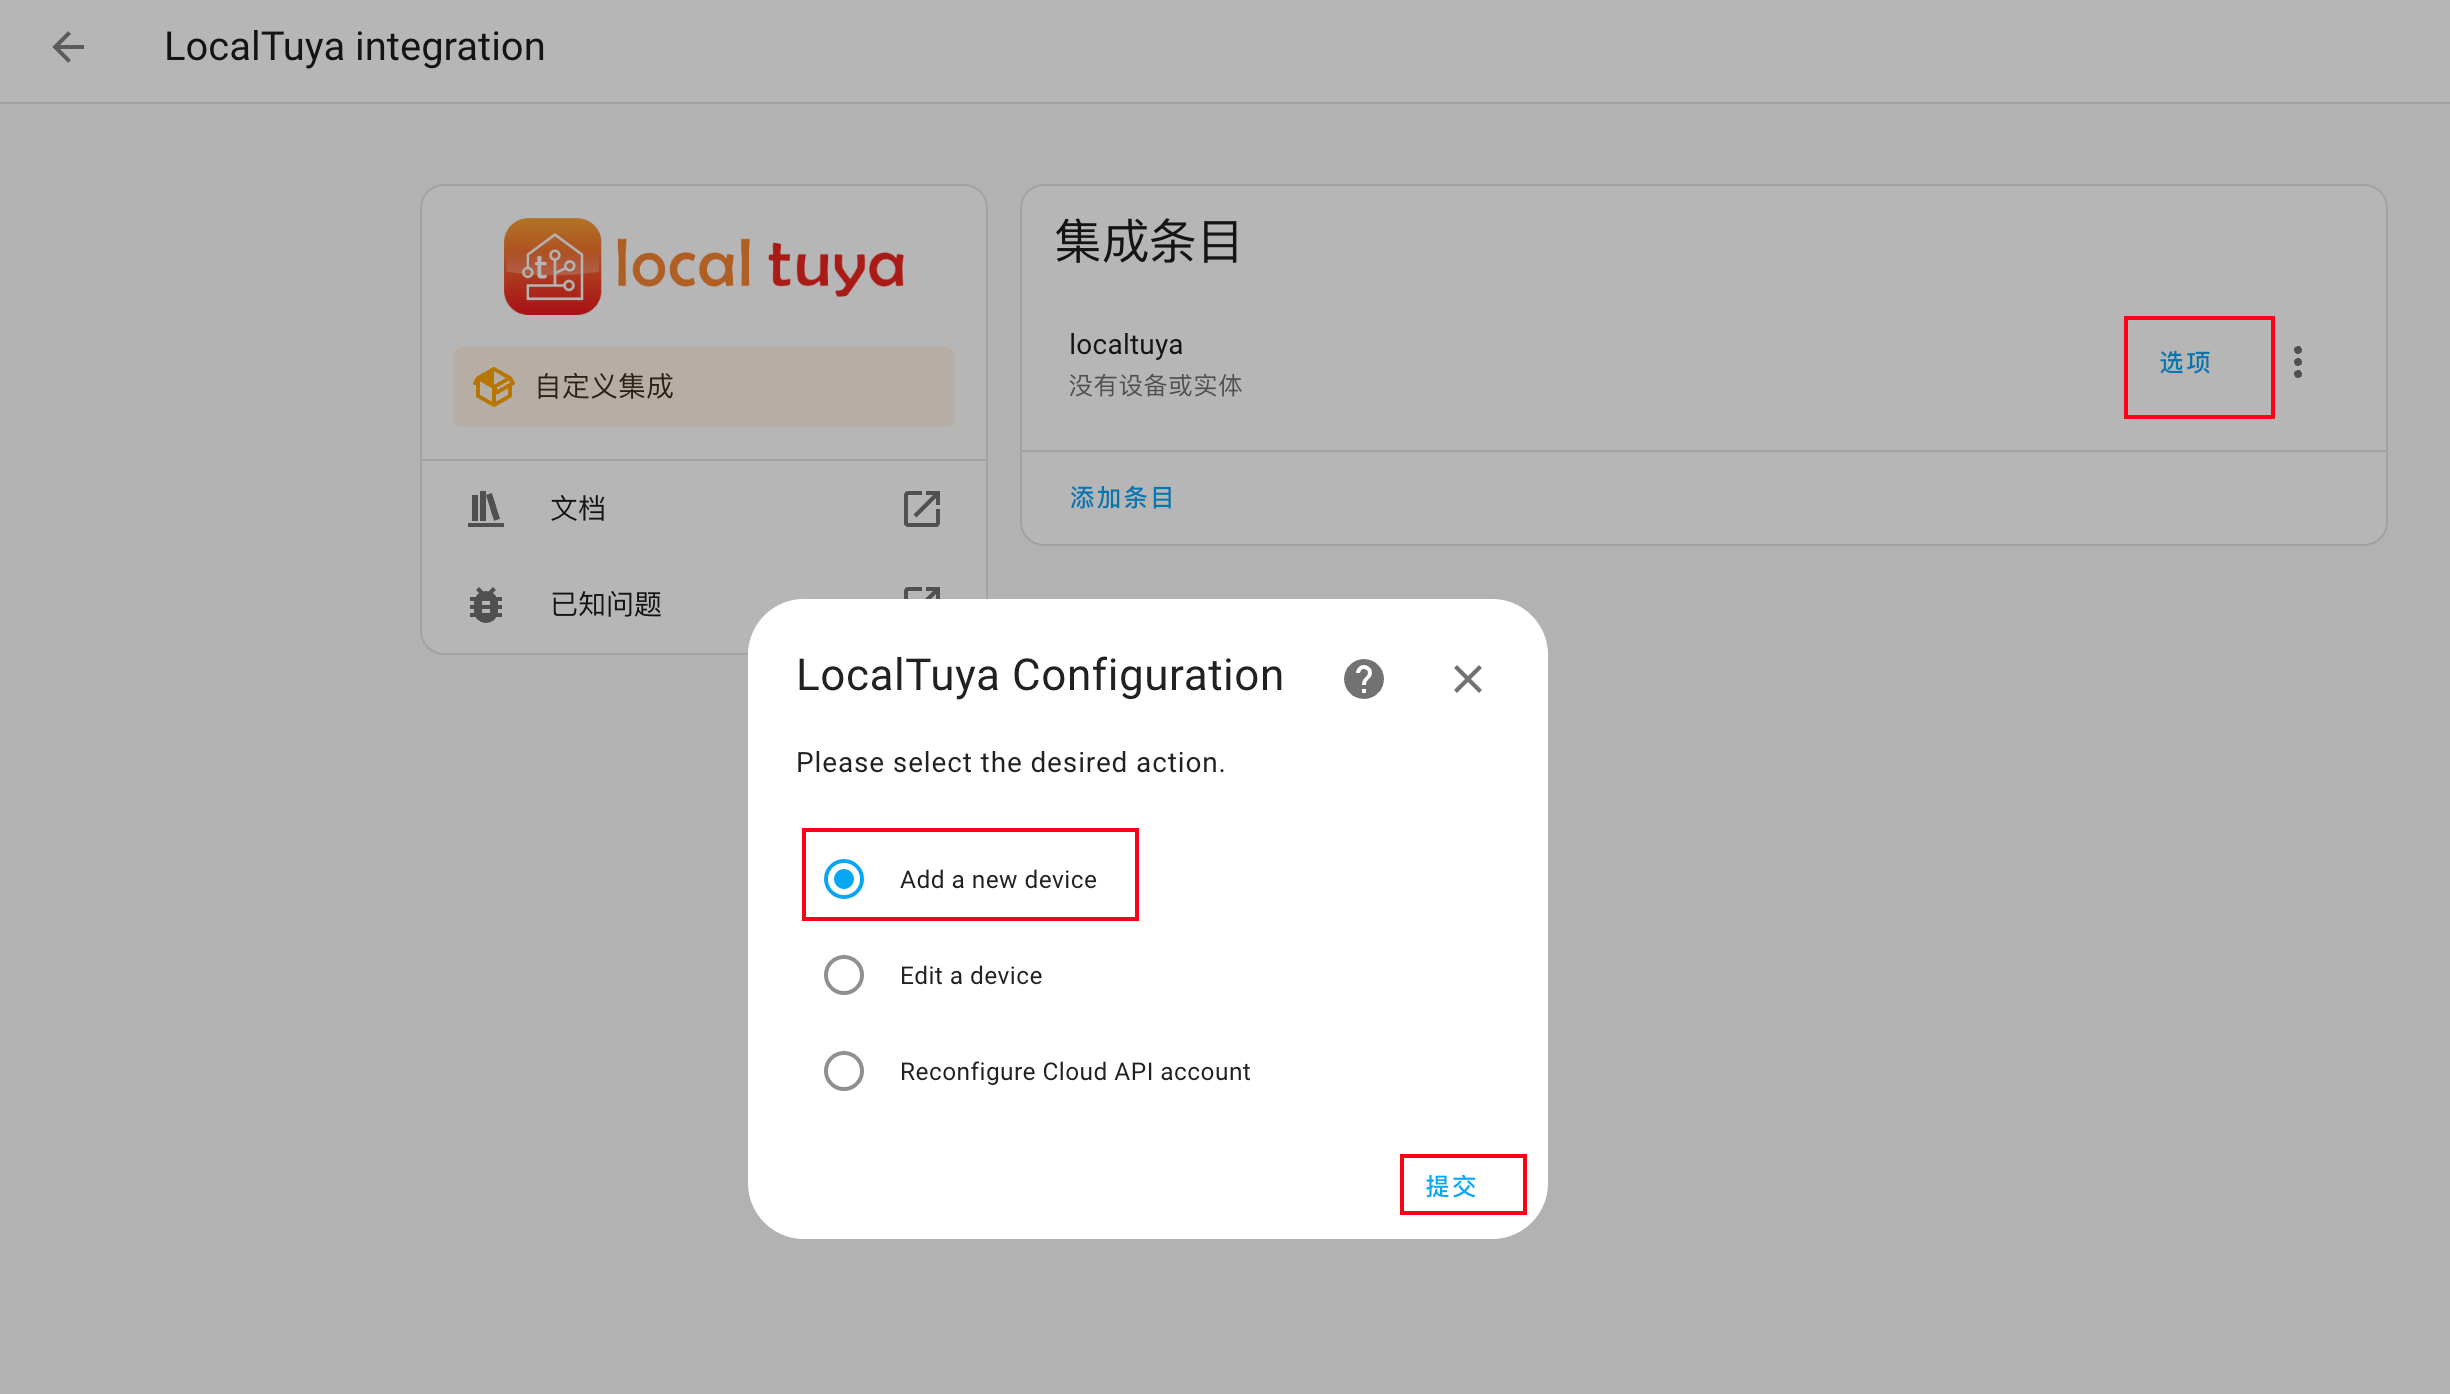
- 按需选择提交(一般默认就行)
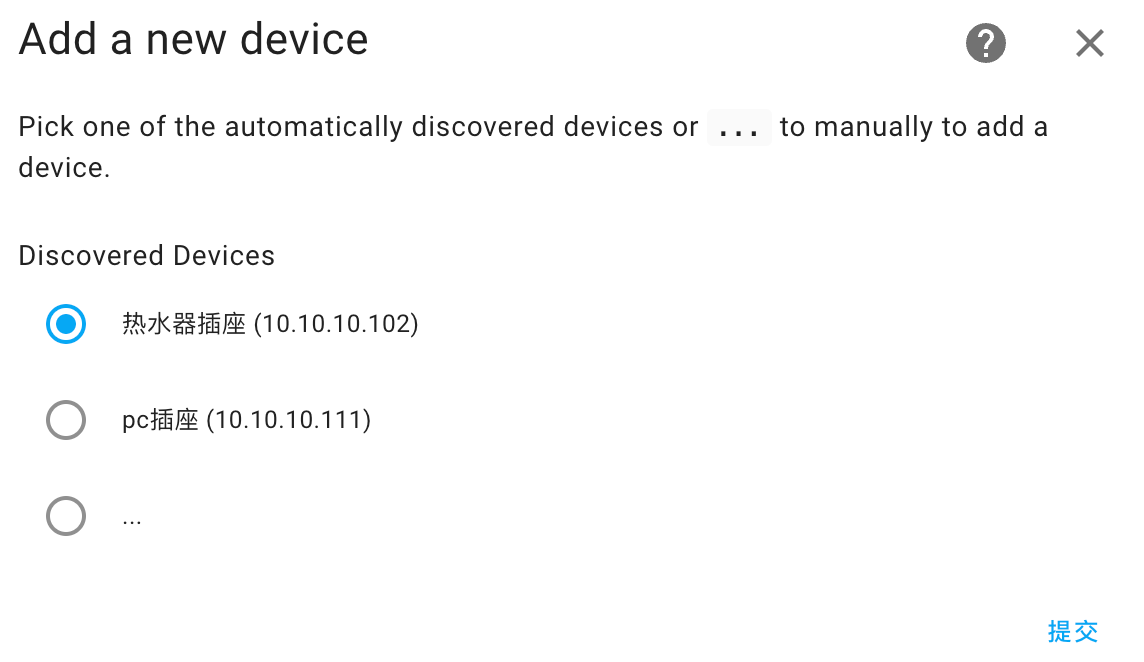
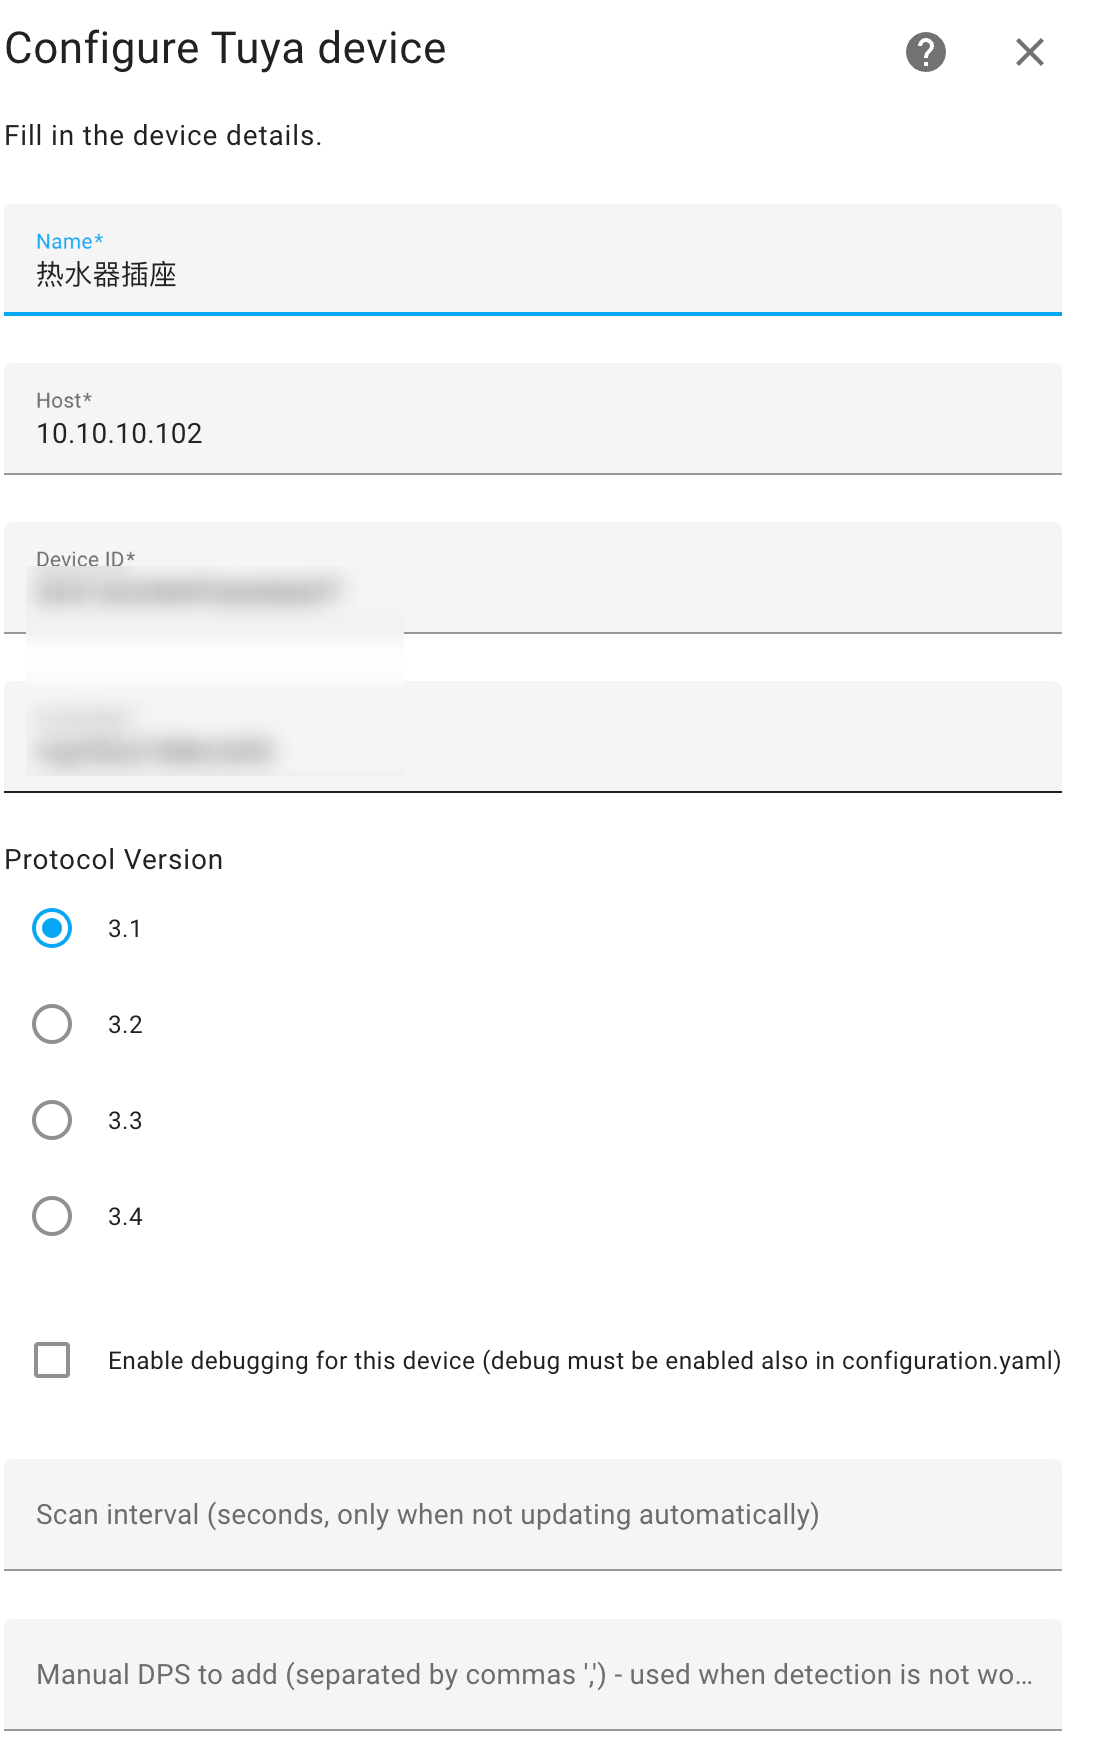
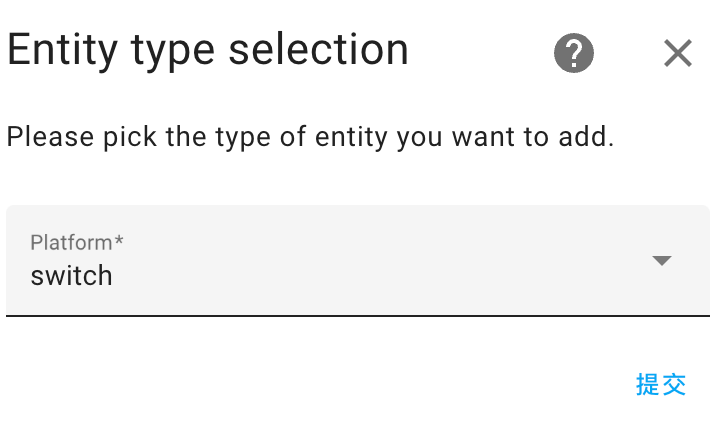
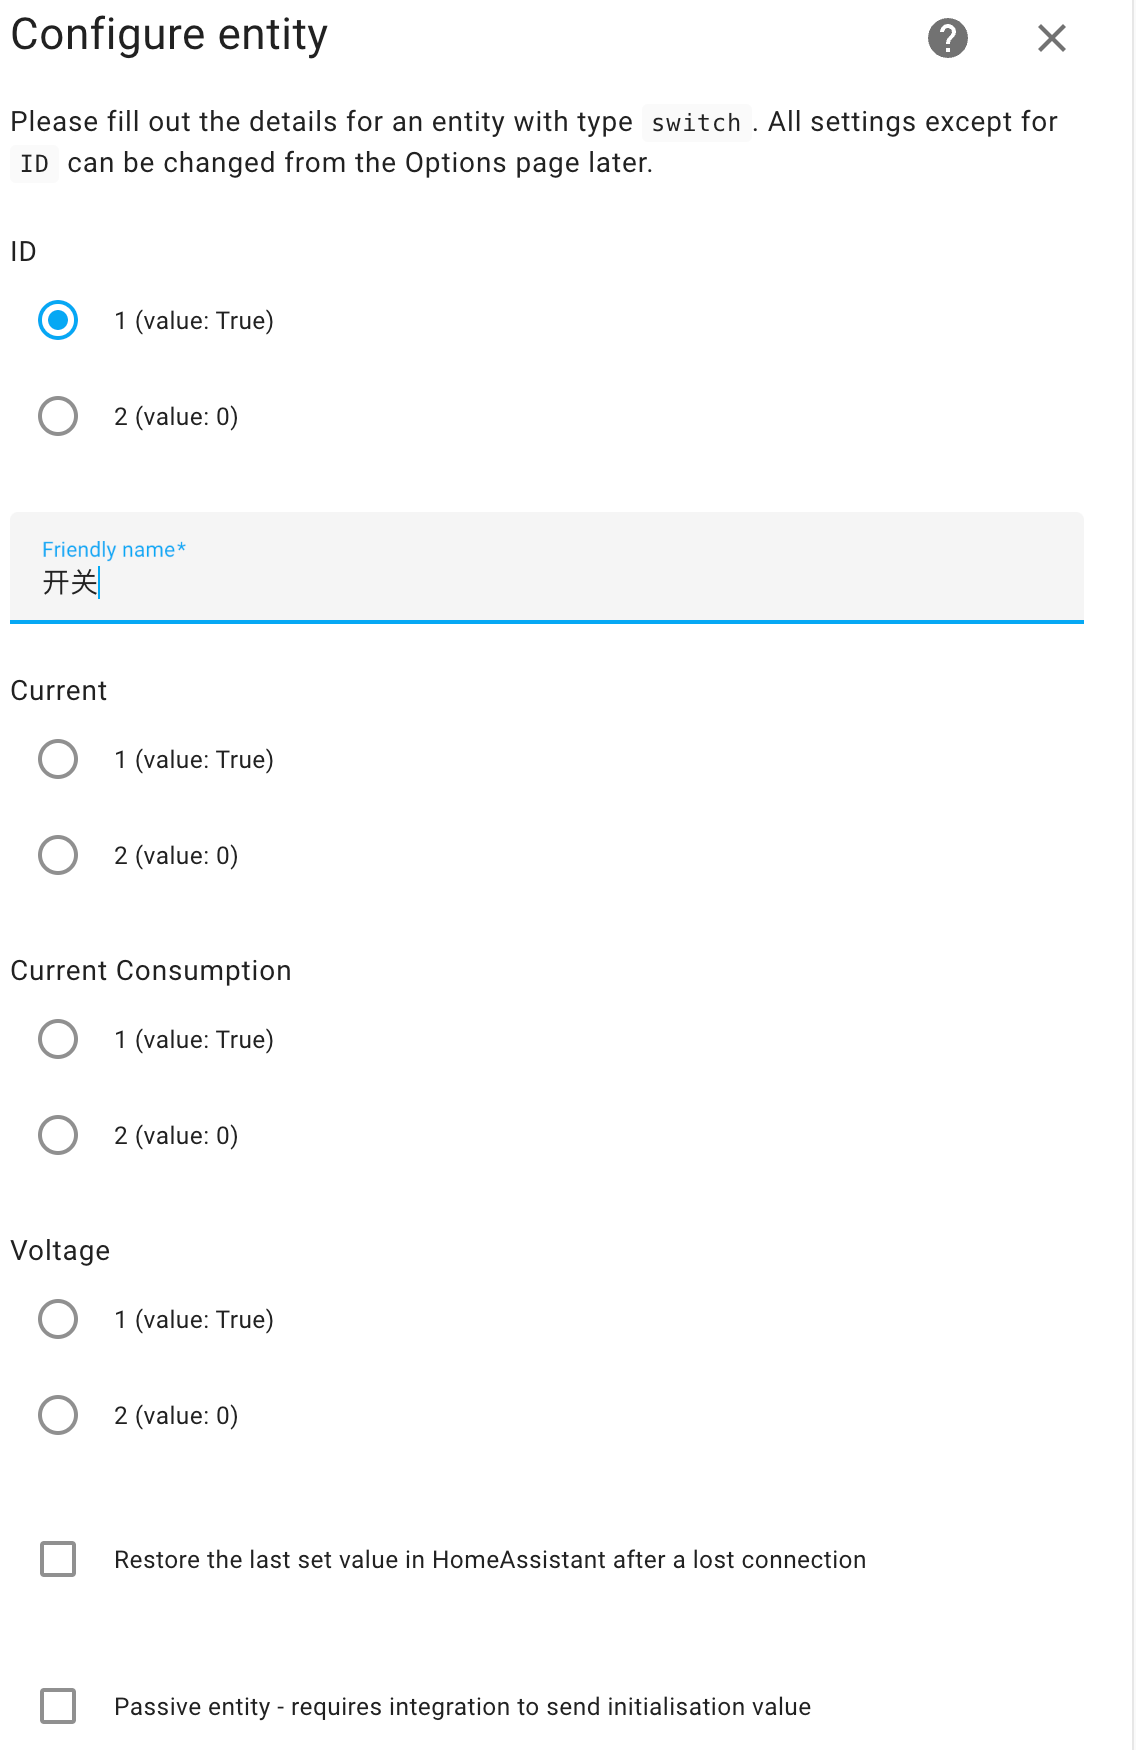
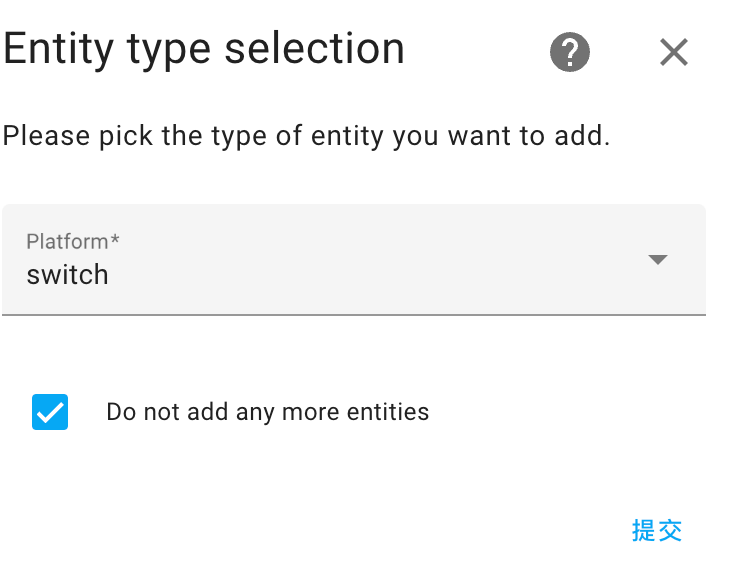
添加设备
- 上面添加集成的时候给了个添加插座的例子,那个插座只有开关所以很简单
- 如果开关带计量的话,得花点功夫,下面给个示范
添加设备
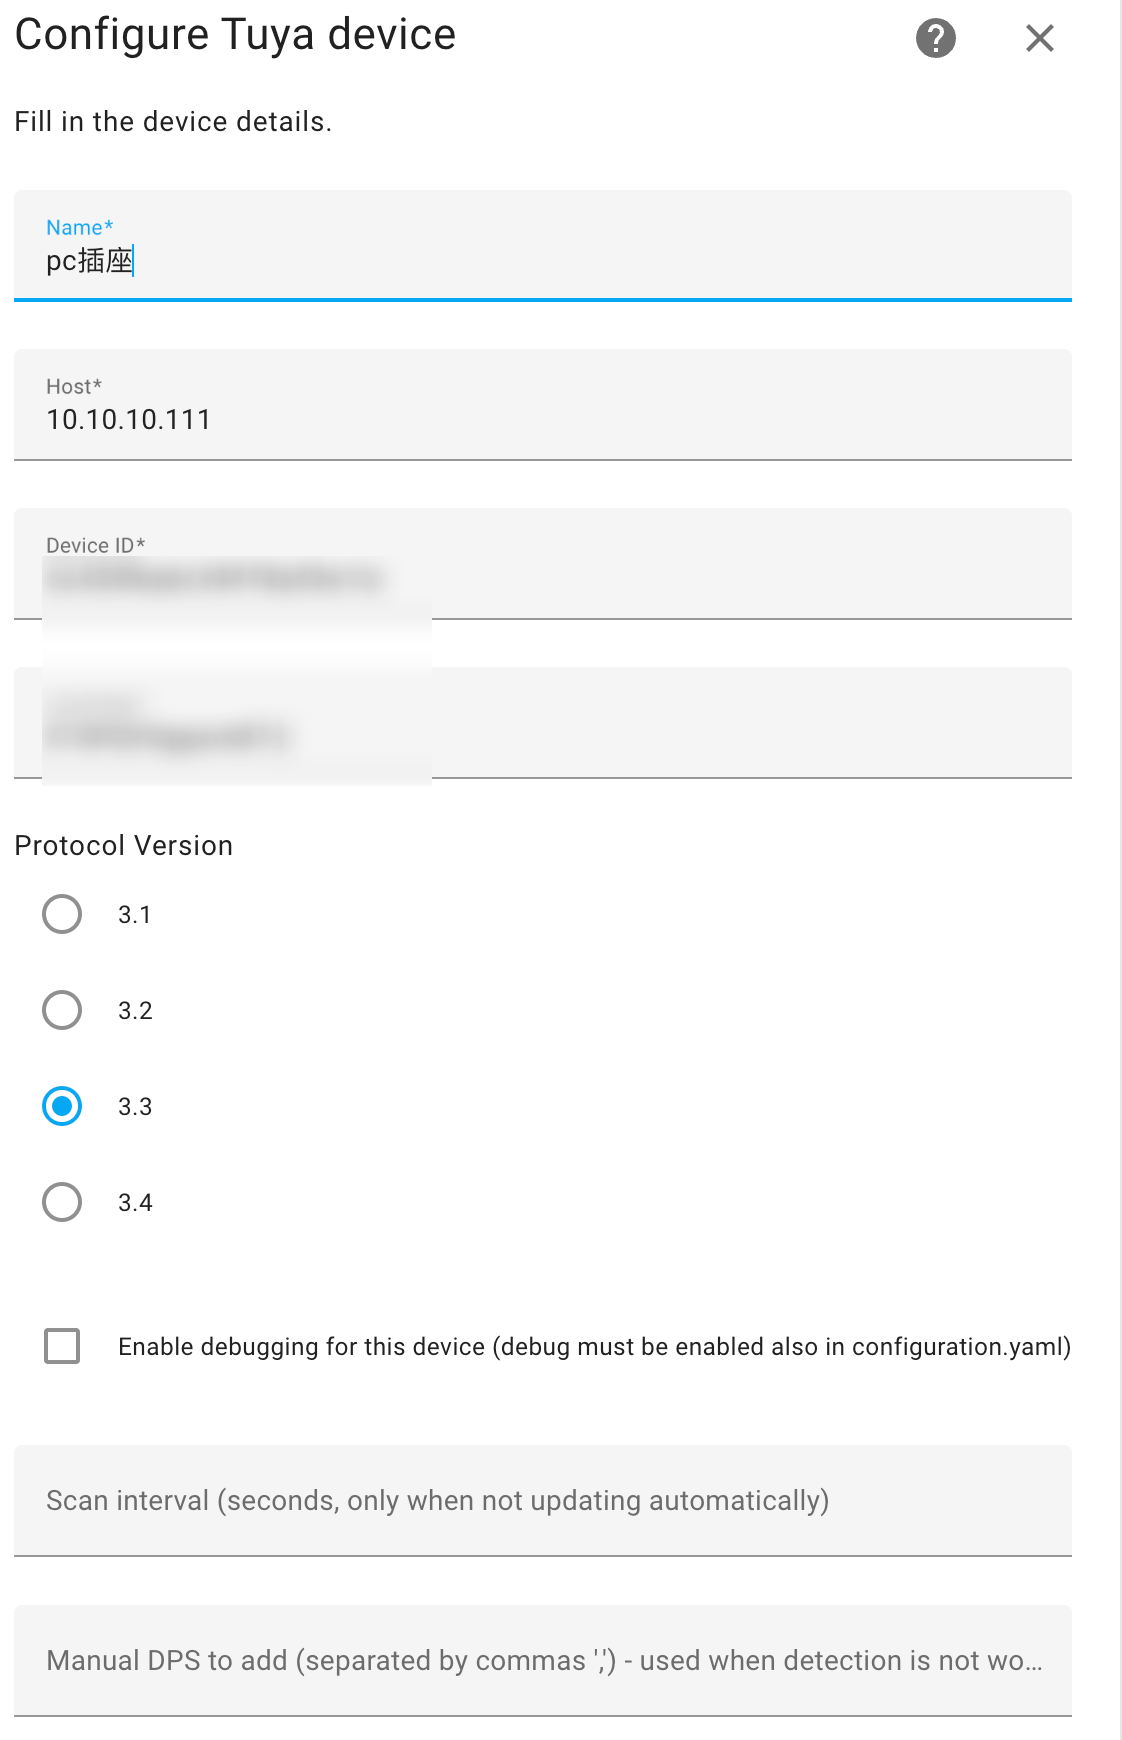
添加开关
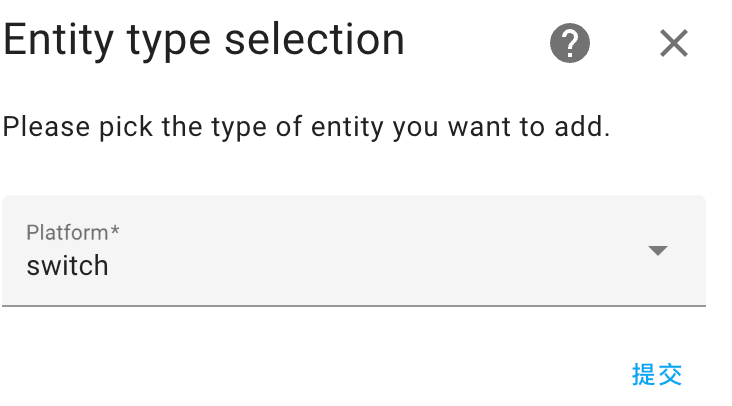
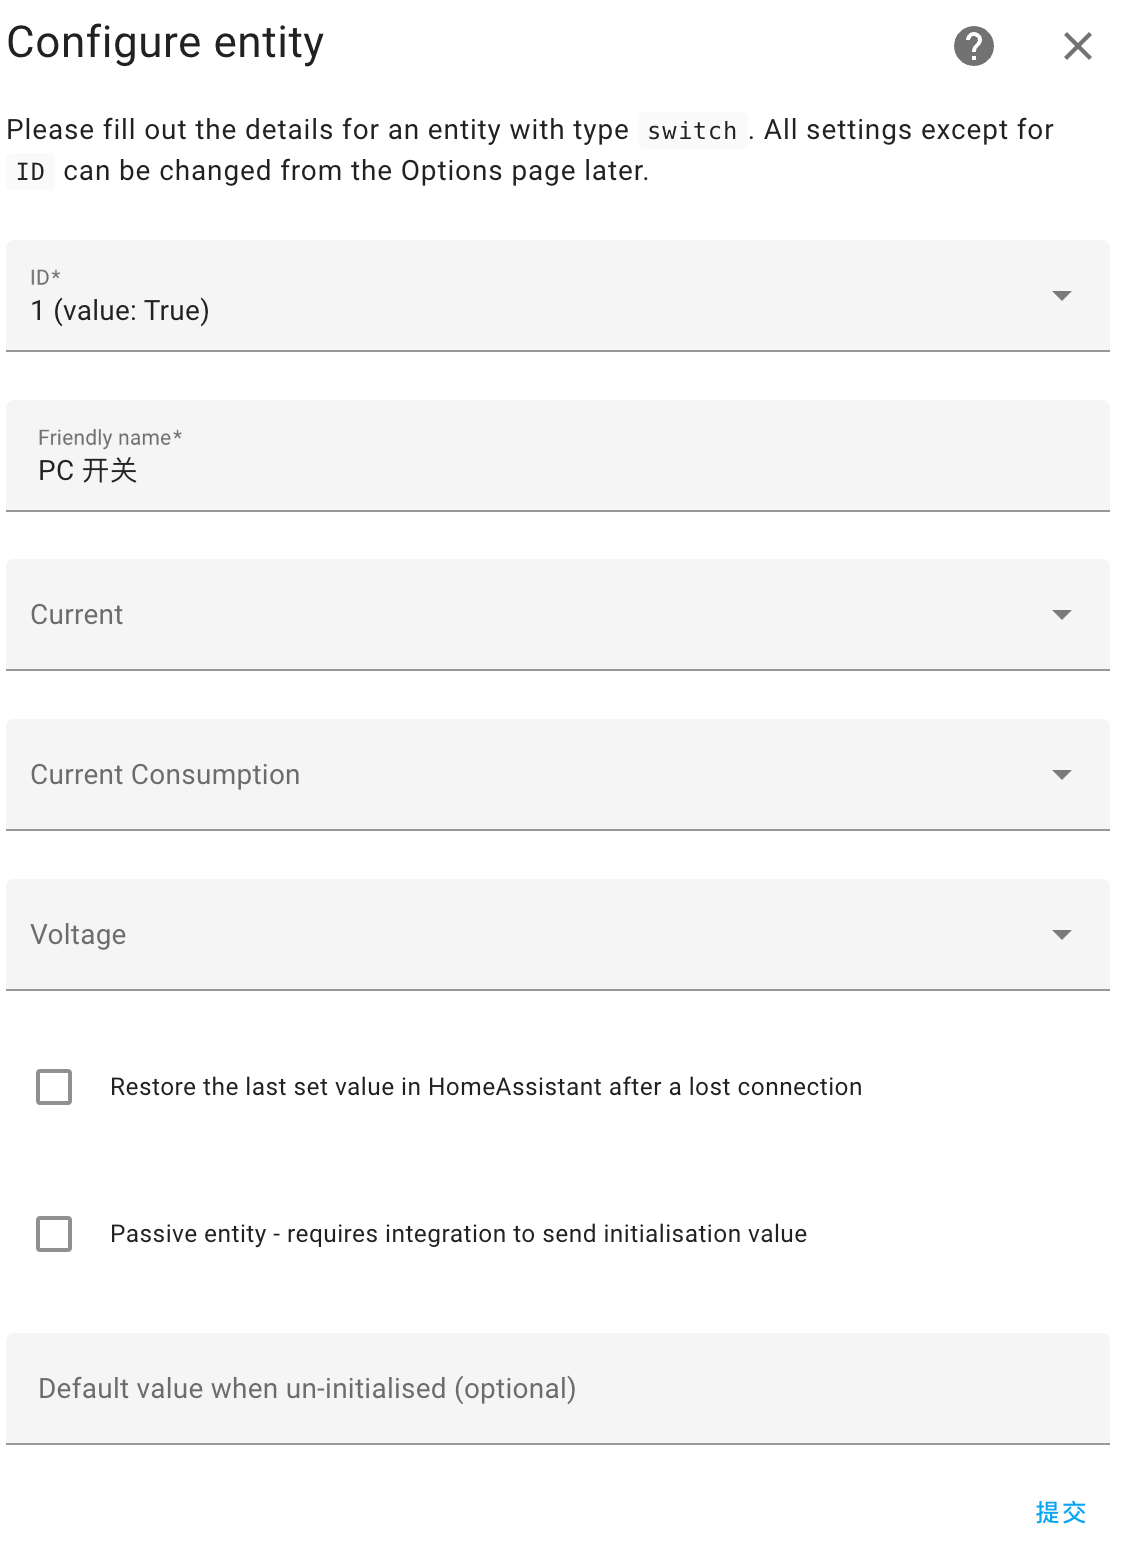
添加传感器
须注意以下几点:
- 可以参考 App 里的值比对 ID 的 value 确定 ID 具体为什么
Scaling Factor是缩放比例,这里我在 App 看到的数值为221.5,在 HASS 看到 ID 的为2215,那缩放比例就是 0.1- 未添加完参数勿勾选
Do not add any more entities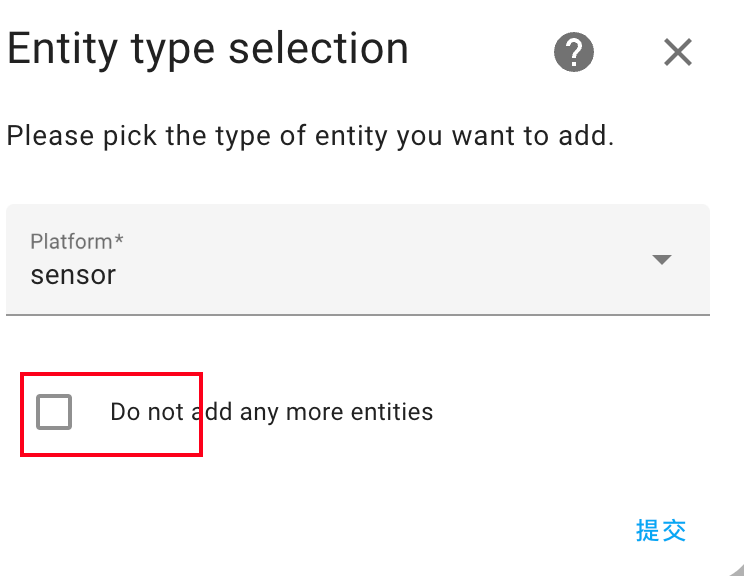
- 添加电压
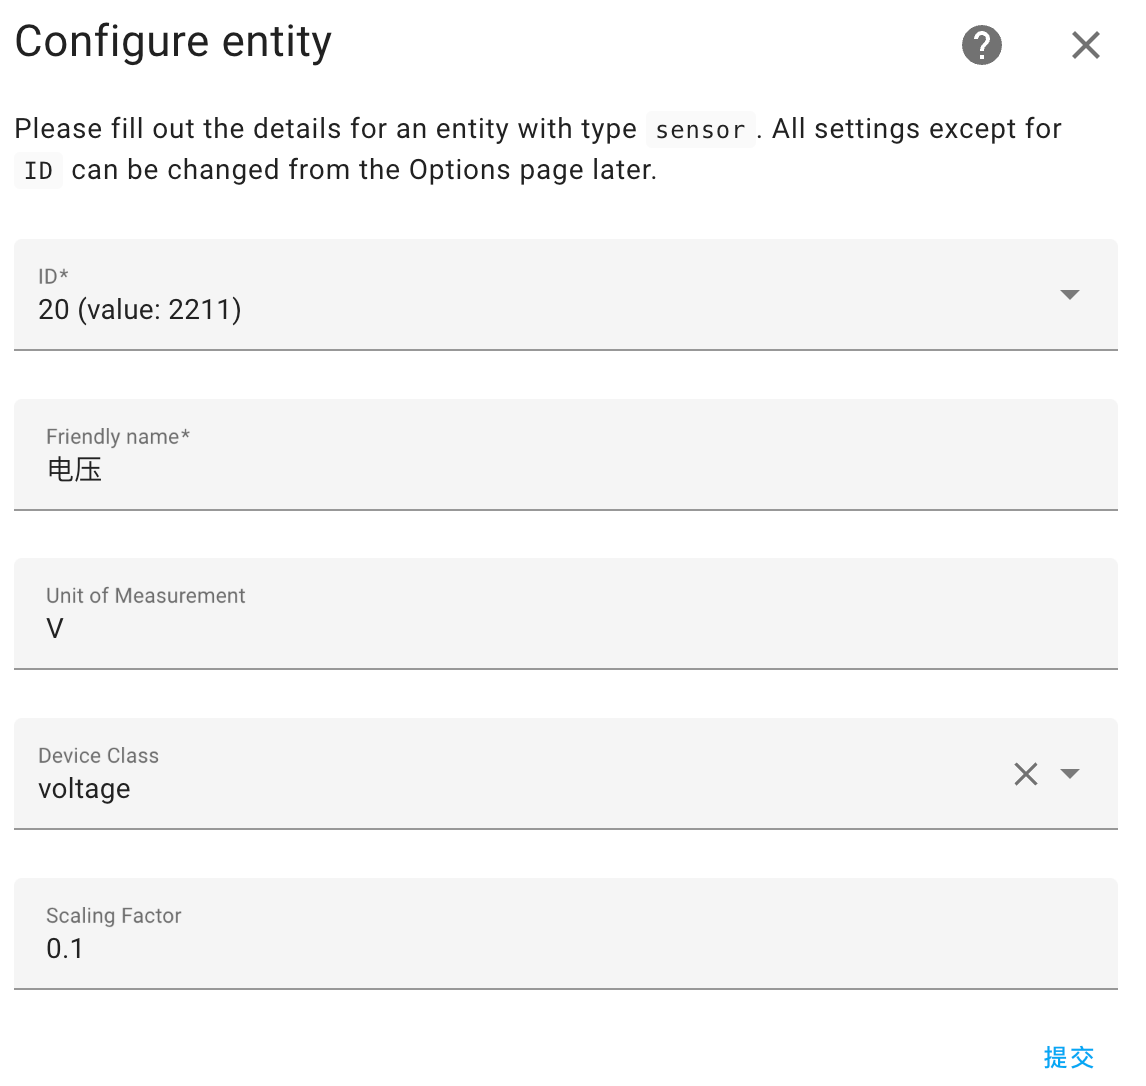
- 添加电流
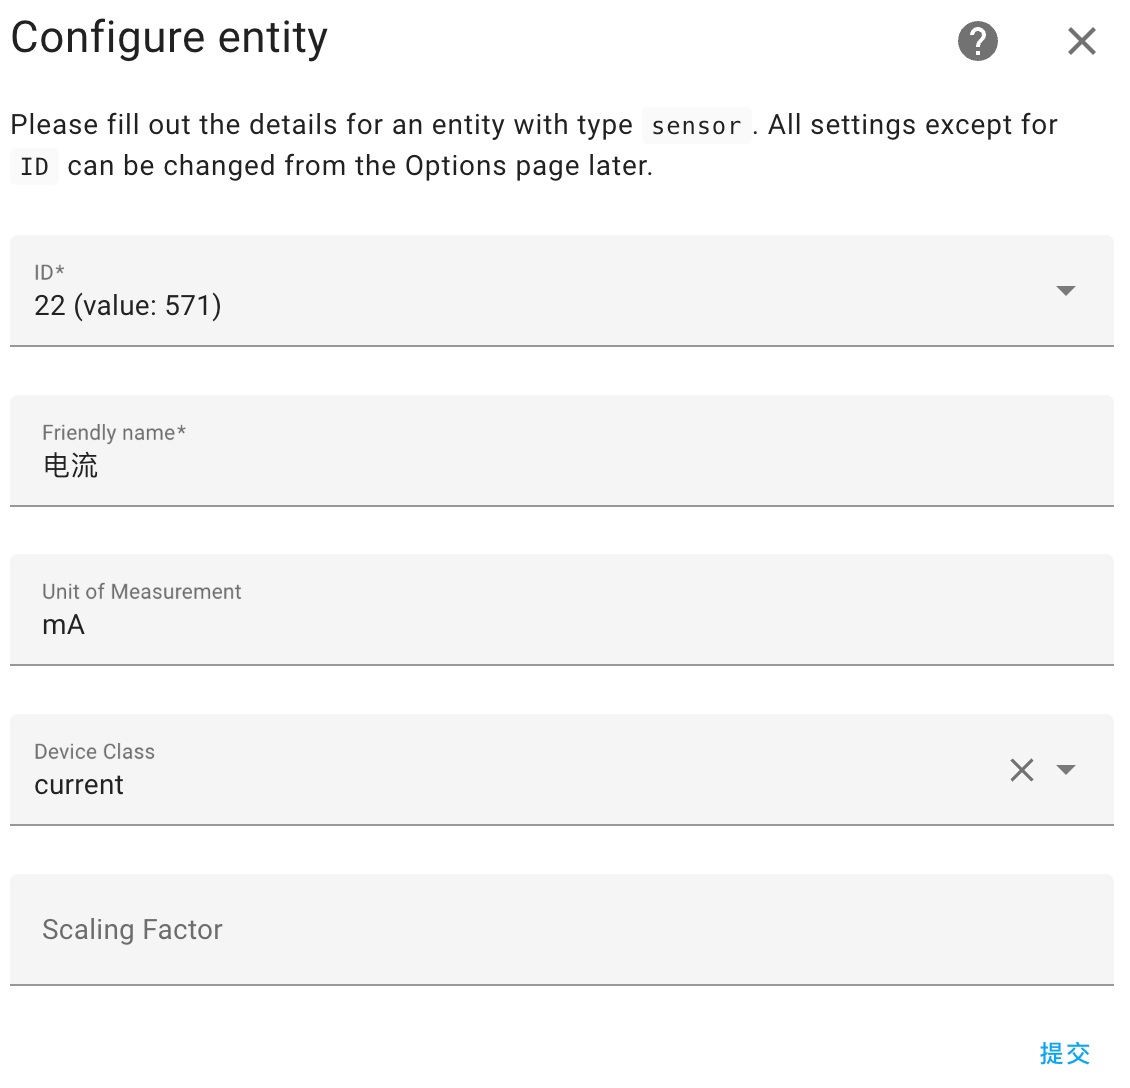
- 添加功耗
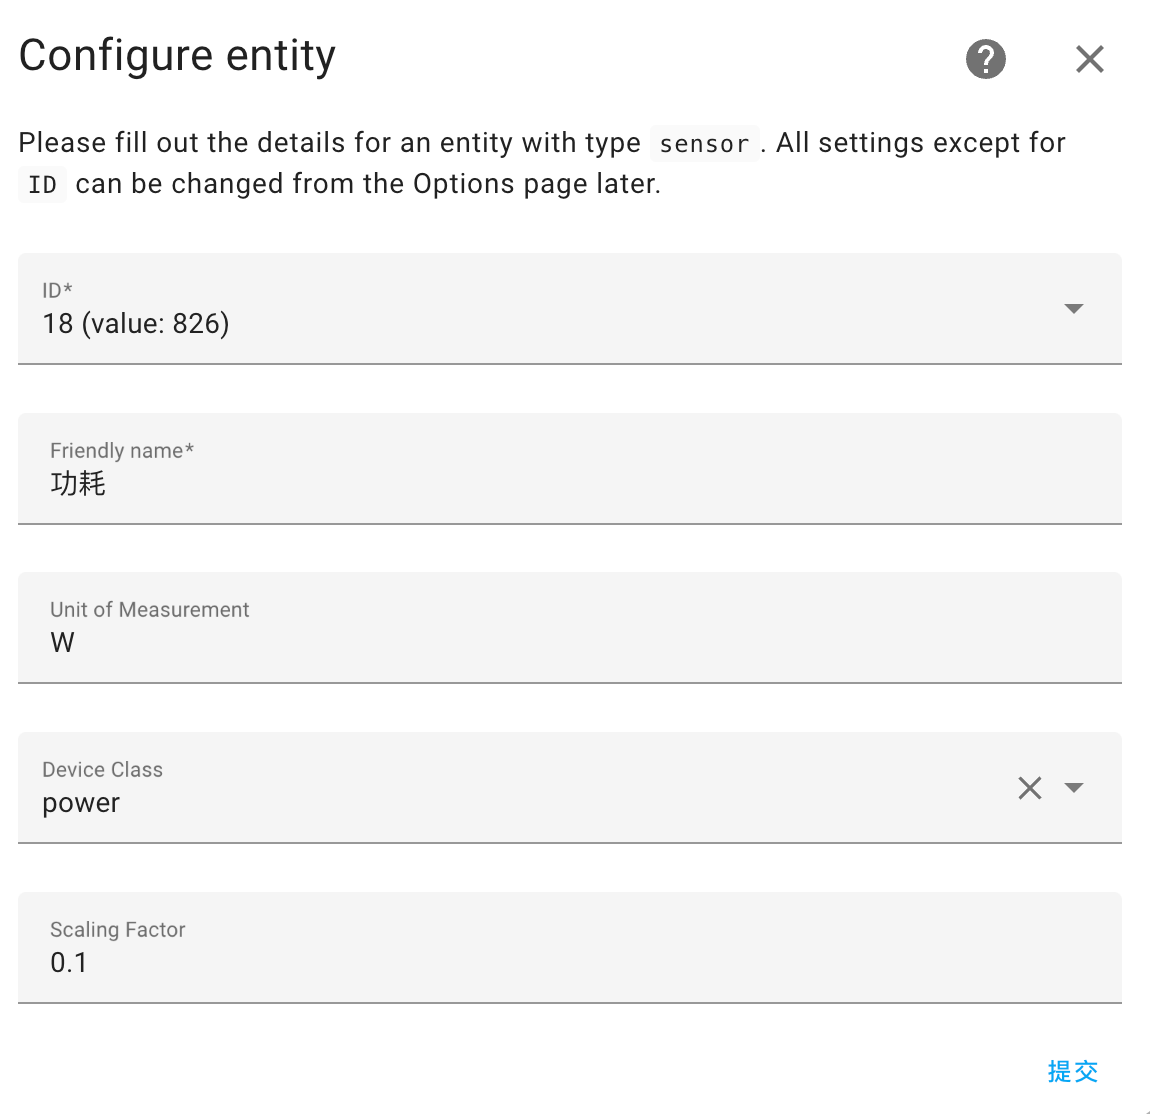
勾选
Do not add any more entities完成添加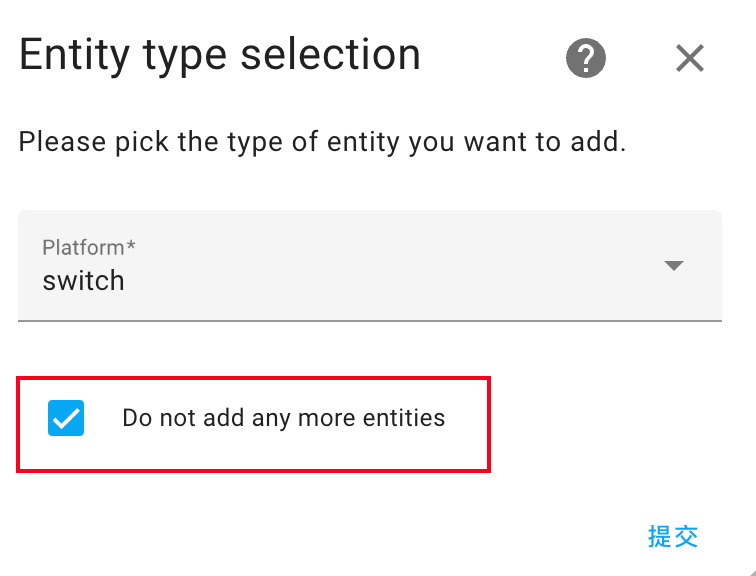
编辑设备
在集成内选择
Edit a device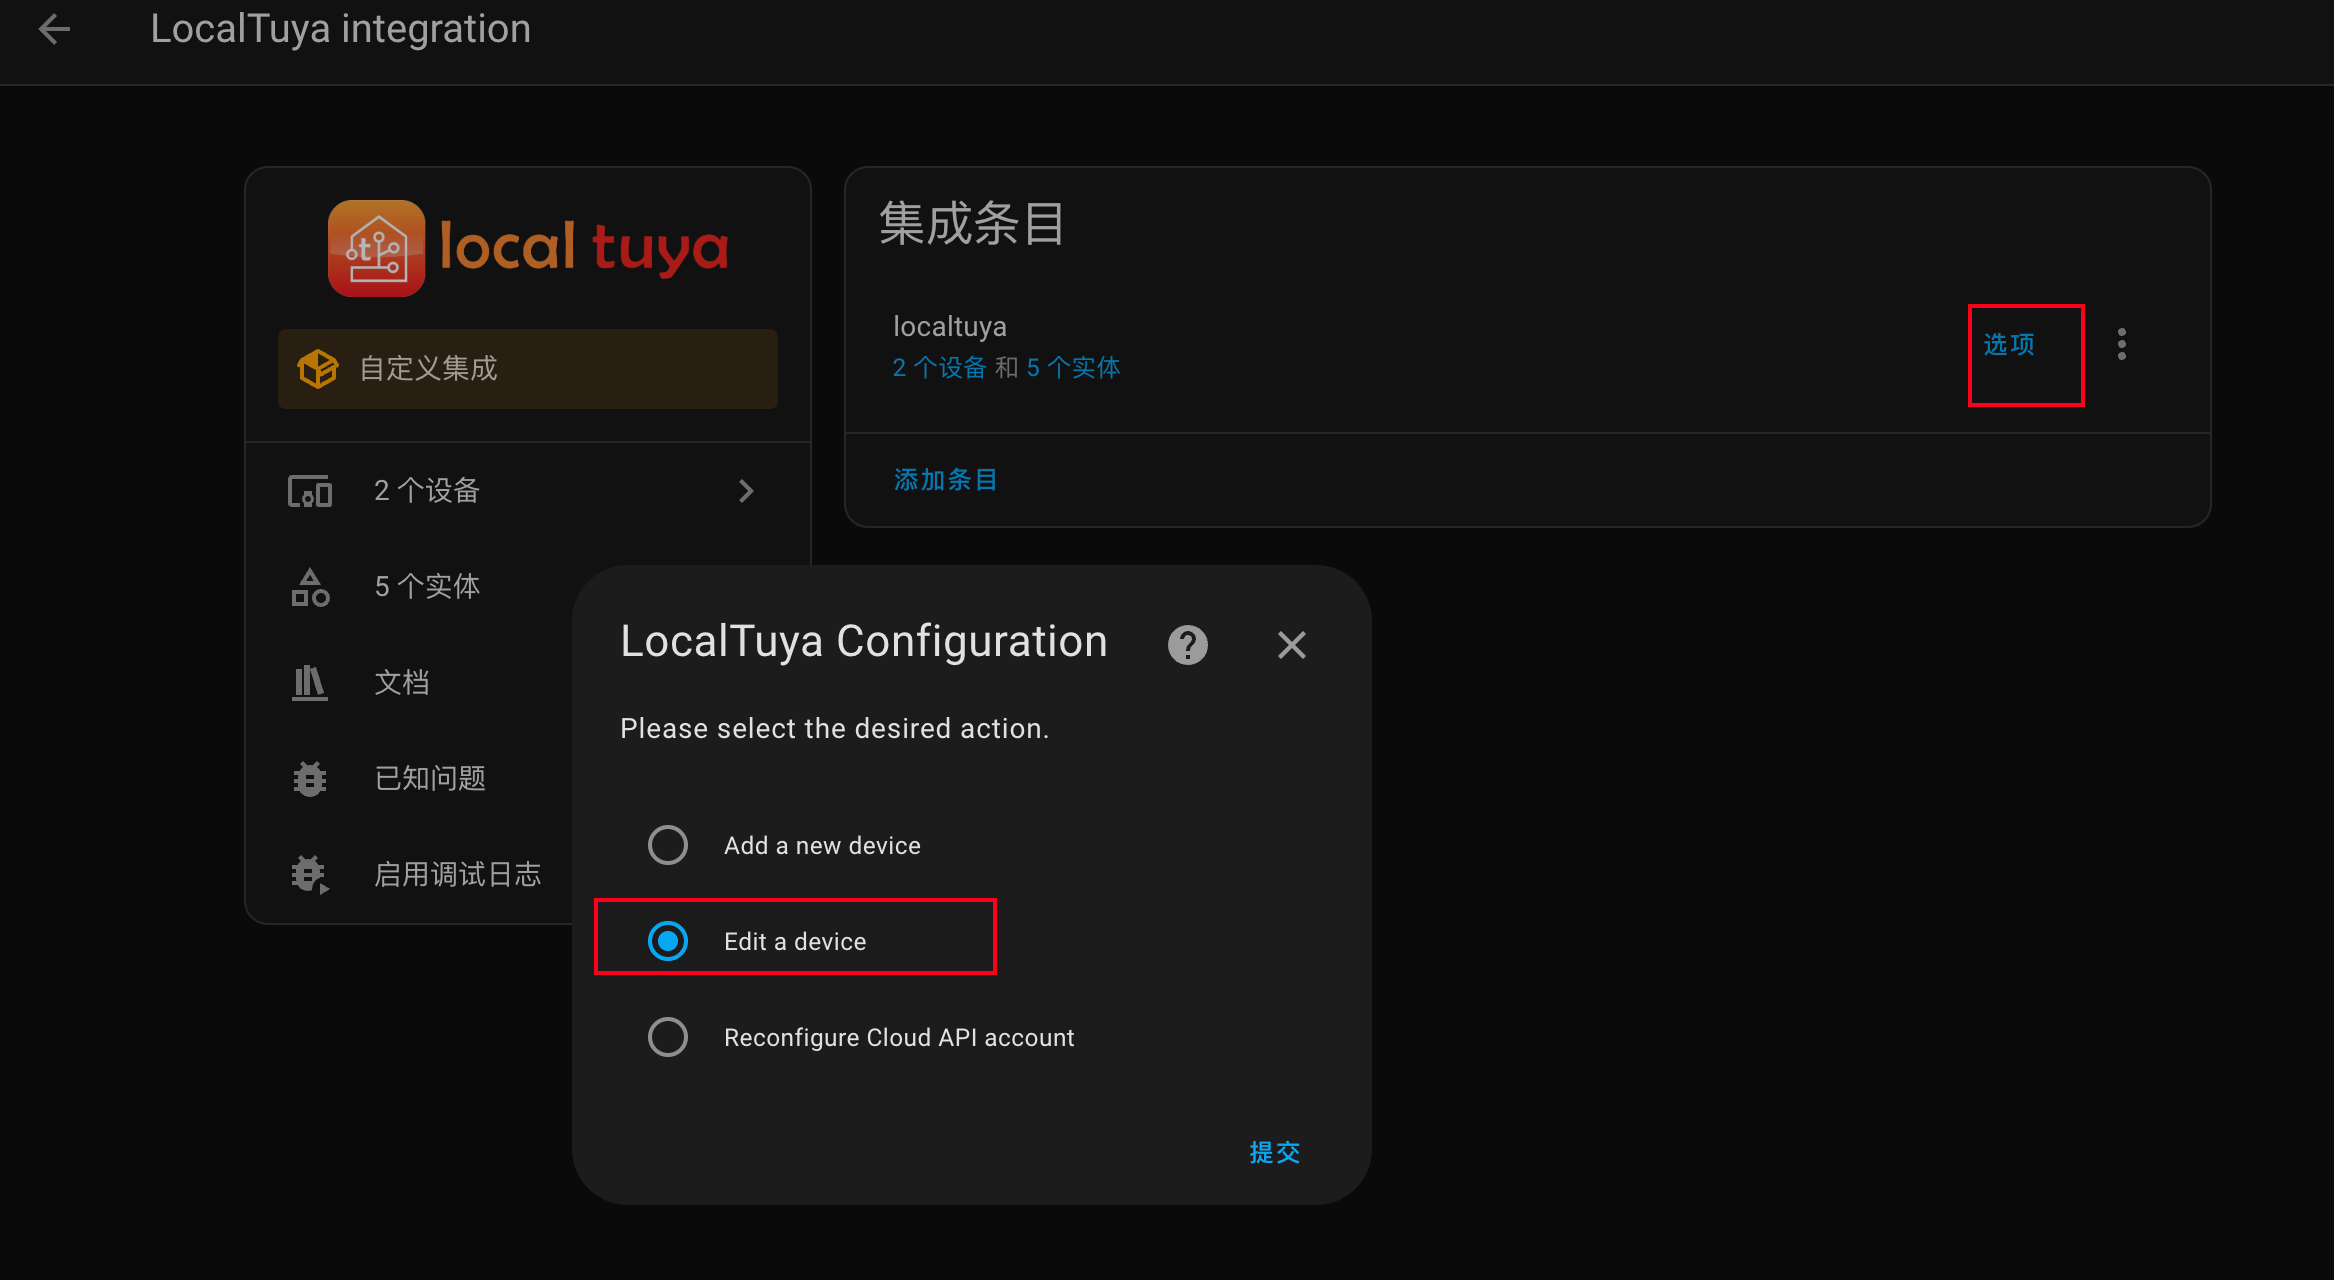
以 pc 插座为例
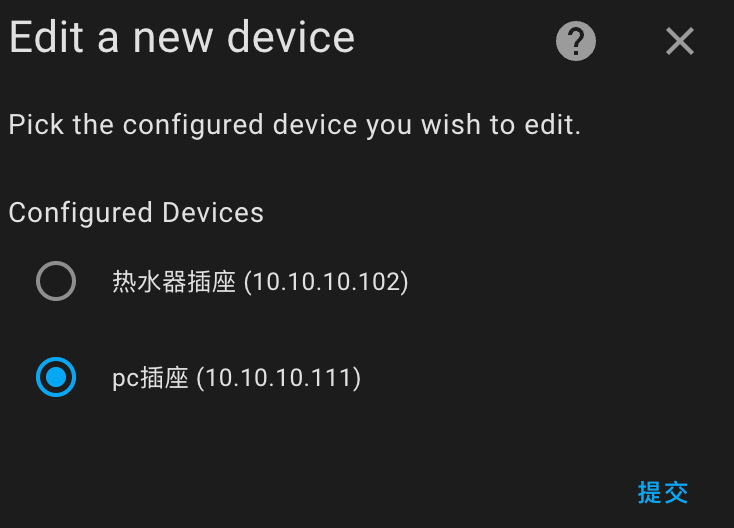
编辑实体
编辑已经设定过的实体:
勾选想要编辑的实体,不勾选
Add more entities in edit device mode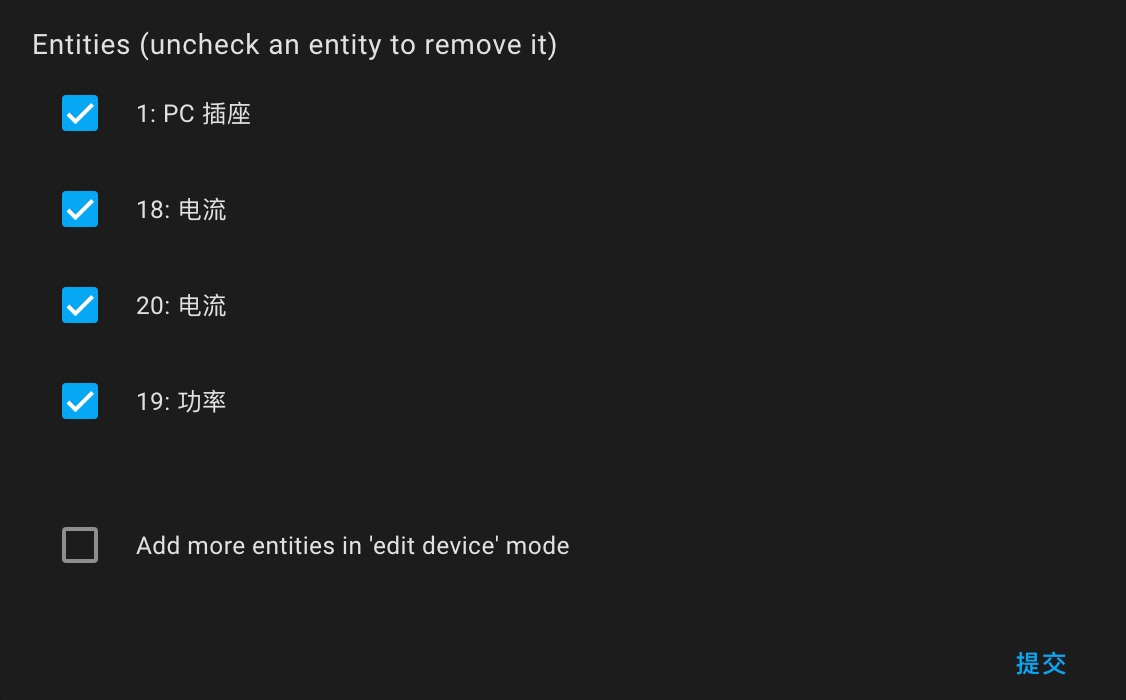
在现有的实体上添加新实体:
勾选
Add more entities in edit device mode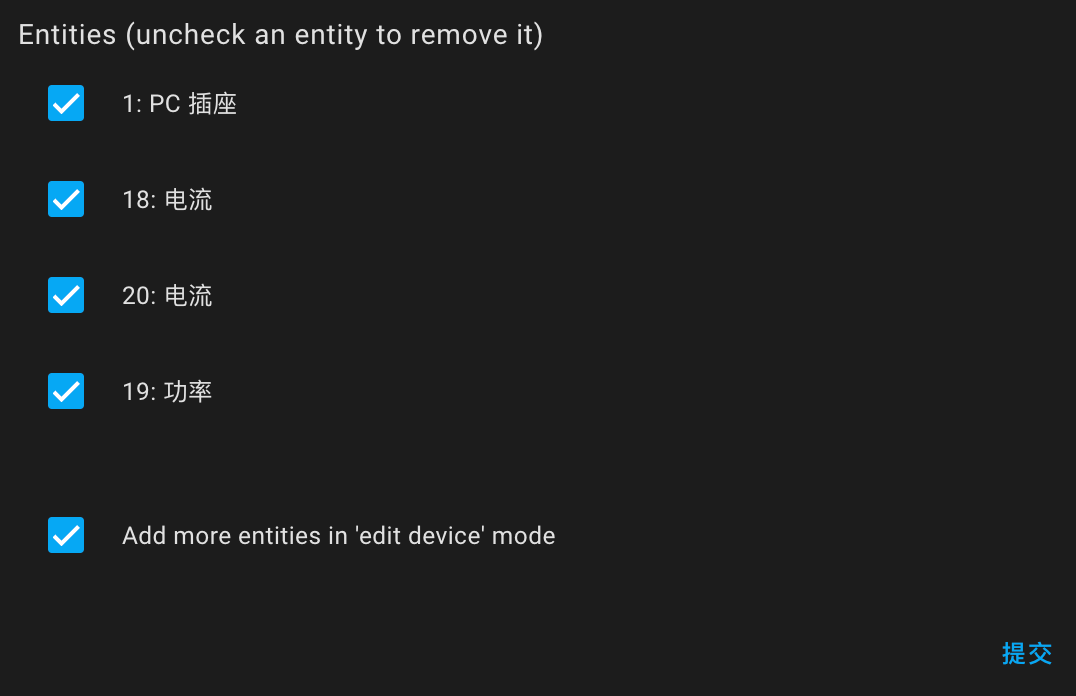
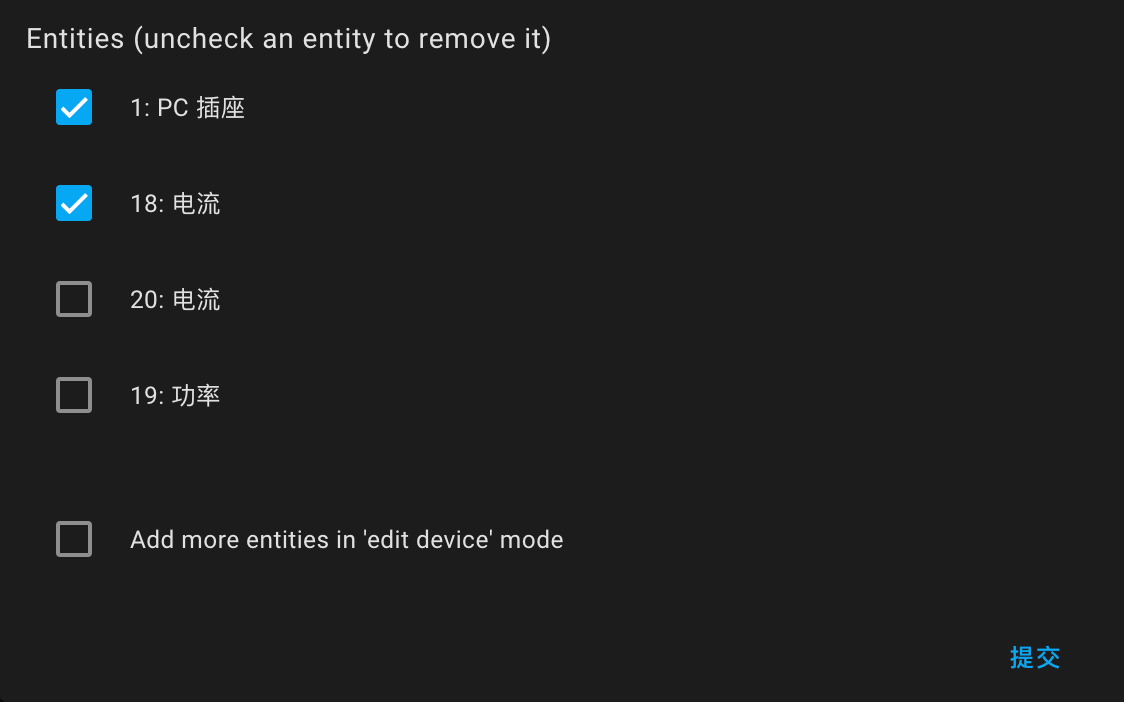
删除现有的实体:
取消勾选想要删除的实体
博联
空调
学码比较麻烦,直接用人家做好的轮子咯
不赘述 App 如何绑定博联设备
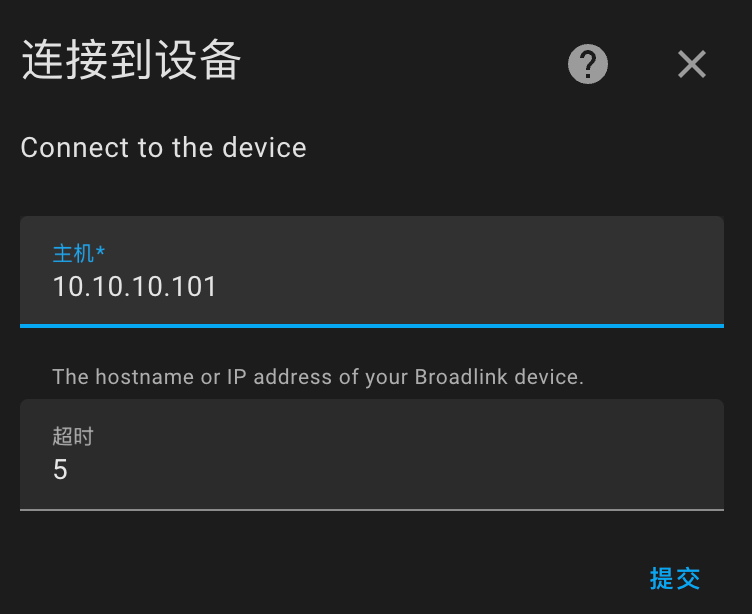
添加 Broadlink 集成
- 输入博联设备的 IP
- 起个名,最好是英文的
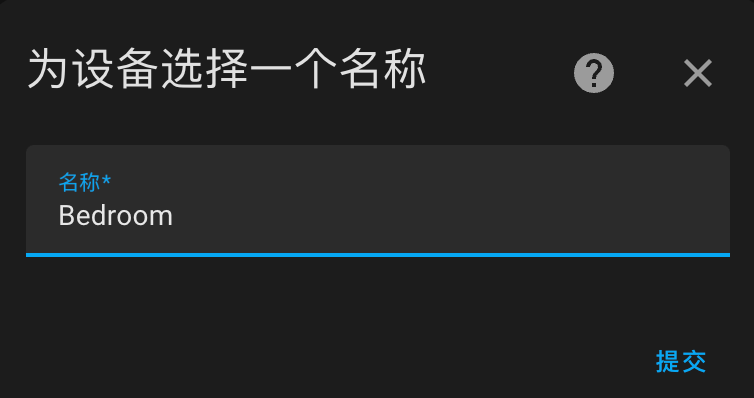
- 输入博联设备的 IP
SmartIR 这种在 HACS 内没有的集成,先把源码下下来
解压后把
custom_components->smartir丢到 HASS 的custom_components内如果网络不好,可以把
codes一并丢进smartir在
configuration.yaml中添加以下内容1
2
3
4
5
6
7
8
9smartir:
climate:
- platform: smartir
name: Bedroom AC
unique_id: bedroom_ac
device_code: 1383
controller_data: remote.bedroom
temperature_sensor: sensor.bedroom_temperature最后重启 HASS
其他红外和射频设备
这个要学码,可以参考一下官方
其他
PC 接入 HASS
思路
- 开机:WOL
- 关机:OpenSSH
- 状态:计量插座监控功率
- 如果功率 < 10W,去检查 pc_switch 的状态,如果为开,则关闭
- 如果功率 > 10W,去检查 pc_switch 的状态,如果为关,则打开
实现
使用 WOL 实现开机
PC 打开 WOL
其他主板自己百度吧,华硕需要以下关键点:
- BIOS [Advanced Mode] ->
Advanced->APM Configuration-> 启用Power On By PCI-E - 以太网的电源管理中须勾选
允许这个装置唤醒计算机 - 控制面板 -> 电源选项 -> 取消
快速启动
- BIOS [Advanced Mode] ->
新建一个文件夹存放 Python 脚本
1
mkdir -p ~/docker/hass/python/pc
新建一个 Python 脚本实现开机
1
2
3
4
5# 前往脚本文件夹
cd ~/docker/hass/python/pc
# 编辑脚本
nano wol.py脚本内容如下
1
2
3
4
5
6
7
8#!/usr/bin/python
from socket import socket, AF_INET, SOCK_DGRAM, SOL_SOCKET, SO_BROADCAST
data = b'\xFF\xFF\xFF\xFF\xFF\xFF' + b'\x11\x22\x33\x44\x55\x66' * 16
sock = socket(AF_INET, SOCK_DGRAM)
sock.setsockopt(SOL_SOCKET, SO_BROADCAST, 1)
sock.sendto(data, ('192.168.2.255', 9))
sock.close()Ctrl + X 输入 y 保存退出
\x11\x22\x33\x44\x55\x66为MAC地址,根据具体电脑修改192.168.2.255根据具体网段修改例如:
1
2
3
4
5
6
7
8#!/usr/bin/python
from socket import socket, AF_INET, SOCK_DGRAM, SOL_SOCKET, SO_BROADCAST
data = b'\xFF\xFF\xFF\xFF\xFF\xFF' + b'\x3F\x7C\x34\xD4\x7D\x66' * 16
sock = socket(AF_INET, SOCK_DGRAM)
sock.setsockopt(SOL_SOCKET, SO_BROADCAST, 1)
sock.sendto(data, ('10.10.10.255', 9))
sock.close()
使用 OpenSSH 实现关机
PC 安装 OpenSSH
- 打开“设置”,选择“系统”,然后选择“可选功能”。
- 扫描列表,查看是否已安装 OpenSSH。 如果未安装,请在页面顶部选择“添加功能”,然后:
- 找到“OpenSSH 客户端”,然后选择“安装”
- 找到“OpenSSH Server”,然后选择“安装”
- 打开“服务”桌面应用。 (选择“开始”,在搜索框中键入 services.msc ,然后选择“服务”应用或按 ENTER。)
- 在详细信息窗格中,双击“OpenSSH SSH 服务器”。
- 在“常规”选项卡上的“启动类型”下拉菜单中,选择“自动”,然后选择“确定”。
- 若要启动服务,请选择“启动”。
新建一个 Python 脚本实现关机
1
2
3
4
5# 前往脚本文件夹
cd ~/docker/hass/python/pc
# 编辑脚本
nano poweroff.py脚本内容如下
1
2
3
4
5
6
7
8
9
10
11
12
13
14
15
16
17
18
19
20
21
22
23
24
25
26
27
28
29import paramiko
def ssh_shutdown(hostname, username, password):
try:
# 创建SSH客户端对象
ssh_client = paramiko.SSHClient()
# 添加远程服务器的主机密钥
ssh_client.set_missing_host_key_policy(paramiko.AutoAddPolicy())
# 连接到远程主机
ssh_client.connect(hostname=hostname, username=username, password=password)
# 执行关机命令
stdin, stdout, stderr = ssh_client.exec_command('shutdown /s /t 0')
# 关闭SSH连接
ssh_client.close()
except Exception as e:
pass
# 要连接的Windows主机的信息
hostname = 'your_windows_hostname_or_ip'
username = 'your_windows_username'
password = 'your_windows_password'
# 执行SSH连接并执行关机命令
ssh_shutdown(hostname, username, password)Ctrl + X 输入 y 保存退出
使用第三方应用实现关机
下载并安装 Airytec Switch Off
允许 Web 接口
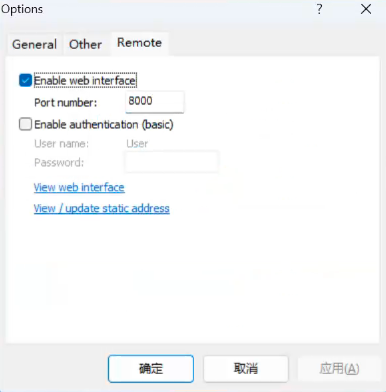
运行里面输入
shell:startup打开「启动」文件夹,把刚才安装的 Airytec Switch Off 的快捷方式丢进去新建一个 Python 脚本实现关机
1
2
3
4
5# 前往脚本文件夹
cd ~/docker/hass/python/pc
# 编辑脚本
nano shutdown.py脚本内容如下
1
2
3
4import subprocess
# 使用 subprocess.run 执行 curl 命令,不捕获输出
subprocess.run(['curl', '-X', 'GET', 'http://<你电脑的 IP>:8000/?action=System.Shutdown'])Ctrl + X 输入 y 保存退出
HASS 中添加开关
添加开关
1
2
3
4
5# 前往配置文件夹
cd ~/docker/hass
# 编辑配置文件
nano configuration.yaml在最下方添加
1
2
3
4
5
6
7
8
9
10
11
12
13
14
15
16switch:
- platform: template
switches:
pc_switch:
turn_on:
- service: switch.turn_on
entity_id: switch.pc_switch_cmd
turn_off:
- service: switch.turn_off
entity_id: switch.pc_switch_cmd
command_line:
- switch:
name: pc_switch_cmd
command_on: "python ./python/pc/wol.py"
command_off: "python ./python/pc/poweroff.py"或者
1
2
3
4
5
6
7
8
9
10
11
12
13
14
15
16switch:
- platform: template
switches:
pc_switch:
turn_on:
- service: switch.turn_on
entity_id: switch.pc_switch_cmd
turn_off:
- service: switch.turn_off
entity_id: switch.pc_switch_cmd
command_line:
- switch:
name: pc_switch_cmd
command_on: "python ./python/pc/wol.py"
command_off: "python ./python/pc/shutdown.py"Ctrl + X 输入 y 保存退出
重启 HASS
同步开关机状态
来到自动化
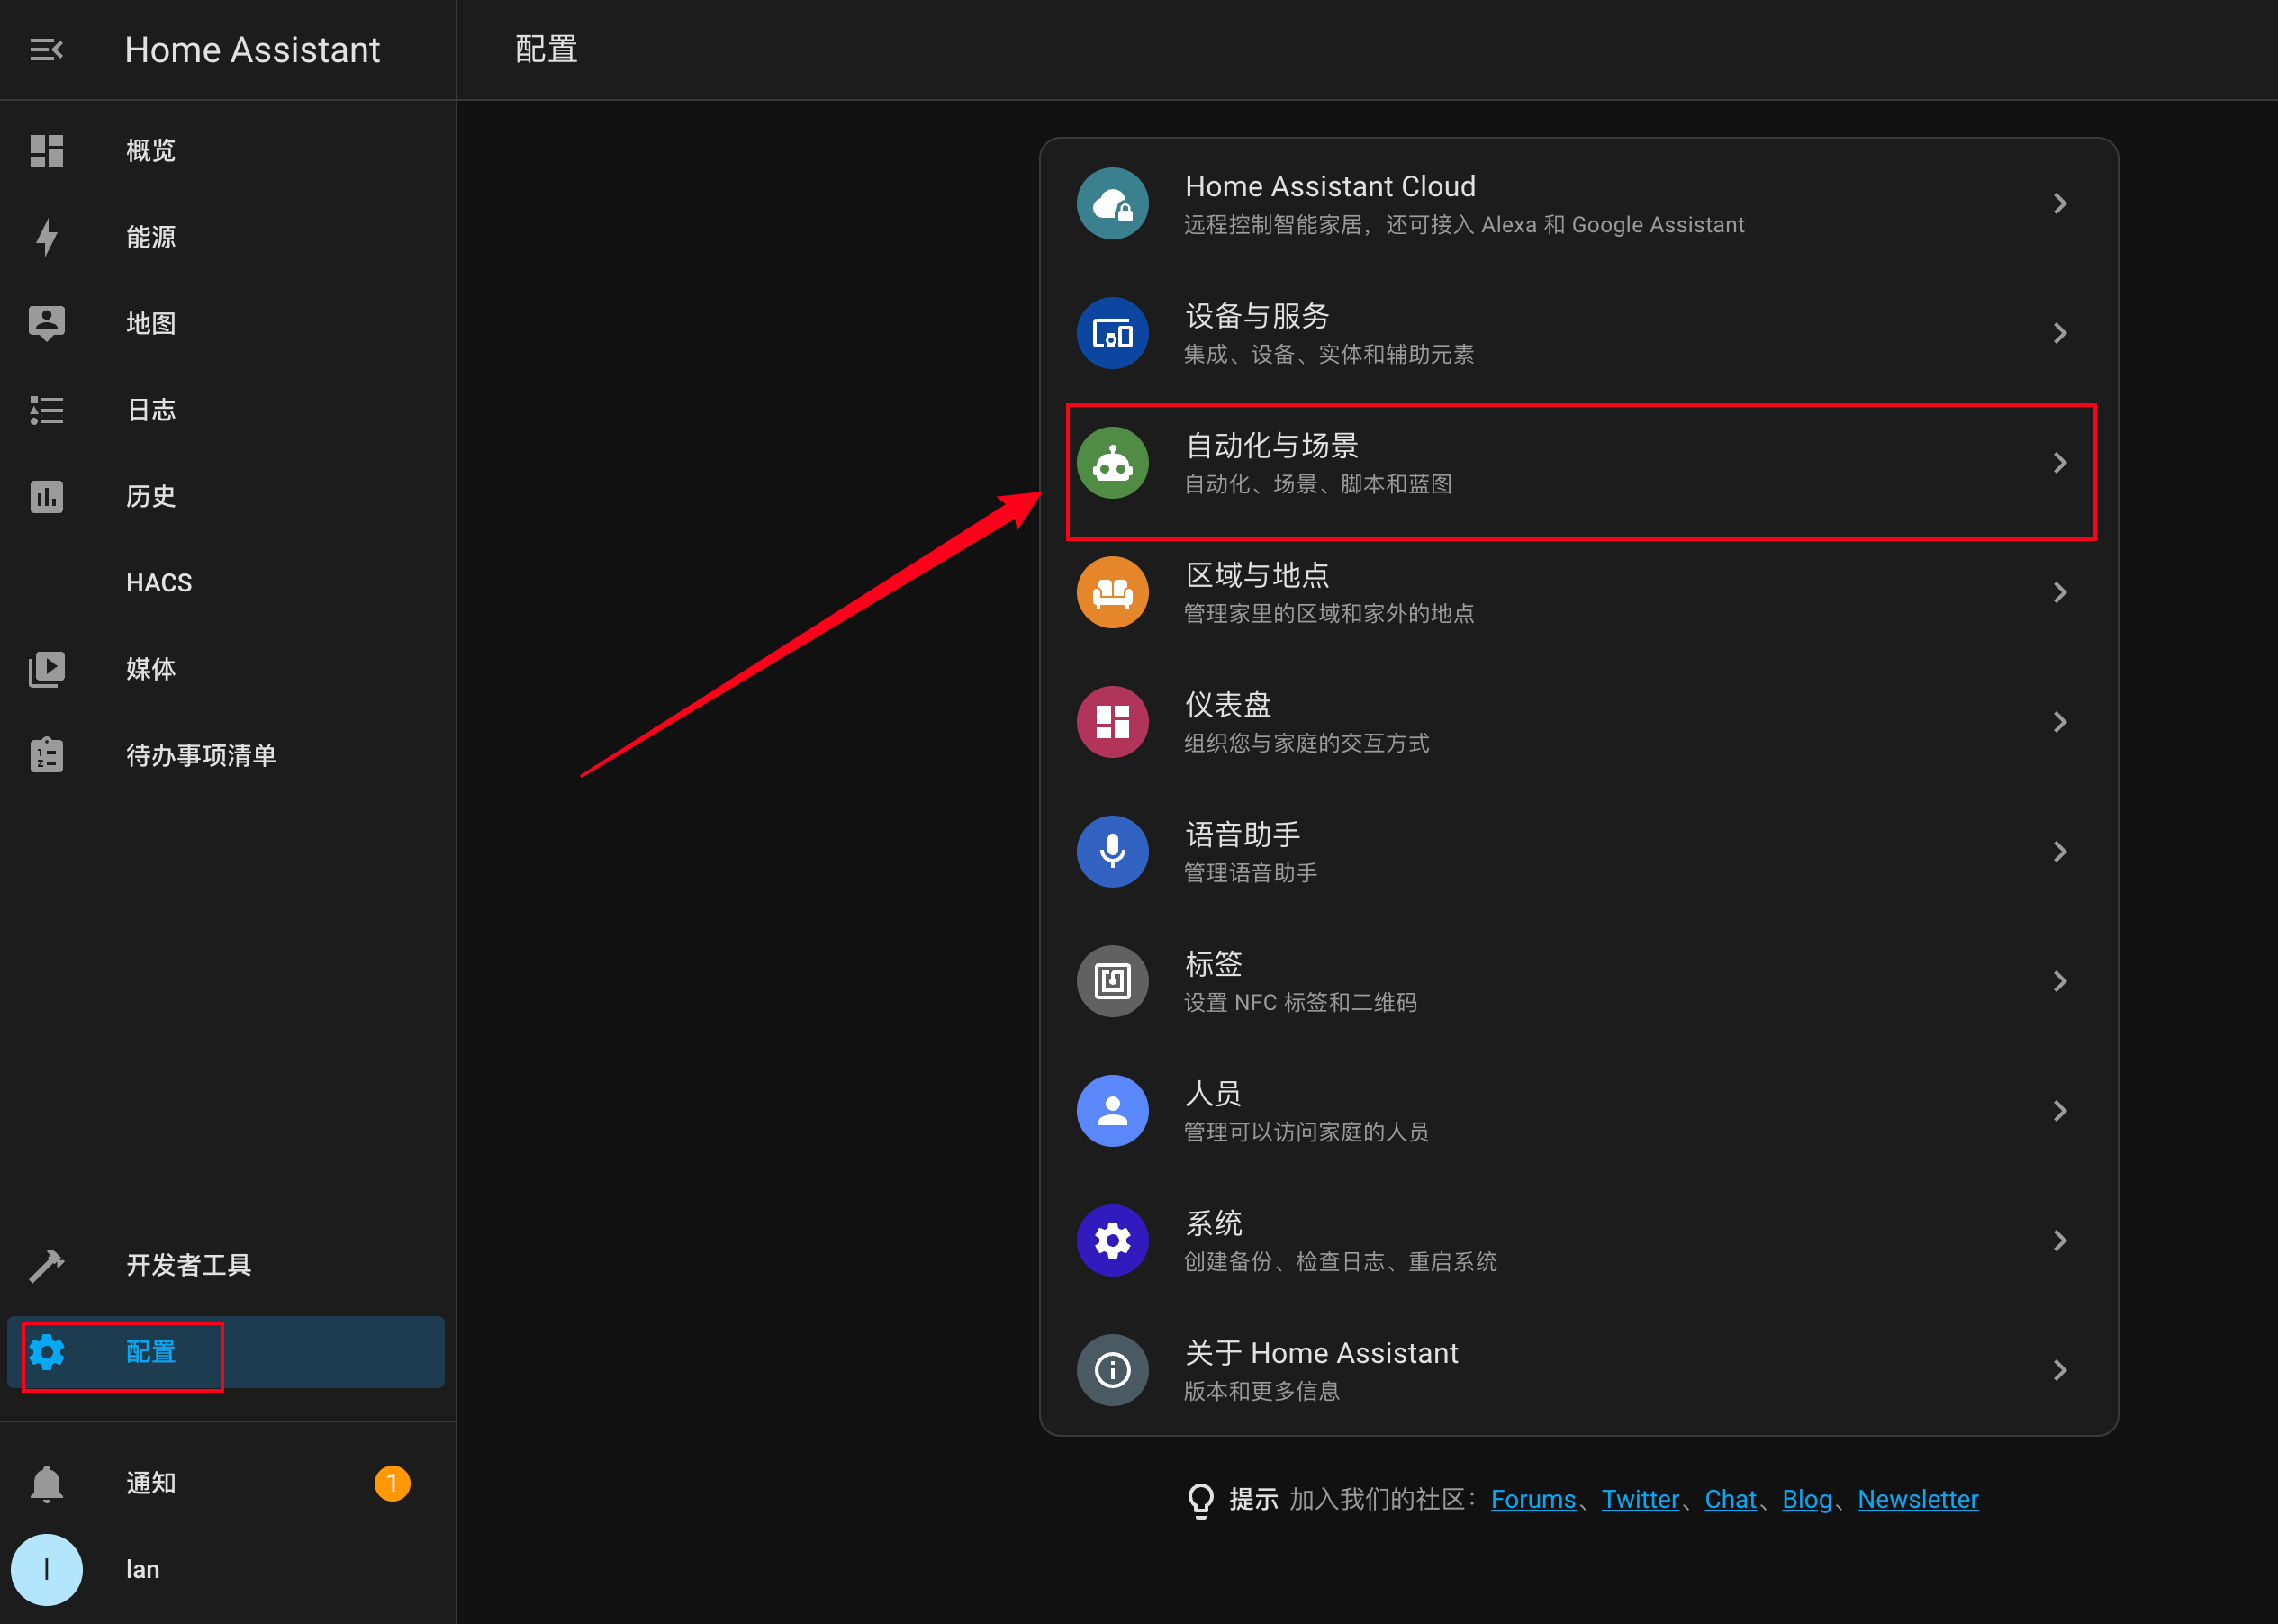
以 YAML 编辑创建自动化
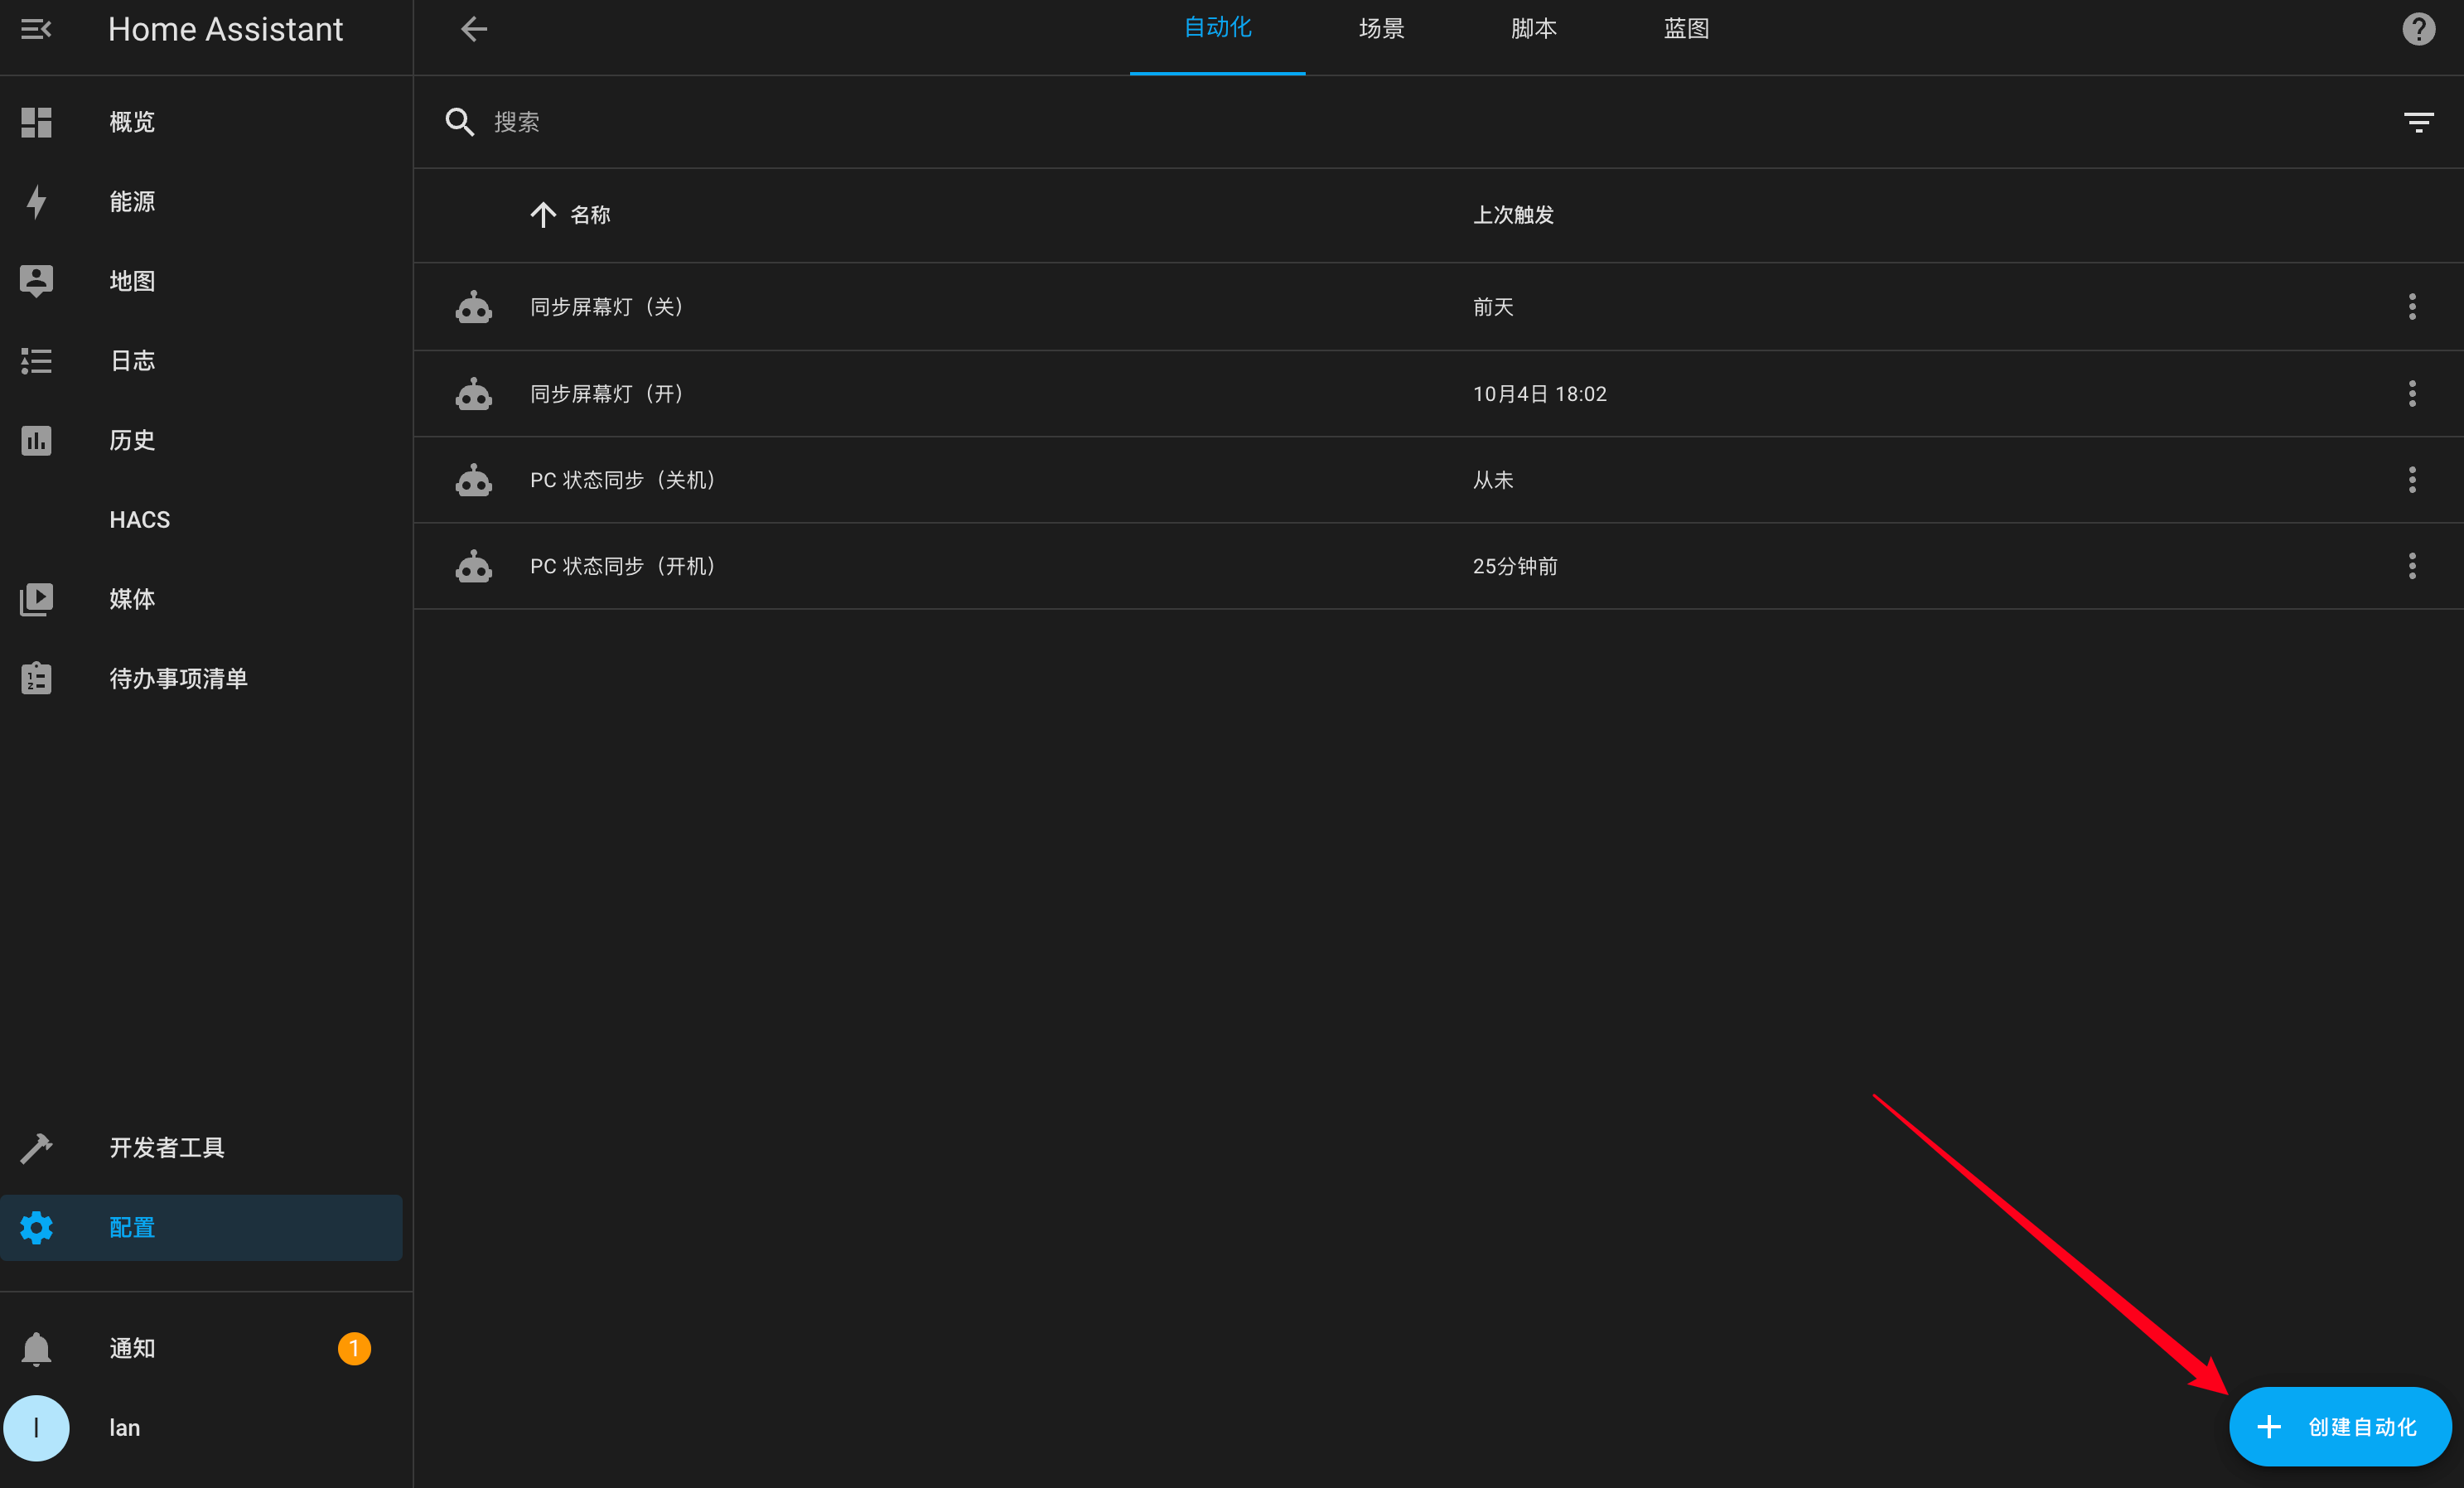
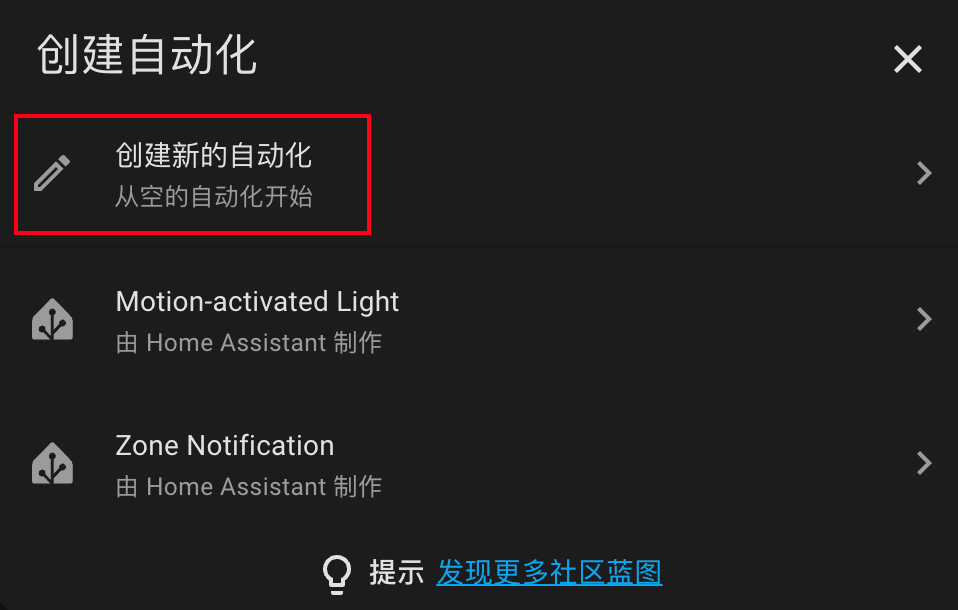
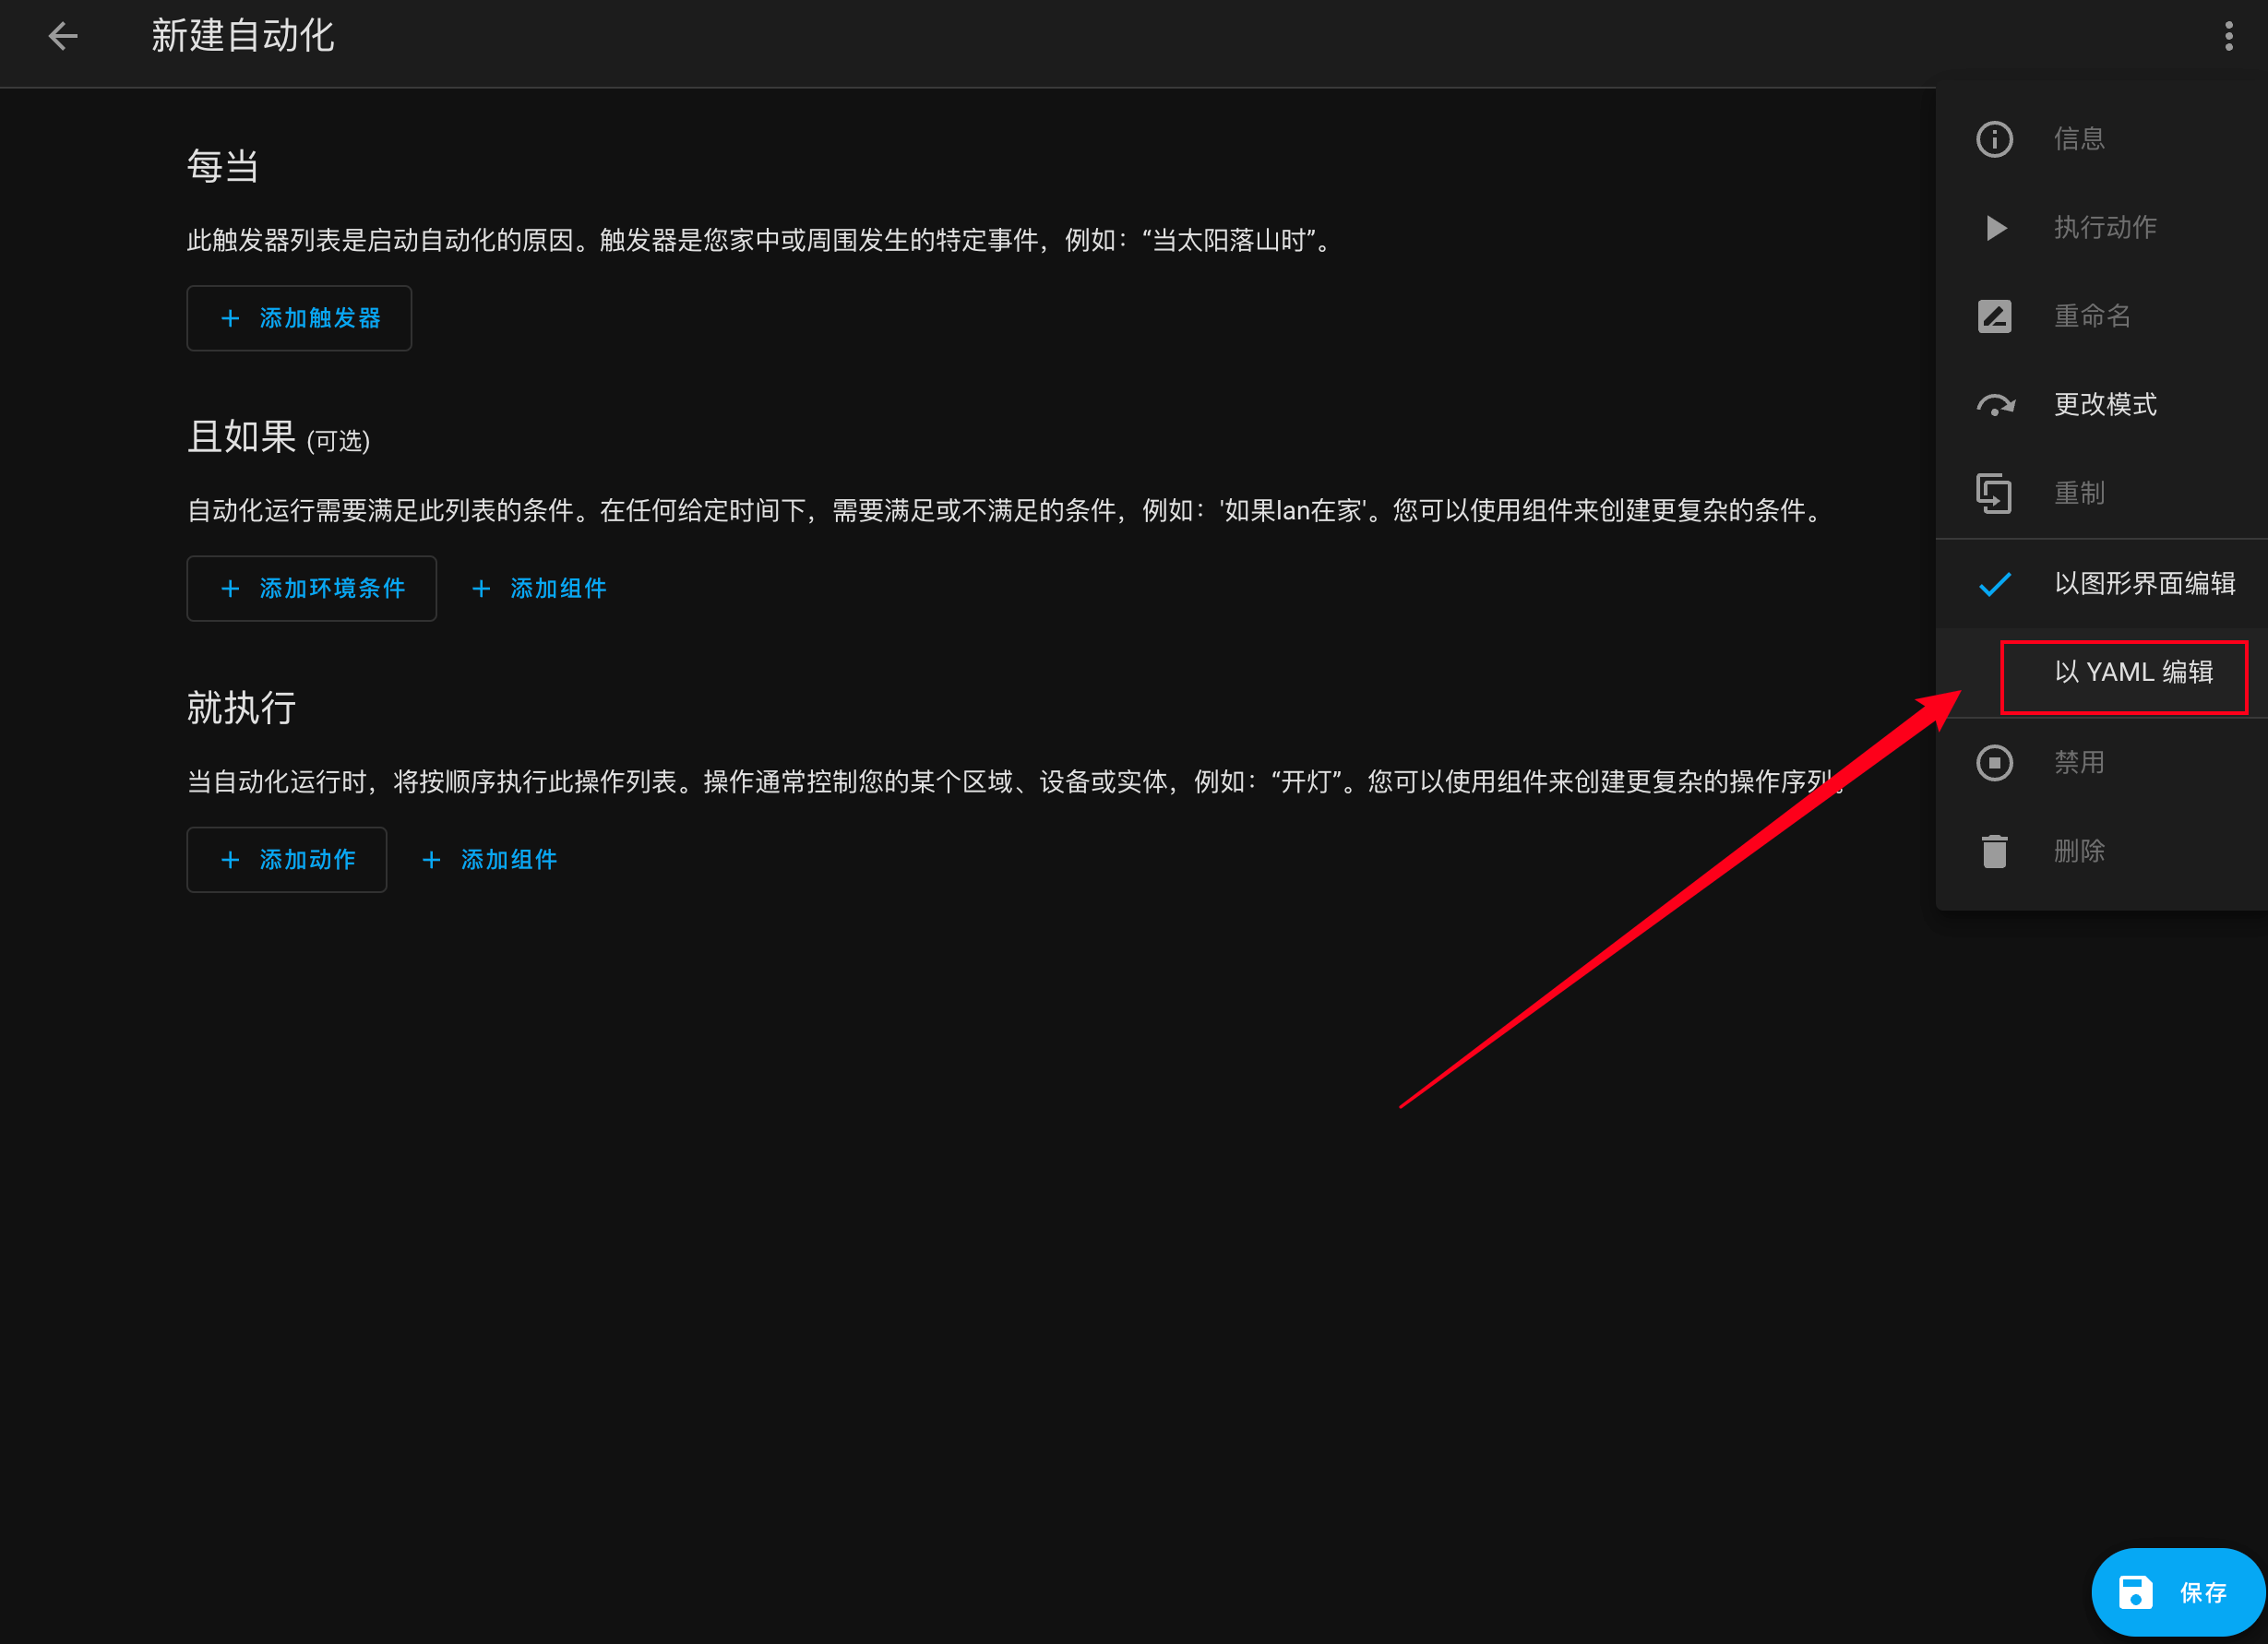
同步开机状态
1
2
3
4
5
6
7
8
9
10
11
12
13
14
15
16
17
18
19
20
21
22
23
24
25
26
27
28
29
30alias: PC 状态同步(开机)
description: ""
trigger:
- type: power
platform: device
device_id: xxxxxxxxxxxxxxxxxxxxxxxxxxxxxxxx
entity_id: xxxxxxxxxxxxxxxxxxxxxxxxxxxxxxxx
domain: sensor
above: 10
- platform: homeassistant
event: start
condition:
- condition: state
entity_id: switch.pc_switch
state: "off"
- condition: and
conditions:
- type: is_power
condition: device
device_id: xxxxxxxxxxxxxxxxxxxxxxxxxxxxxxxx
entity_id: xxxxxxxxxxxxxxxxxxxxxxxxxxxxxxxx
domain: sensor
above: 10
action:
- service: switch.turn_on
target:
entity_id:
- switch.pc_switch
data: {}
mode: single同步关机状态
1
2
3
4
5
6
7
8
9
10
11
12
13
14
15
16
17
18
19
20alias: PC 状态同步(关机)
description: ""
trigger:
- type: power
platform: device
device_id: xxxxxxxxxxxxxxxxxxxxxxxxxxxxxxxx
entity_id: xxxxxxxxxxxxxxxxxxxxxxxxxxxxxxxx
domain: sensor
below: 10
condition:
- condition: state
entity_id: switch.pc_switch
state: "on"
action:
- service: switch.turn_off
metadata: {}
data: {}
target:
entity_id: switch.pc_switch
mode: single
Mac 接入 HASS
思路
- Mac 不用关机,所以只需要实现休眠就可以了
- 也不需要实现唤醒,所以做个自动化每次休眠后自动把开关重新打开就好了
实现
新建一个 Python 脚本实现关机
1
2
3
4
5
6
7# 新建脚本文件夹
mkdir -p ~/docker/hass/python/mac
# 前往脚本文件夹
cd ~/docker/hass/python/mac
# 编辑脚本
nano sleep.py脚本内容如下
1
2
3
4
5
6
7
8
9
10
11
12
13
14
15
16
17
18
19
20
21
22
23
24
25
26
27
28
29import paramiko
def ssh_sleep(hostname, username, password):
try:
# 创建SSH客户端对象
ssh_client = paramiko.SSHClient()
# 添加远程服务器的主机密钥
ssh_client.set_missing_host_key_policy(paramiko.AutoAddPolicy())
# 连接到远程主机
ssh_client.connect(hostname=hostname, username=username, password=password)
# 执行休眠命令
stdin, stdout, stderr = ssh_client.exec_command('pmset sleepnow')
# 关闭SSH连接
ssh_client.close()
except Exception as e:
pass
# 要连接的 macOS 主机的信息
hostname = 'your_windows_hostname_or_ip'
username = 'your_windows_username'
password = 'your_windows_password'
# 执行SSH连接并执行休眠命令
ssh_shutdown(hostname, username, password)Ctrl + X 输入 y 保存退出
HASS 中添加开关
1
2
3
4
5# 前往配置文件夹
cd ~/docker/hass
# 编辑配置文件
nano configuration.yaml在最下方添加
1
2
3
4
5
6
7
8
9
10
11
12
13
14
15
16switch:
- platform: template
switches:
mac_switch:
turn_on:
- service: switch.turn_on
entity_id: switch.mac_switch_cmd
turn_off:
- service: switch.turn_off
entity_id: switch.mac_switch_cmd
command_line:
- switch:
name: mac_switch_cmd
command_on: ""
command_off: "python ./python/mac/sleep.py"多个实体应该这样添加:
1
2
3
4
5
6
7
8
9
10
11
12
13
14
15
16
17
18
19
20
21
22
23
24
25
26
27
28
29switch:
- platform: template
switches:
pc_switch:
turn_on:
- service: switch.turn_on
entity_id: switch.pc_switch_cmd
turn_off:
- service: switch.turn_off
entity_id: switch.pc_switch_cmd
mac_switch:
turn_on:
- service: switch.turn_on
entity_id: switch.mac_switch_cmd
turn_off:
- service: switch.turn_off
entity_id: switch.mac_switch_cmd
command_line:
- switch:
name: pc_switch_cmd
command_on: "python ./python/pc/wol.py"
command_off: "python ./python/pc/poweroff.py"
- switch:
name: mac_switch_cmd
command_on: ""
command_off: "python ./python/mac/sleep.py"Ctrl + X 输入 y 保存退出
自动化实现每次休眠后自动把开关重新打开
1
2
3
4
5
6
7
8
9
10
11
12
13
14
15
16
17
18
19
20
21
22
23alias: Mac 状态同步
description: ""
trigger:
- platform: state
entity_id:
- switch.mac_switch
from: "on"
to: "off"
- platform: homeassistant
event: start
condition: []
action:
- delay:
hours: 0
minutes: 0
seconds: 10
milliseconds: 0
- service: switch.turn_on
metadata: {}
data: {}
target:
entity_id: switch.mac_switch
mode: single终于来到最后一步了,现在 HomeKit 藏在 Apple 集成里
接入 HomeKit
终于来到最后一步了,到此即可真正用 HomeKit 本地管理所有家里的设备了
添加集成
现在 HomeKit 集成藏在 Apple 集成里面了

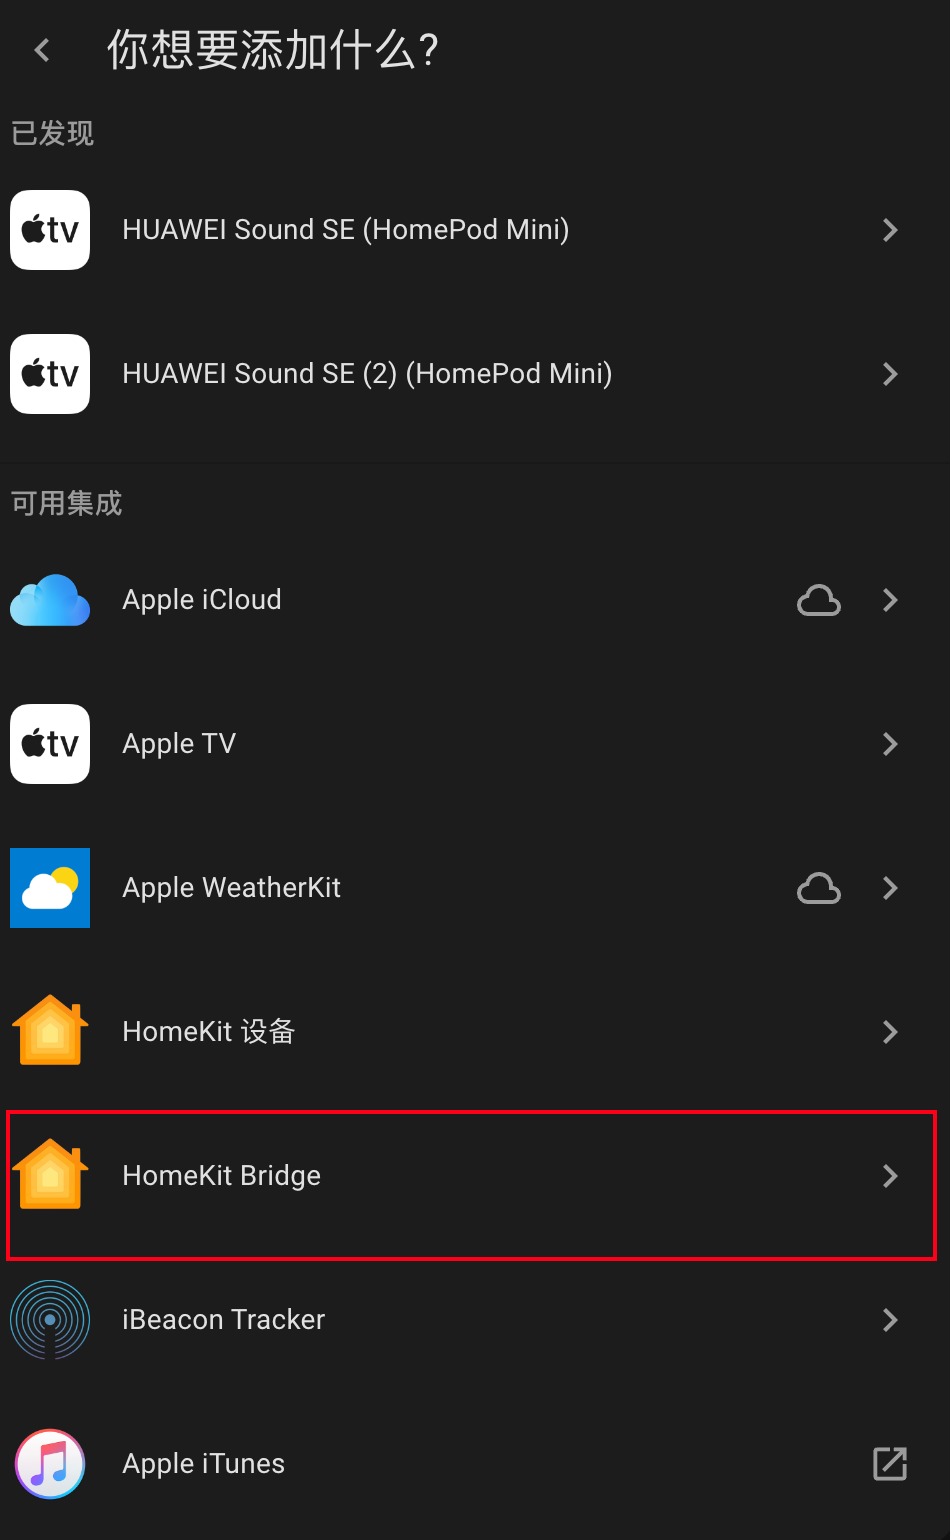
按需选择要包含的域

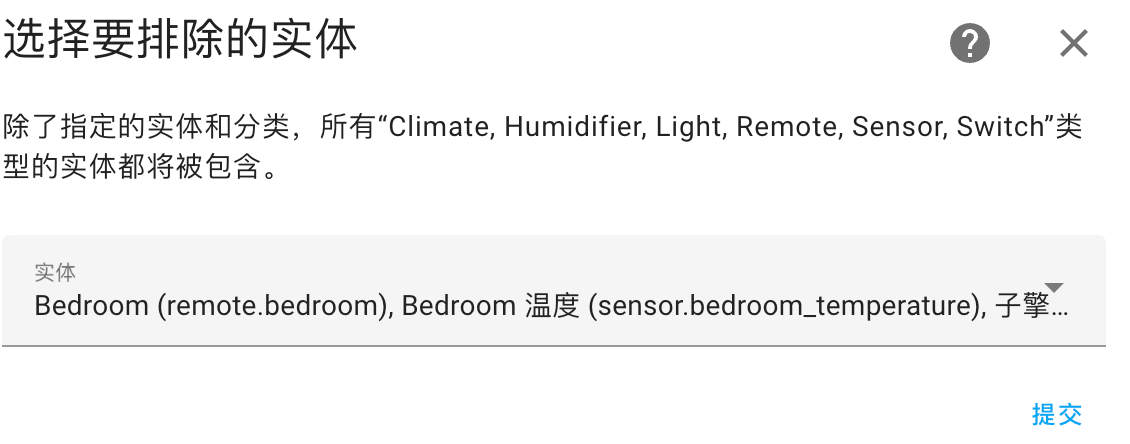
提交完成之后我们回到集成里面,包含模式选择
exclude(选include会有 bug)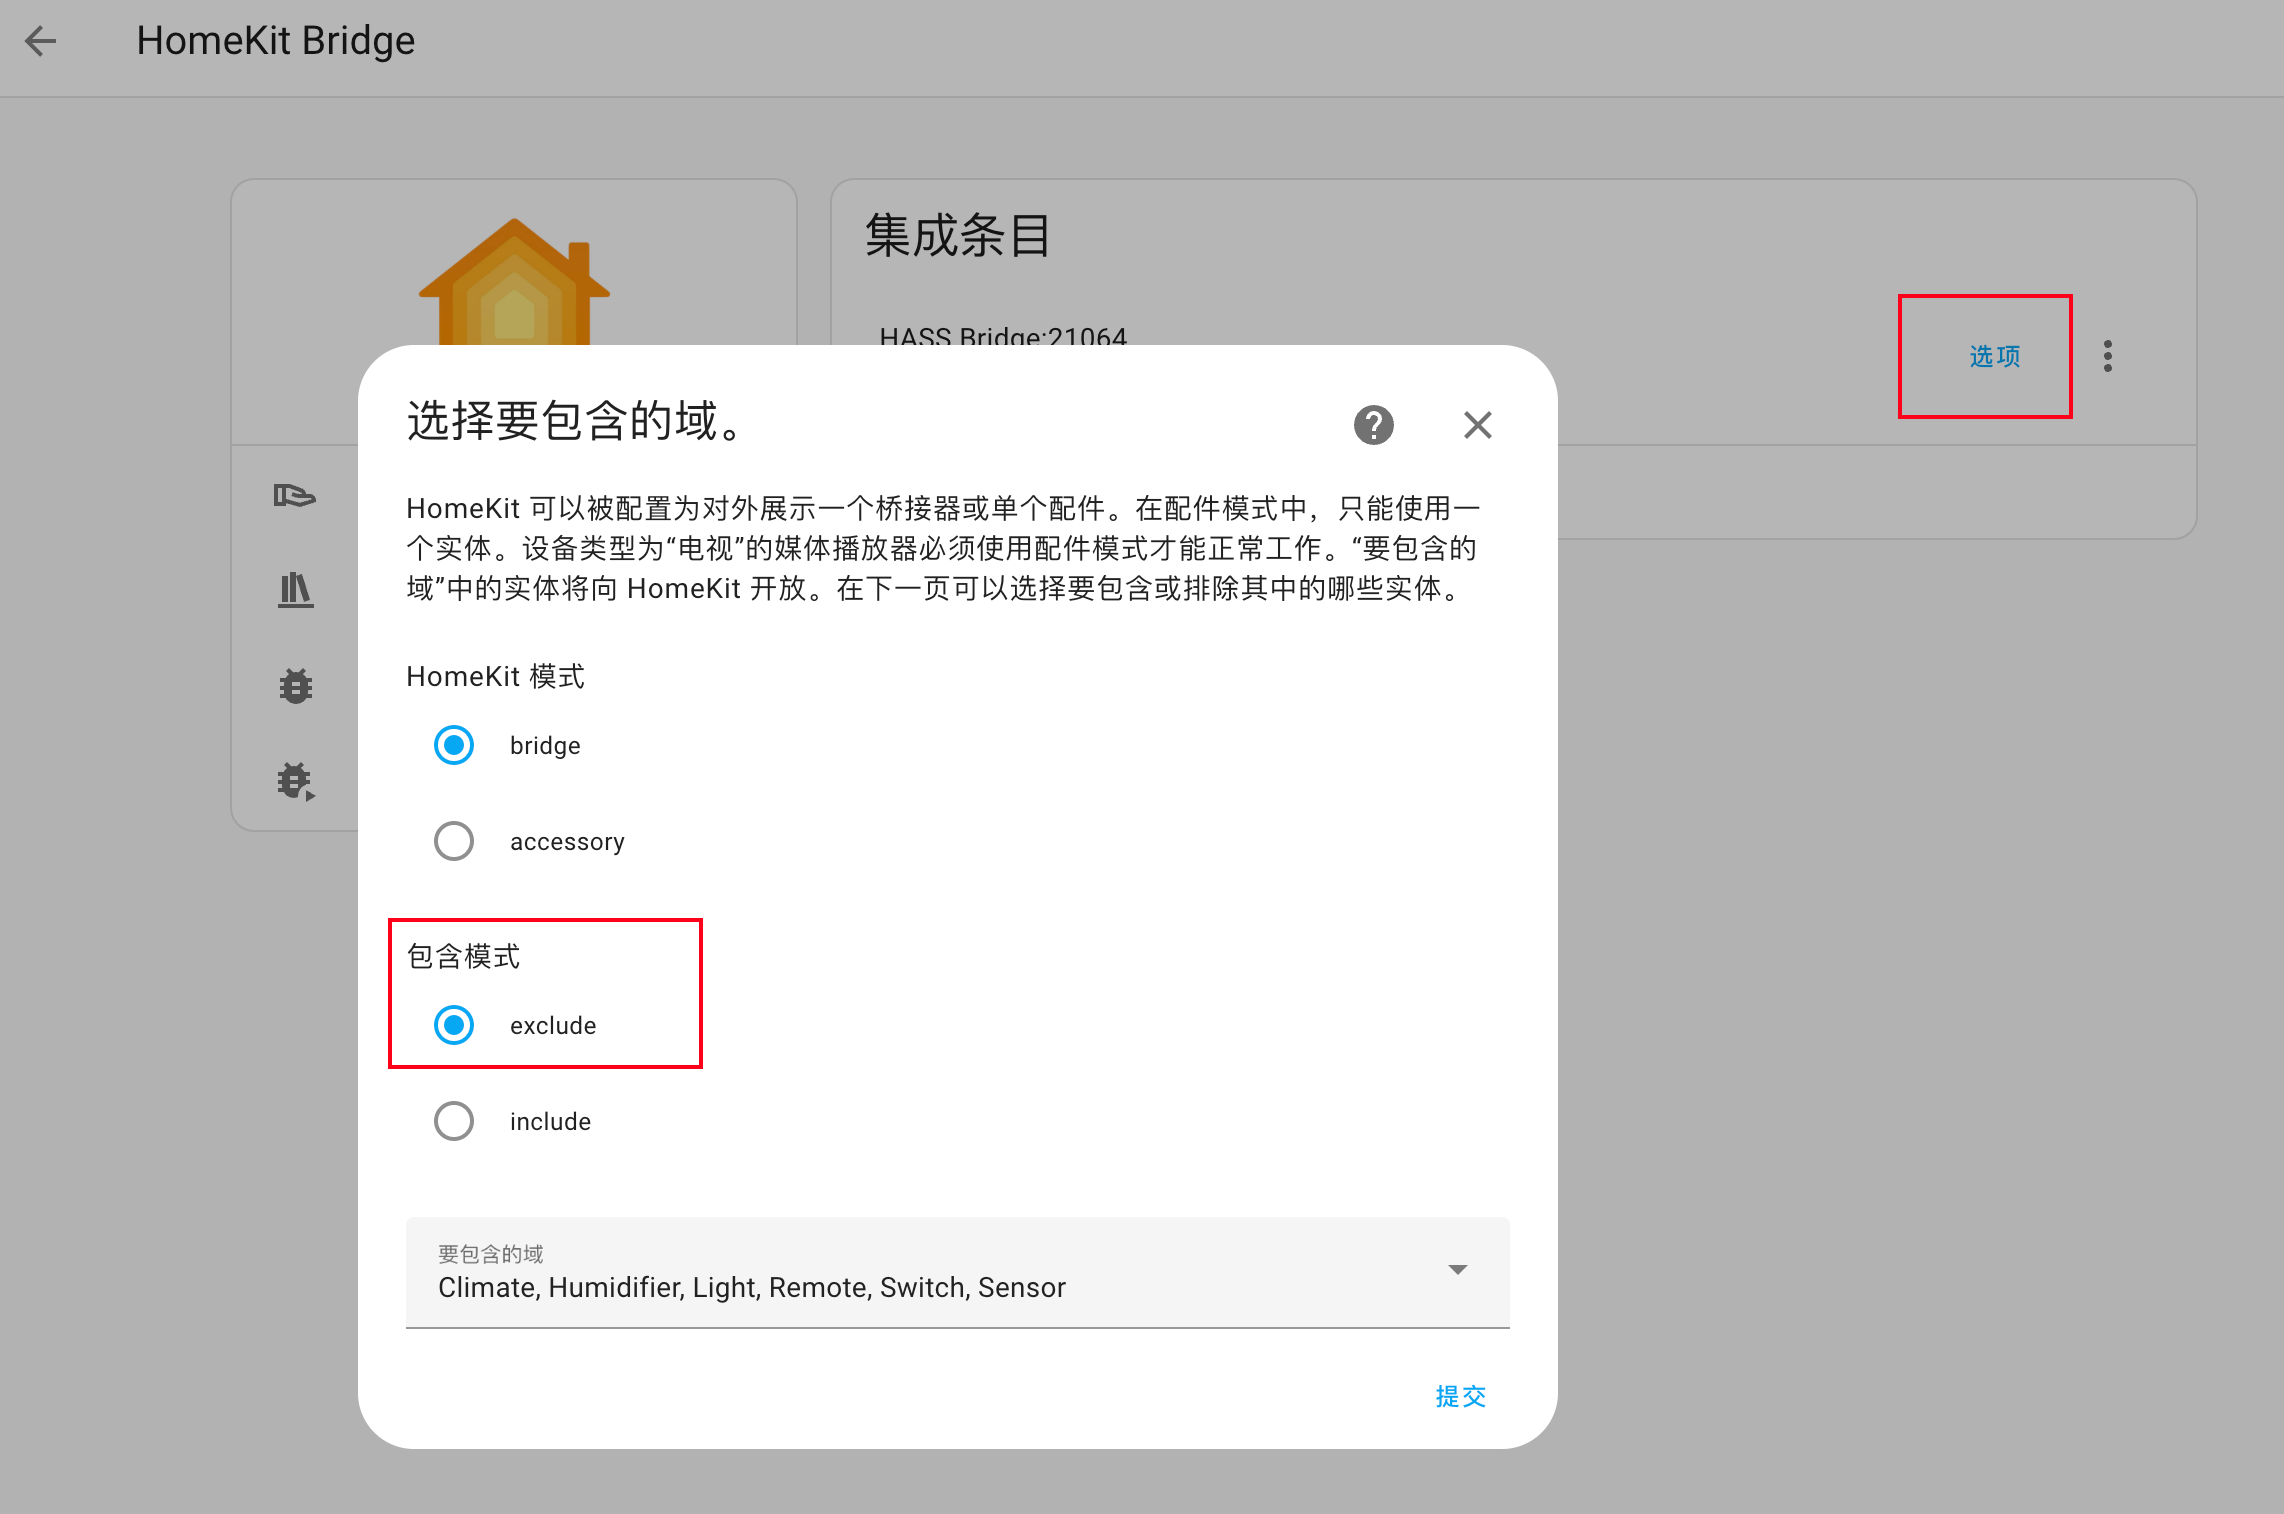
排除掉不需要的实体
去扫左下角
通知里的码(iPhone 用自带相机扫码就可以了)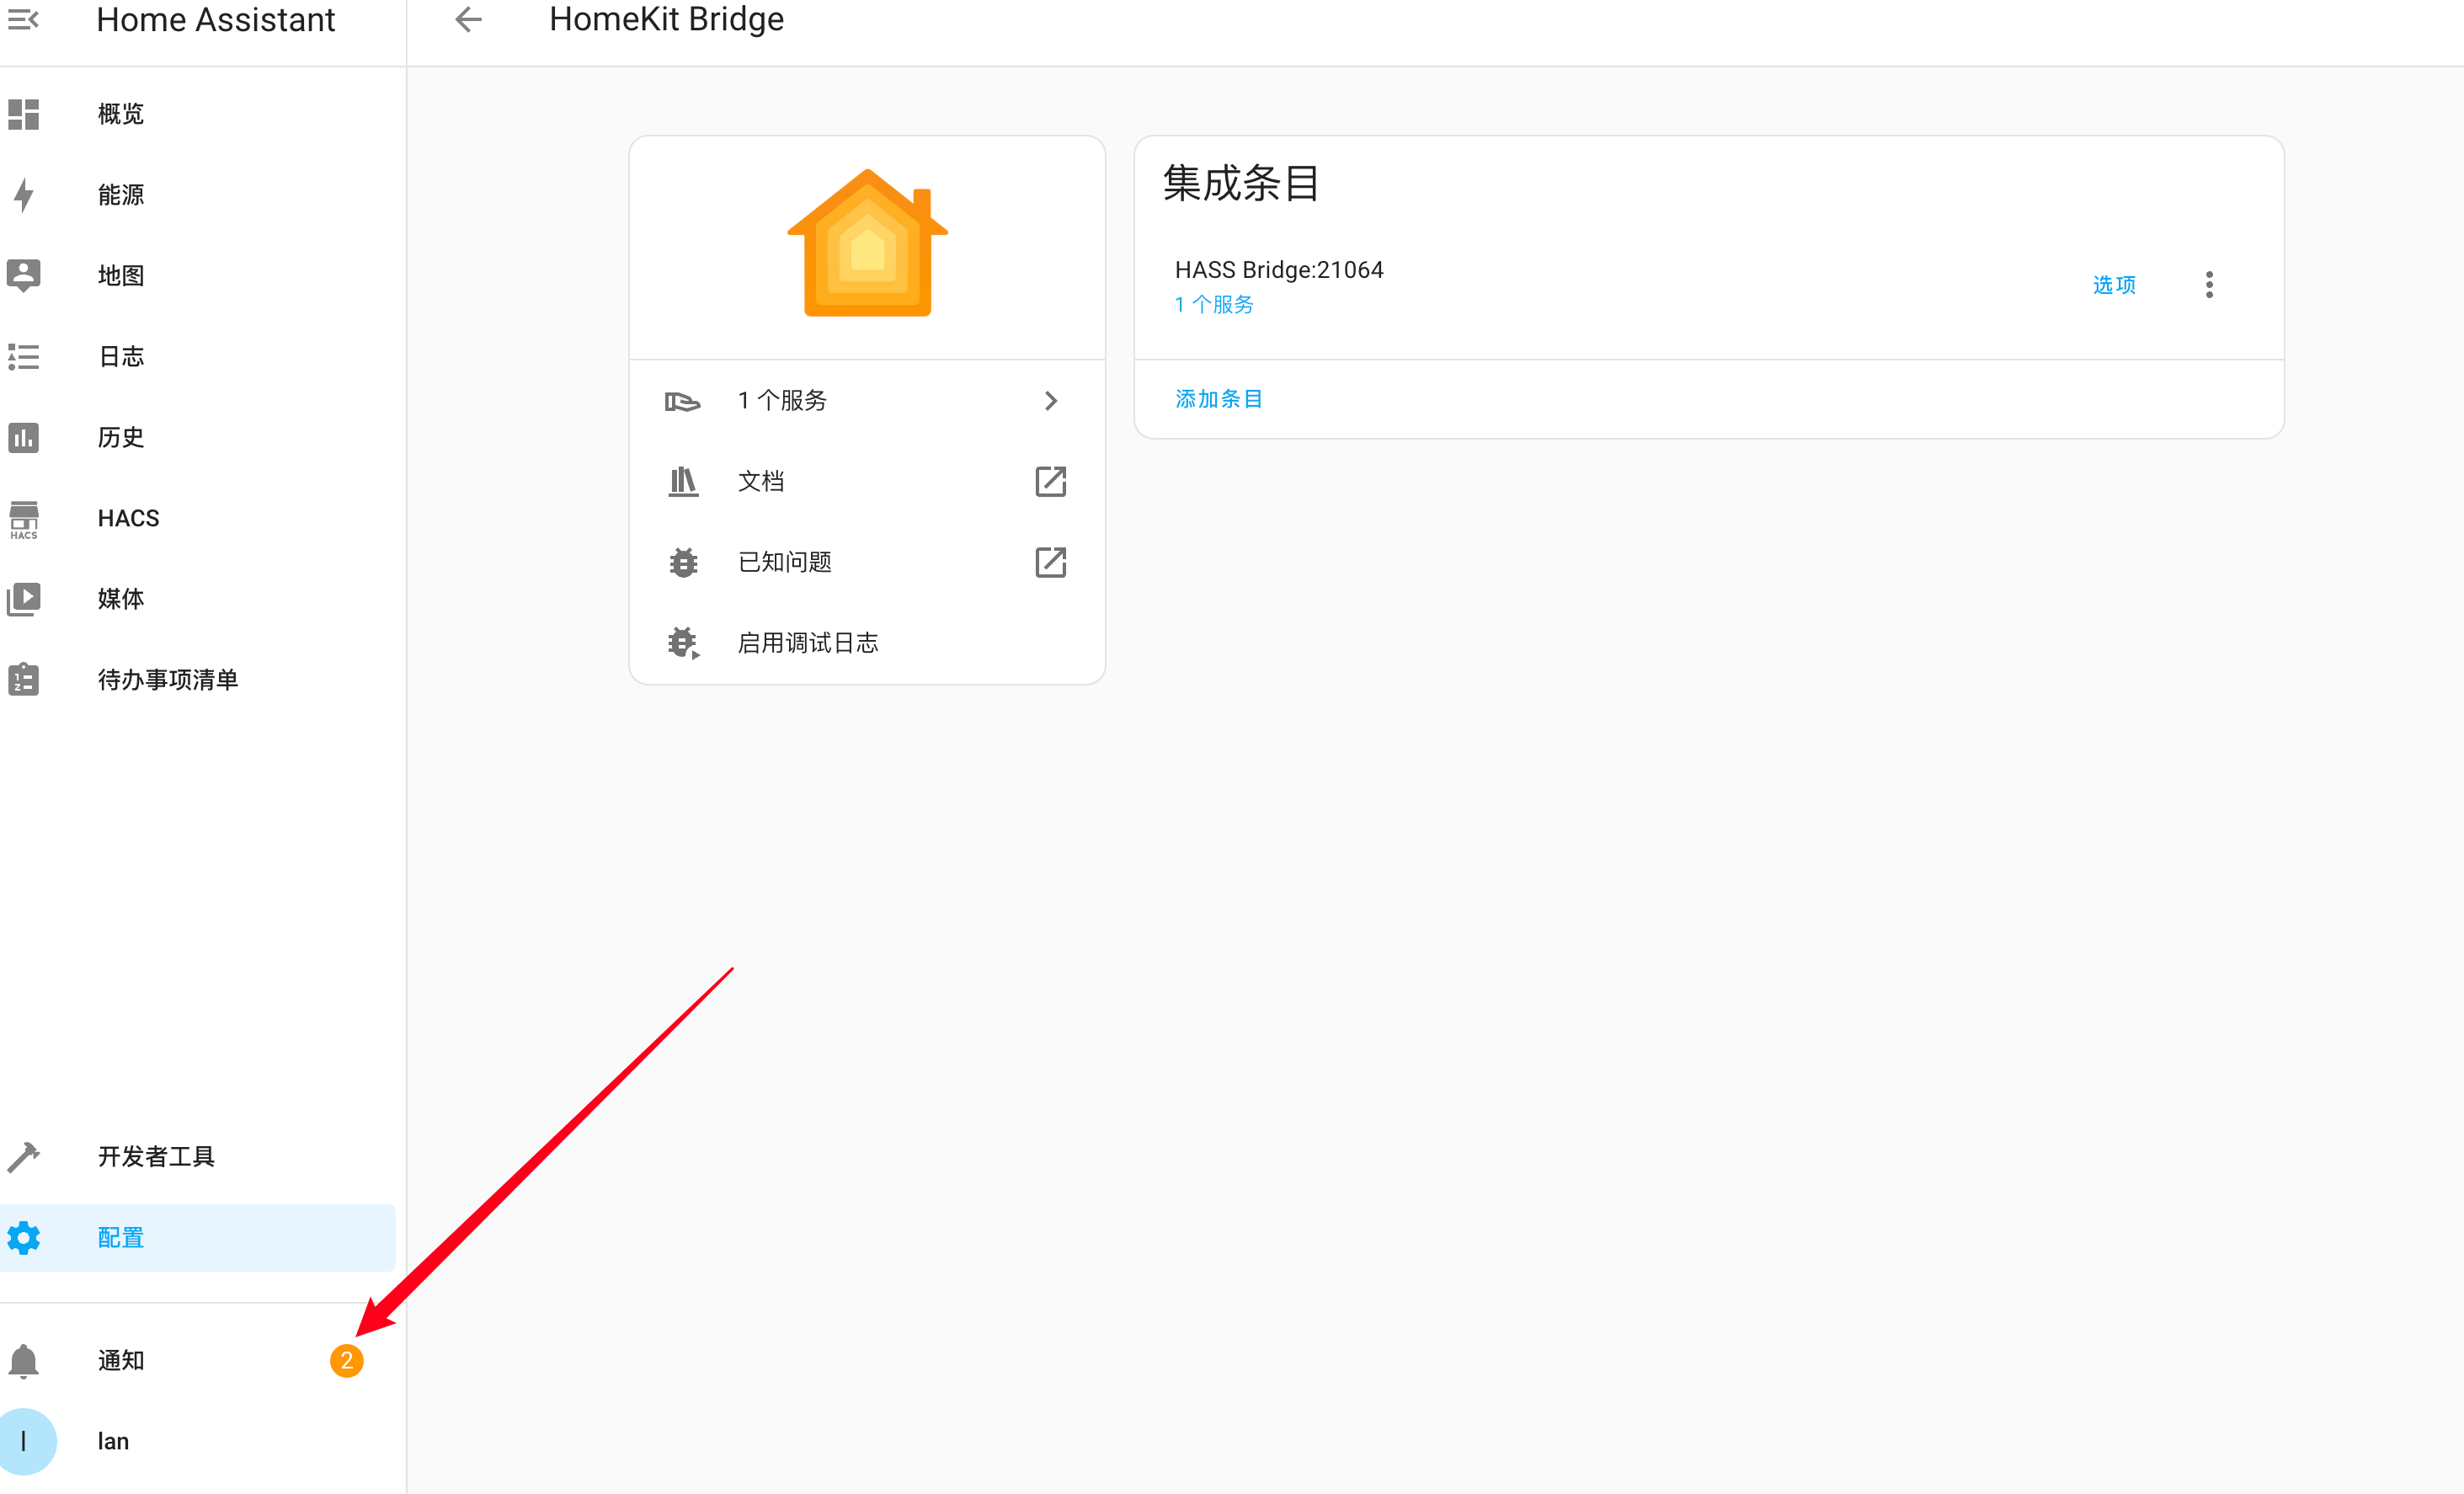
按直觉往下设置就行啦

