破解苏州电信 TEWA-707E 光猫超密
前言
苏州的朋友找我说他打瓦总丢包
看了下他是光猫拨号,他和室友两个人两个路由接在光猫后面
应该是垃圾光猫负载顶不住,过热断流了
思路
让朋友把光猫正面和背面拍我看看,正面一般会留宽带账号和密码,背面的会写光猫的型号等信息
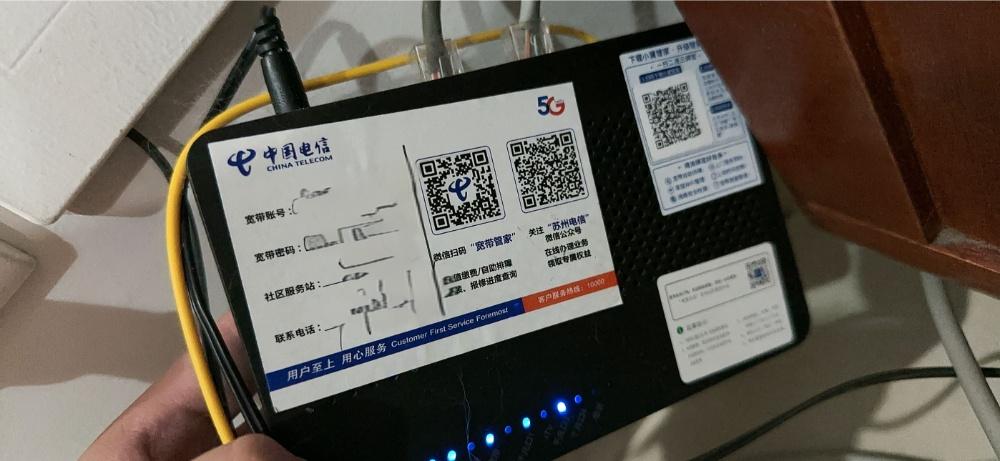
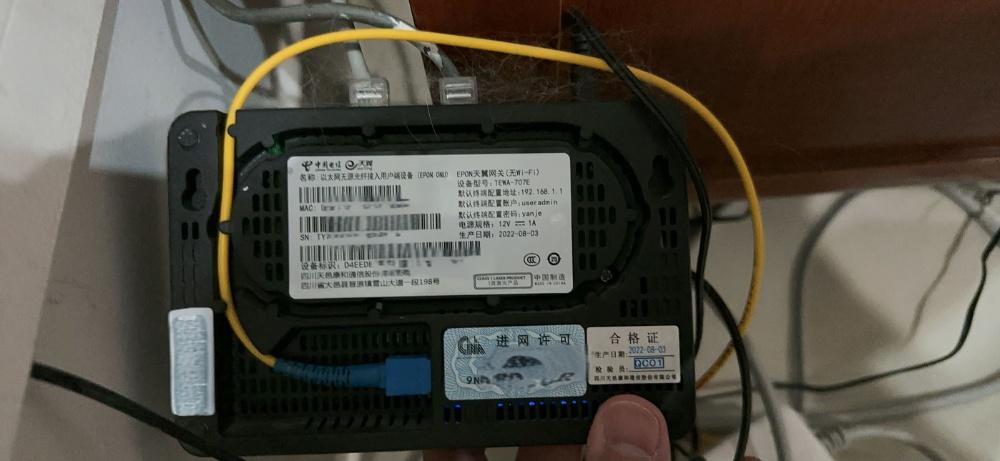
拿到宽带账号密码以及光猫型号,网上检索一下「TEWA-707E超密」
拿到超密后进光猫后台把光猫改成桥接,用路由拨号
实操
检索半天,都没啥用,不过最后还是让我检索到了,以下是作者原文:
这款光猫很魔性,没有WIFI,没有USB接口,没有Telnet,试了很多方法去获取超级密码都不行。后来偶尔的机会找到了方法,现与大家共享。
1、用FTP登录,用户名和密码就是光猫背面标签上的。FTP软件比较好使的是:FlashFXP
2、进入/userconfig/cfg目录,将db_user_cfg.xml文件下载下来。
3、这个文件是用AES加密了的,直接打开是乱码,所以得用AES解密,key为16个字节的 x00。
4、附解密用的python代码。1
2
3
4
5
6
7
8
9
10
11
12
13
14
15
16
17
18
19from binascii import a2b_hex
KEY = b'\x00\x00\x00\x00\x00\x00\x00\x00\x00\x00\x00\x00\x00\x00\x00\x00'
def decrypt(text):
cryptor = AES.new(KEY, AES.MODE_ECB)
plain_text = cryptor.decrypt(a2b_hex(text))
return plain_text
cfg_file = open("db_user_cfg.xml", "rb")
dec_file = open("db_user_cfg.decode.xml", "w")
file_header = cfg_file.read(60)
while 1:
trunk_info = cfg_file.read(12)
trunk_data = cfg_file.read(65536)
trunk_real_size = int.from_bytes(trunk_info[0:4], byteorder='big', signed=False)
trunk_size = int.from_bytes(trunk_info[4:8], byteorder='big', signed=False)
next_trunk = int.from_bytes(trunk_info[8:12], byteorder='big', signed=False)
print(trunk_real_size, trunk_size, next_trunk)
dec_file.write(decrypt(trunk_data.hex()).decode(encoding="utf-8"))
if next_trunk==0:
break解密时可能会报错,可能是文件后面部分不晓得是咋拼接过来的,用AES解密时分组数据有问题。不过似乎不影响我们需要的结果。
打开解出来的文件,然后搜索 telecomadmin,就可以发现超级密码了按照作者的操作成功了,作者写的基本没啥坑,我顺带写写我的过程吧:
把电脑用网线直连光猫的 LAN 口,然后去
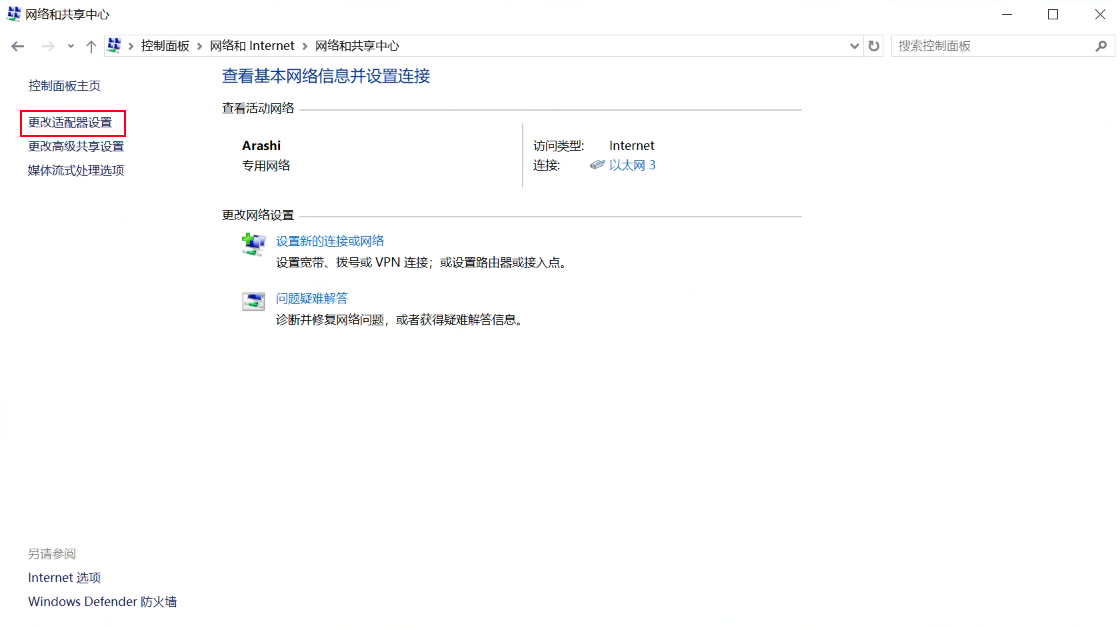
控制面板,把查看方式改成类别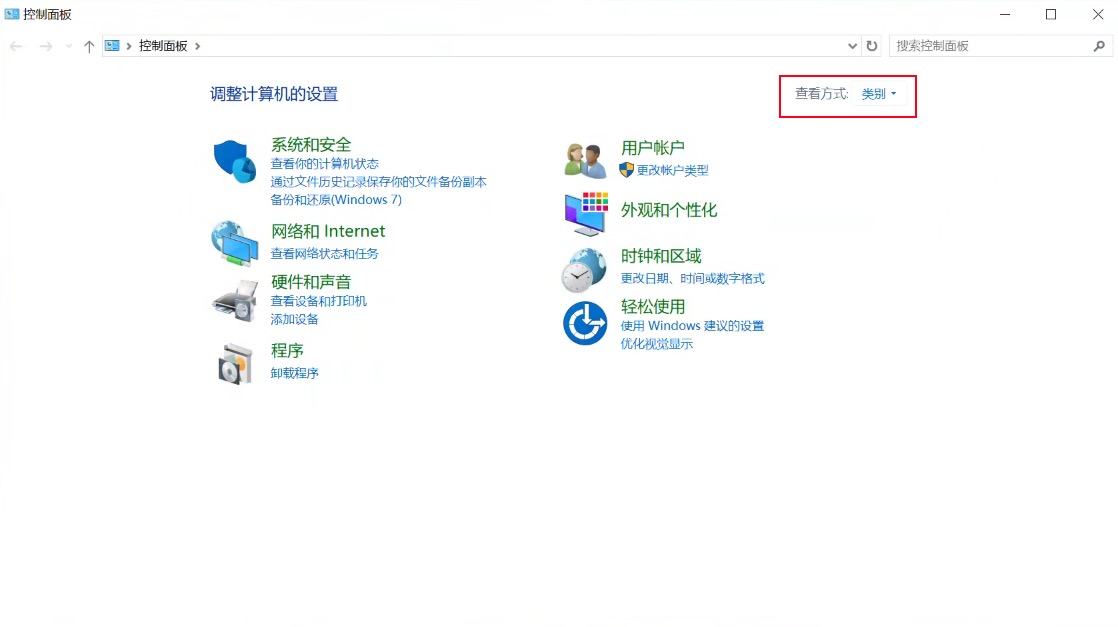
进入
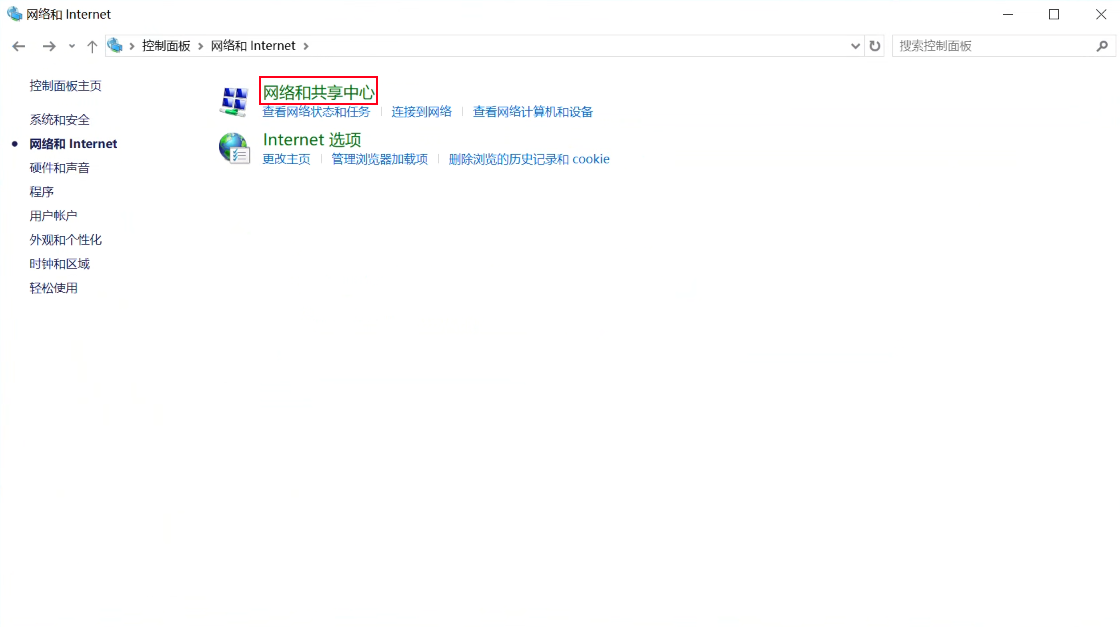
网络和 Internet->网络和共享中心->更改适配器设置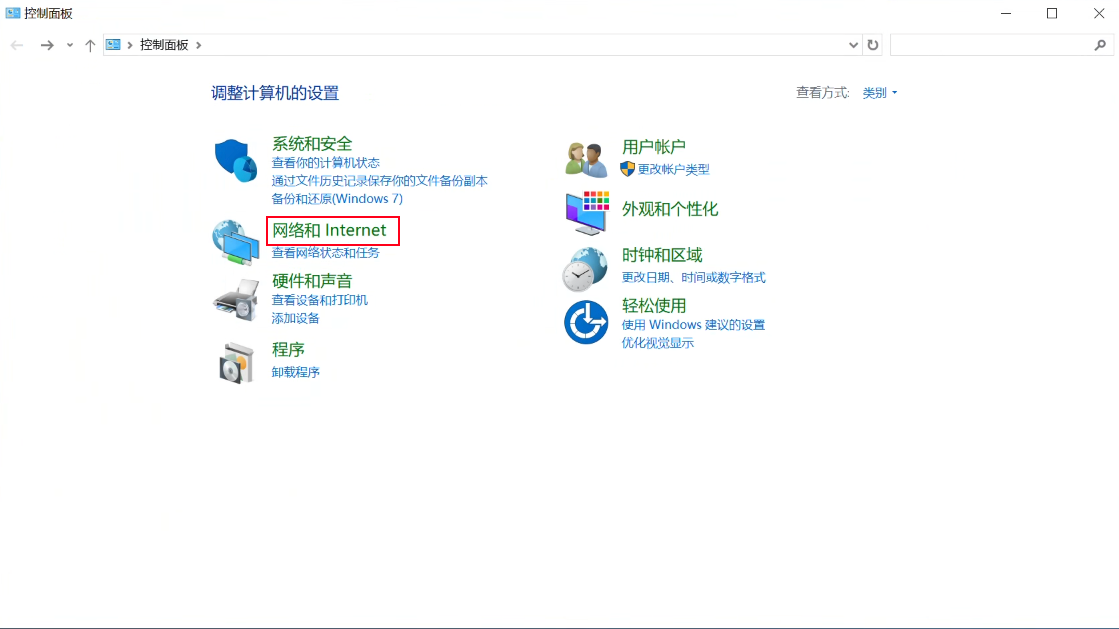
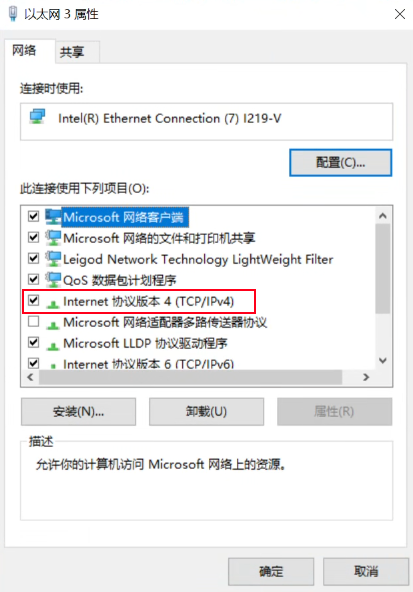
右键
以太网,属性,双击Internet 协议版本 4(TCP/IPv4)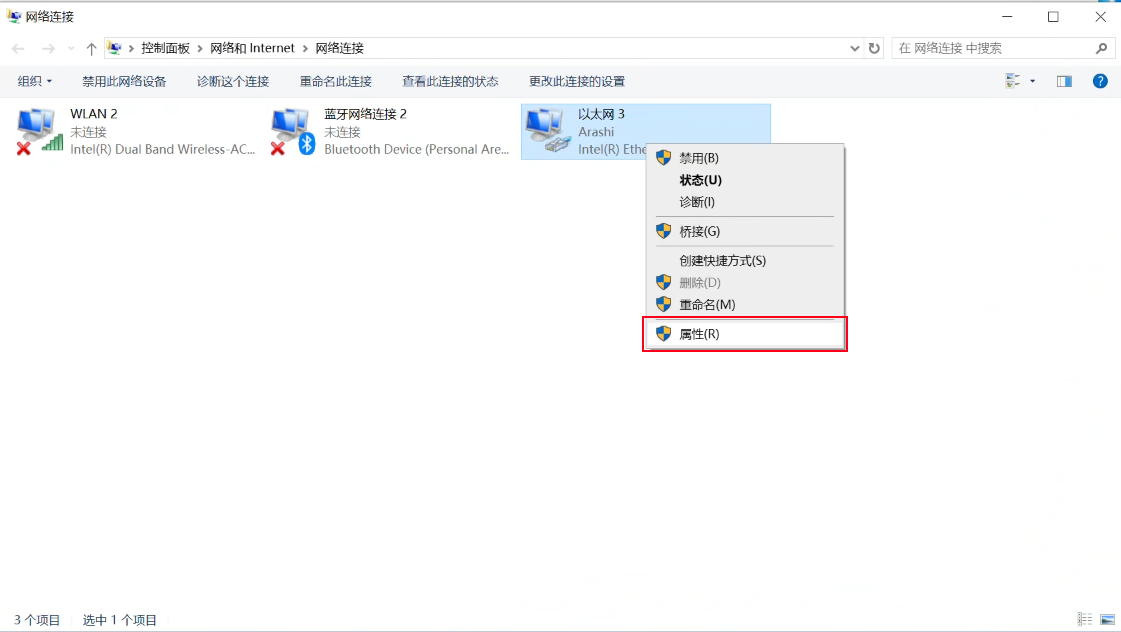
勾选
使用下面的 IP 地址和使用下面的 DNS 服务器地址,IP 地址填入192.168.1.100,子网掩码单击一下会自动填入255.255.255.0,剩下的不用管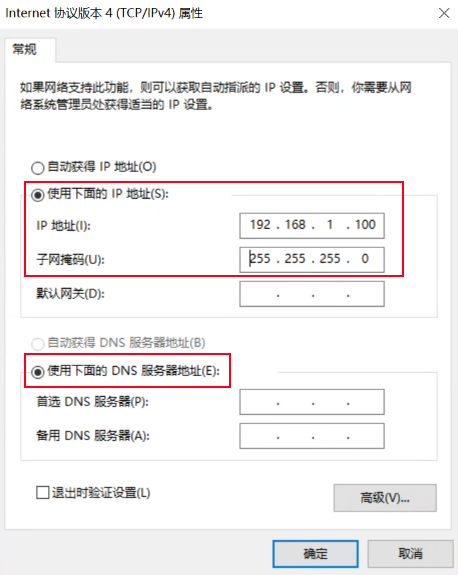
两个
确定记得都要点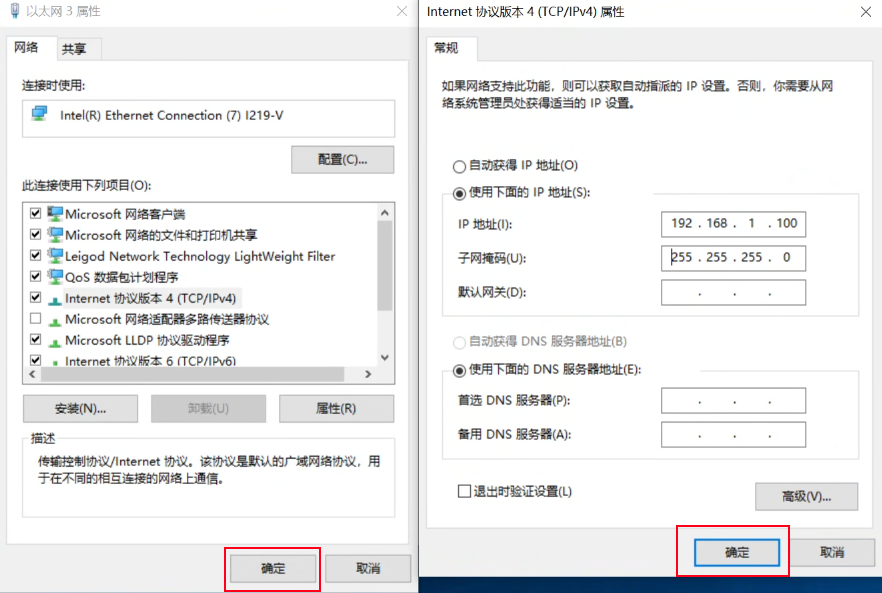
FTP 登录光猫,我这里用的是 WinSCP,文件协议选择
FTP,主机名192.168.1.1,用户名和密码就是光猫后面那个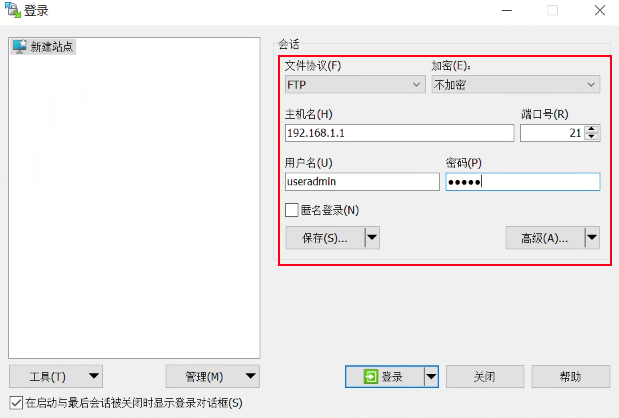
进入
user/config/cfg目录,将db_user_cfg.xml文件下载下来预装好 Python 环境,来到刚才下载的文件的目录下,新建一个名为
decode.py的文件,内容如下:1
2
3
4
5
6
7
8
9
10
11
12
13
14
15
16
17
18
19from binascii import a2b_hex
KEY = b'\x00\x00\x00\x00\x00\x00\x00\x00\x00\x00\x00\x00\x00\x00\x00\x00'
def decrypt(text):
cryptor = AES.new(KEY, AES.MODE_ECB)
plain_text = cryptor.decrypt(a2b_hex(text))
return plain_text
cfg_file = open("db_user_cfg.xml", "rb")
dec_file = open("db_user_cfg.decode.xml", "w")
file_header = cfg_file.read(60)
while 1:
trunk_info = cfg_file.read(12)
trunk_data = cfg_file.read(65536)
trunk_real_size = int.from_bytes(trunk_info[0:4], byteorder='big', signed=False)
trunk_size = int.from_bytes(trunk_info[4:8], byteorder='big', signed=False)
next_trunk = int.from_bytes(trunk_info[8:12], byteorder='big', signed=False)
print(trunk_real_size, trunk_size, next_trunk)
dec_file.write(decrypt(trunk_data.hex()).decode(encoding="utf-8"))
if next_trunk==0:
break在当前目录打开 CMD,运行命令
python decode.py,会报错,不用管运行完当前目录下会多出一个
de_user_cfg.decode.xml文件,用记事本打开它,搜索telecomadmin,即可得到超密了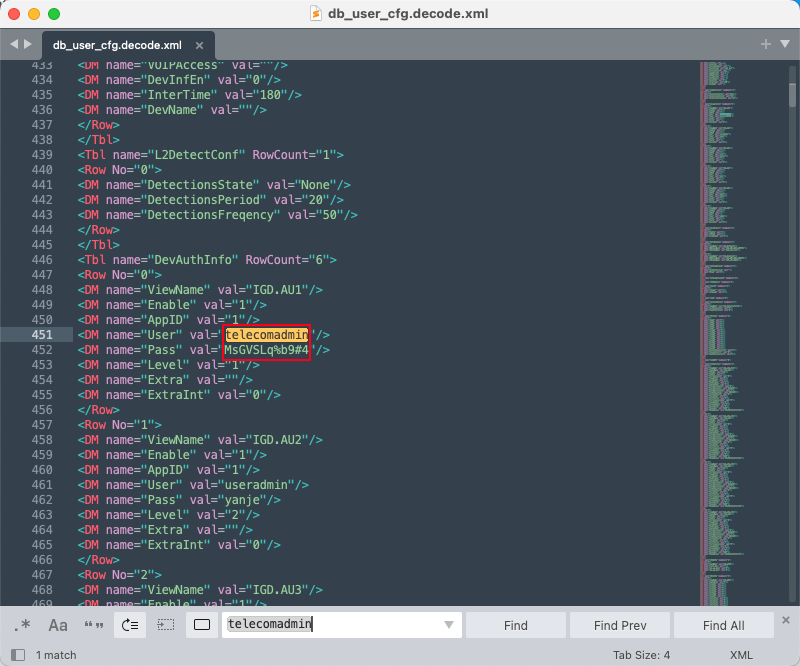
打开浏览器,访问
192.168.1.1,输入刚拿到的账号和密码,前往网络->网络设置->网络连接,连接名称选择2_INTERNET_R_VID_41,然后把连接模式改成桥模式,LAN端口绑定记得至少勾选一个,点下面的修改即可把刚才
LAN端口绑定的端口连到路由器的 WAN 口,然后进路由后台输入把上网方式改成PPPOE拨号,填入刚才在光猫上看到的宽带账号密码即可回到电脑,把电脑连到路由器上,别忘了在
以太网的属性中改回自动获得 IP 地址和自动获得 DNS 服务器地址,到此应该能正常上网了